Windows 10 is the only release Acquia's BLT officially supports. But there are still many people who use Windows 7 and 8, and most of these people don't have control over what version of Windows they use.
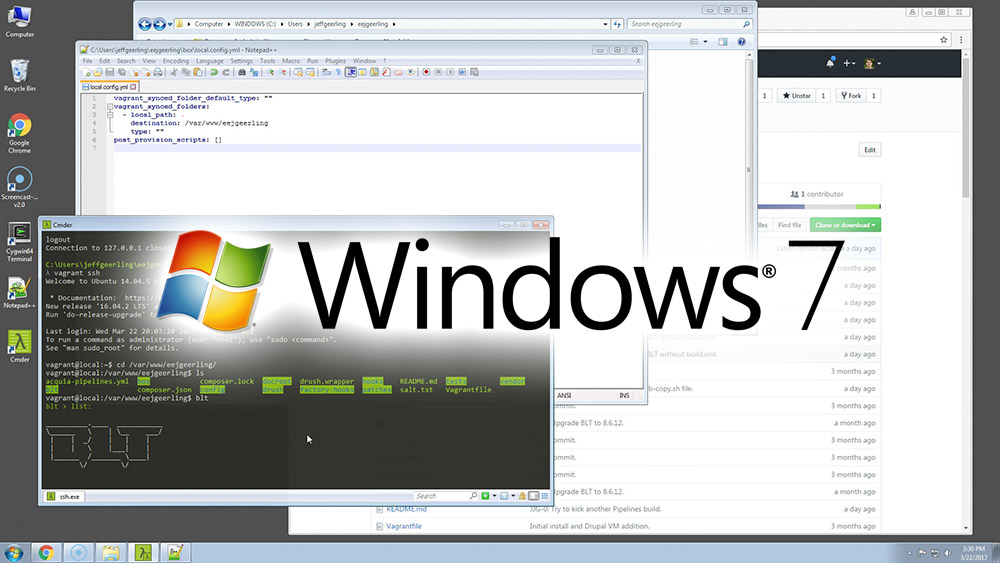
Drupal VM has supported Windows 7, 8, and 10 since I started building it a few years ago (at that time I was still running Windows 7), and using a little finesse, you can actually get an entire modern BLT-based Drupal 8 project running on Windows 7 or 8, as long as you do all the right things, as will be demonstrated in this blog post.
Note that this setup is not recommended—you should try as hard as you can to either upgrade to Windows 10, or switch to Linux or macOS for your development workstation, as setup and debugging are much easier on a more modern OS. However, if you're a sucker for pain, have at it! The process below is akin to the Apollo 13 Command Module startup sequence:
It required the crew—in particular the command module pilot, Swigert—to perform the entire power-up procedure in the blind. If he made a mistake, by the time the instrumentation was turned on and the error was detected, it could be too late to fix. But, as a good flight controller should, Aaron was confident his sequence was the right thing to do.
Following the instructions below, you'll be akin to Swigert: there are a number of things you have to get working correctly (in the right sequence) before BLT and Drupal VM can work together in Windows 7 or Windows 8. And once you have your environment set up, you should do everything besides editing source files and running Git commands inside the VM (and, if you want, you can actually do everything inside the VM. For more on why this is the case, please read my earlier post: Developing with VirtualBox and Vagrant on Windows.
Here's a video overview of the entire process (see the detailed instructions below the video):
Upgrade PowerShell
Windows 7 ships with a very old version of PowerShell (2.0) which is incompatible with Vagrant, and causes vagrant up to hang. To work around this problem, you will need to upgrade to PowerShell 4.0:
- Visit the How to Install Windows PowerShell 4.0 guide.
- Download the
.msufile appropriate for your system (most likelyWindows6.1-KB2819745-x64-MultiPkg.msu). - Open the downloaded installer.
- Run through the install wizard.
- Restart your computer when the installation completes.
- Open Powershell and enter the command
$PSVersionTable.PSVersionto verify you're running major version4or later.
Install XAMPP (for PHP)
XAMPP will be used for it's PHP installation, but it won't be used for actually running the site; it's just an easy way to get PHP installed and accessible on your Windows computer.
- Download XAMPP (PHP 5.6.x version).
- Run the XAMPP installer.
- XAMPP might warn that UAC is enabled; ignore this warning, you don't need to bypass UAC to just run PHP.
- On the 'Select Components' screen, only choose "Apache", "PHP", and "Fake Sendmail" (you don't need to install any of the other components).
- Install in the
C:\xamppdirectory. - Uncheck the Bitnami checkbox.
- When prompted, allow access to the Apache HTTP server included with XAMPP.
- Uncheck the 'Start the control panel when finished' checkbox and Finish the installation.
- Verify that PHP is installed correctly:
- Open Powershell.
- Run the command:
C:\xampp\php\php.exe -v
Note: If you have PHP installed and working through some other mechanism, that's okay too. The key is we need a PHP executable that can later be run through the CLI.
Set up Cmder
- Download Cmder - the 'full' installation.
- Expand the zip file archive.
- Open the
cmderdirectory and right-click on theCmderexecutable, then choose 'Run as administrator'.- If you are prompted to allow access to Cmder utilities, grant that access.
- Create an alias to PHP:
alias php=C:\xampp\php\php.exe $* - Verify that the PHP alias is working correctly:
php -v(should return the installed PHP version).
Cmder is preferred over Cygwin because it's terminal emulator works slightly better than
mintty, which is included with Cygwin. Cygwin can also be made to work, as long as you install the following packages during Cygwin setup:openssh,curl,unzip,git.
Configure Git (inside Cmder)
There are three commands you should run (at a minimum) to configure Git so it can work correctly with the repository:
git config --global user.name "John Doe"(use your own name)git config --global user.email [email protected](use an email address associated with your GitHub account)git config --global core.autocrlf true(to ensure correct line endings)
Install Composer (inside Cmder)
- Make sure you're in your home directory:
cd C:\Users\[yourusername]. - Run the following commands to download and install Composer:
- Download Composer:
php -r "copy('https://getcomposer.org/installer', 'composer-setup.php');" - Build the Composer executable:
php composer-setup.php - Delete the setup file:
rm -f composer-setup.php
- Download Composer:
- Test that Composer is working by running
php composer.phar --version.
Create a Private/Public SSH Key Pair to authenticate to GitHub and Acquia Cloud
Generate an SSH key
All the following commands will be run inside of Cmder.
- Inside of Cmder, make sure you're in your home directory:
C:\Users\[yourusername] - Run the command:
ssh-keygen -t rsa -b 4096 -C "[email protected]"- When prompted for where to save the key, press enter/return (to choose the default path).
- When prompted to enter a passphrase, press enter/return (to leave it empty).
- When prompted to enter the same passphrase, press enter/return (to leave it empty).
- To get the value of the new public key, run the command:
cat .ssh/id_rsa.pub- Highlight the text that is output (starts with
ssh-rsaand ends with your email address) - Copy the text of the public key
- Highlight the text that is output (starts with
Note: The public key (
id_rsa.pub) can be freely shared and added to services where you need to connect. NEVER share the private key (id_rsa), as that is a secret that identifies you personally to the services to which you're connecting.
Add the SSH key to your GitHub account
- Log into GitHub
- Go to your account settings (click on your profile image in the top right, then choose 'Settings').
- Click on "SSH and GPG keys" in the 'Personal settings' area.
- Click "New SSH key" to add your new SSH key.
- Add a title (like "Work Windows 7")
- Paste your key in the "Key" field.
- Click "Add SSH Key" to save the key.
Add the SSH key to your Acquia Cloud account
- Log into Acquia Cloud
- Go to your Profile (click on your profile image in the top right, then choose 'Edit Profile').
- Click on "Credentials"
- Under "SSH Keys", click "Add SSH Key"
- Add a nickname (like "Work_Windows_7")
- Paste your key in the "Public key" field.
- Click "Add Key" to save the key.
Set up the BLT-based Drupal project
Fork the BLT project into your own GitHub account
- Log into GitHub.
- Visit your project's GitHub repository page.
- Click the "Fork" button at the top right to create a clone of the project in your own account.
- After GitHub has created the Fork, you'll be taken to your Fork's project page.
Clone the BLT project to your computer
- Click the "Clone or download" button on your Fork's project page.
- Copy the URL in the 'Clone with SSH' popup that appears.
- Go back to Cmder, and
cdinto whatever directory you want to store the project on your computer. - Enter the command:
git clone [URL that you copied in step 2 above]- If you receive a prompt asking if you want to connect to github.com, type
yesand press enter/return. - Wait for Git to clone the project to your local computer.
- If you receive a prompt asking if you want to connect to github.com, type
Note: At this time, you may also want to add the 'canonical' GitHub repository as an
upstreamremote repo so you can easily synchronize your codebase with the repository you forked earlier. That way it's easy for you to make sure you're always working on the latest code. This also makes it easier to do things like open Pull Requests on GitHub from the command line using Hub.
Install BLT project dependencies
- Change directory into the project directory (
cd projectname). - Ensure you're on the
masterbranch by checking the repository's status:git status - Move the
composer.pharfile into the project directory:mv ..\composer.phar .\composer.phar - Run
php composer.phar install --prefer-sourceto ensure everything needed for the project is installed.- Wait for Composer to finish installing all dependencies. This could take 10-20 minutes the first time it's run.
- If the installation times out, run
php composer.phar install --prefer-sourceagain to pick up where it left off. - The installation may warn that patches can't be applied; ignore this warning (we'll reinstall dependencies later).
- Move the
composer.pharfile back out of the project directory:mv composer.phar ..\composer.phar(in case you ever need it on your host computer again).
Note: You need to use the
--prefer-sourceoption when installing to prevent theZipArchive::extractTo(): Full extraction path exceed MAXPATHLEN (260)error. See this Stack Overflow answer for details.
Set up the Virtual Machine (Drupal VM)
- Download and install Vagrant.
- Download and install VirtualBox.
- Restart your computer after installation.
- Open Cmder, and
cdinto the project folder (where you cloned the project). - Install recommended Vagrant plugins:
vagrant plugin install vagrant-hostsupdater vagrant-vbguest vagrant-cachier- Note that if you get an error about a space in your username, you will need to add a folder and VAGRANT_HOME environment variable (see this post for more info).
- Create a config file for your VM instance:
touch box/local.config.yml Inside the config file, add the following contents (you can use
vior some other Unix-line-ending-compatible editor to modify the file):vagrant_synced_folder_default_type: "" vagrant_synced_folders: - local_path: . destination: /var/www/projectname type: "" post_provision_scripts: []Run
vagrant up.- This will download a Linux box image, install all the prerequisites, then configure it for the Drupal site.
- This could take 10-20 minutes (or longer), depending on your PC's speed and Internet connection.
- If the command stalls out and seems to not do anything for more than a few minutes, you may need to restart your computer, then run
vagrant destroy -fto destroy the VM, then runvagrant upagain to start fresh.
Note: If you encounter any errors during provisioning, kick off another provisioning run by running
vagrant provisionagain. You may also want to reload the VM to make sure all the configuration is correct after a failed provision—to do that, runvagrant reload.
Log in and start working inside the VM
- First make sure that
ssh-agentis running and has your SSH key (created earlier) loaded:start-ssh-agent - Run
vagrant sshto log into the VM (your SSH key will be used inside the VM viassh-agent). - Change directories into the project directory:
cd /var/www/projectname - Using Windows Explorer (to avoid access errors), remove the contents of the following directories which Composer will recreate:
vendordocroot/coredocroot/librariesdocroot/modules/contribdocroot/themes/contribdocroot/profiles/contrib
- Back in Cmder, run
composer installso all the packages will be reinstalled and linked correctly. - Manually run the BLT post-provision shell script to configure BLT inside the VM:
./vendor/acquia/blt/scripts/drupal-vm/post-provision.sh - Log out (
exit), then log back in (vagrant ssh) andcdback into the project directory. - Use BLT to pull down the latest version of the database and finish building your local environment:
blt local:refresh
After a few minutes, the site should be running locally, accessible at http://local.projectname.com/
Note:
ssh-agentfunctionality is outside the scope of this post. Basically, it allows you to use your SSH keys on your host machine in other places (including inside Drupal VM) without worrying about manually copying anything. If you wantssh-agentto automatically start whenever you open an instance of Cmder, please see Cmder's documentation: SSH Agent in Cmder.
Comments
I'm glad you were able to get this working! I converted my VM from working fully inside it to this setup but it's not really much better, unfortunately. Due to the terrible native shared folders performance is dog slow when reading from/writing to files so I'm switching between mounting
/var/www/<projectname>with a mounted CIFS share, unmounting it and rsync'ing with/vagrant, and the default to see which one is less awful. So far none of them are really winning.See also: https://github.com/geerlingguy/drupal-vm/issues/1242#issuecomment-289130181
Basically, you could set up rsync so that the main files are all rsynced (one-way), but certain folders (like config) are synced via a two-way (slower) mechanism.
oops, I was expecting angle brackets to get escaped. /var/www/<projectname> is what I'm messing with.
Would this also work on a Win8 VM (FusionWare VM) instance running on a Mac?
Technically it could, but I'd recommend instead using Vagrant to build a Linux VM directly from your Mac instead, as that will give you fewer headaches than trying to nest VMs inside each other, and it will be faster too.
Hi Jeff, I am writing to share some notes on following the process you outlined operating behind a corporate firewall/proxy configuration. The main thing that I had to take care of was to signal to the VM, once it was created, of the proxy settings.
After running the 'vagrant up' command, the playbook at some point fails to install some required components due to the proxy settings not being available in the VM. At that point I logged into the VM and made the following changes:
http_proxyand https_proxy (both lower and upper case versions) were captured in my.bashrcAdded the same proxy info to the
/etc/environmentsfileUsing
sudo visudoI added:Defaults env_keep="http_proxy https_proxy no_proxy"to the configuration following theDefaults env_resetentryFor good measure I added to
/etc/apt/apt.conf.d/apt.confthe following entry:Of course the above had to be invoked via
sudo.Following the changes, I just ran
vagrant provisionand was now able to have the playbook run successfully.Finally, another hint that may help folks behind firewalls and proxies, since SSH is blocked on the default network, I overrode the BLT "local:sync" task to use a local SQL file for the database loading instead of SSH-ing to the remote server. The
blt/custom.xmlfile was modified in the root of the project for that change. The actual change was as follows:<!--Start overwrite local-refresh-->
<target name="local:sync" description="Synchronize local environment from remote(remote-->local)." depends="setup:drupal:settings">
<drush command="cc drush"/>
<drush command="sql-drop"/>
<drush command="sql-query">
<option name="file">${docroot}/database.sql</option>
</drush>
</target>
<!--End overwrite local-refresh-->
Note, I was not able to achieve similar results using the
vagrant-proxyconfvagrant plugin, but if that's possible I'd be interested in more details on how to do that, as that would be more efficient than having to make the above changes.Thanks, Mohsen
@Moshen - have you tried using these instructions? Using Drupal VM behind a corporate proxy with
vagrant-proxyconfI just retried the plugin, and it did seem to work. Thanks.
Hi,
So i have reached the stage: "Set up the Virtual Machine (Drupal VM)"
The instructions were very clear till then. But then i am confused with step 6.
"Create a config file for your VM instance: touch box/local.config.yml"
Do i manually create a folder called touch box in my project folder with a local.config.yml file or through cmder. I tried running that line, but nothing happens.
Additionally when i edit the file, you mention this line "destination: /var/www/projectname"
do i leave it as that or change projectname to my actual project folder? or am i getting this all wrong?
You run the touch command to create the file (it's a command in Linux/UNIX that creates a file), so that needs to be run in cmder. And you should substitute your project's name for projectname.
Hi again,
When I run the following command:
touch box/local.config.yml
this is what I get:
touch: cannot touch 'box/local.config.yml': No such file or directory
Do i need to specifically install vagrant somewhere?
Yes, it's presumed you install Vagrant and VirtualBox both before doing anything else, otherwise vagrant up will not run.
Hi Jeff,
We've been using the techniques documented here to build a BLT-enabled local sandbox. However, we are just migrating to the new version of BLT (8.9.x) with the commands now implemented via Robo. Would any of the procedures listed here require any changes? I am asking since I wasn't sure if the new "blt vm" would be comparable?