I've written previously about my simple $50 standing desk that can be installed on a wall. That standing desk worked great at my house, where I worked full-time as a remote employee for a few years. I started a new job for a local company in April 2013, working on-site, and was relegated to a cubicle with a decidedly un-adjustable sitting-height desk top. Even when using a Pomodoro-esque technique of standing and moving around every 20 minutes or so hasn't been much of a help.
Not to be kept sitting down by 'the man', I eschewed the provided office chair and adjustable-height keyboard tray, and built a small surface on which to work in a standing position, while still working in the cubicle to which I was assigned. Behold:
I based my design off what I could make out in the pictures of this Speedy Stand Up Portable Desk on Amazon, and made the desk out of 3/4" thick pine, stained and finished with three layers of protective polyurethane.
I wanted the desk to be big enough for a large monitor, a keyboard, and a mouse, and maybe a drink and some papers. So, I went to Lowe's and bought three Ponderosa panels (basically, pre-sanded edge-glued pine boards in various sizes, like this one)—one for the top, and two narrower ones, for the sides and the back.
I'll walk you through the process of building and staining/finishing the desk in pictures:
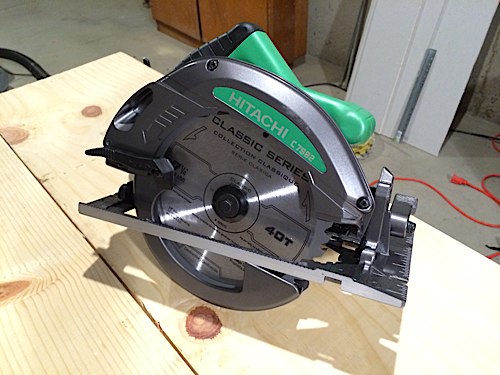
I used this circular saw to cut the wood; a table saw would've been a little easier, as I had to make some long, straight cuts, but I used a straight edge to get some pretty straight cuts (I'll show you a picture of the setup later). I used a 40T (40-tooth) blade instead of the more standard 24T blade, for a slightly smoother crosscut.
For my first cuts, I chopped one board into three pieces, giving me two 13" tall side panels, and a bit of scrap. I learned—after the fact—that if you want two circular-saw cuts to align perfectly, you should clamp the boards together and cut through both at once, instead of cutting one, then trying to make the second the exact same size. I sanded the boards to match almost perfectly after taking the above picture.
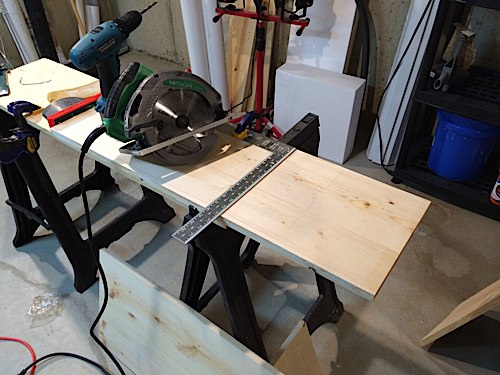
Here's the makeshift rig I used to cut straight lines with my circular saw. I clamped down my framing square with a few Irwin quick clamps, and had the straight edge a few inches to the left of the line I cut. I butted the circular saw against the edge, and pushed the saw against the edge as I made the cut.
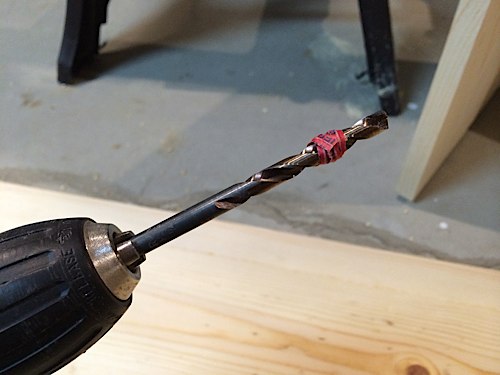
After drilling dowel holes in the sides of the back bracing board and the tops of the side boards (to attach the desk top) using a doweling jig (pictured later), I used a makeshift drill bit stop to try to drill the dowel holes into the underside of the desk top. Using a twist tie didn't work well—two of my holes went right through to the surface, because the twist tie slid and my drill bit caught and plunged through. I would recommend using a drill press (if you're lucky enough to have one), a real drill stop, or at least a rubber band that stays in place!
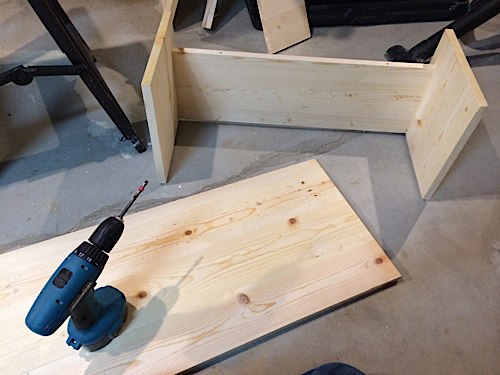
After all the drilling was complete, I assembled everything upside-down and marked where the parts came together, so I could more easily get them back together over and over again (it's really hard to remember what was up and down/left and right when you keep assembling and disassembling the parts).
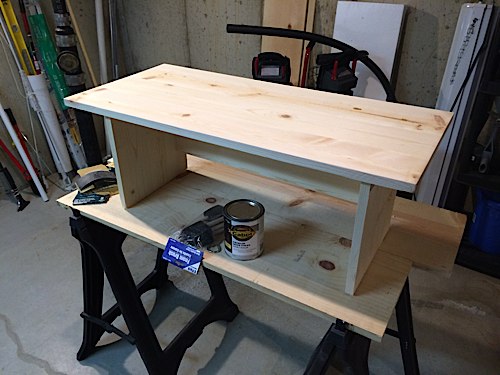
Yay! The desk is assembled, and looking great! I could stop here, if I wanted to get a bunch of splinters every time I used the desk, and stain the wood with water and soda. Instead, I decided to sand down all the edges and sides with 220-grit sandpaper so there were no sharp corners or splinters, and proceed to staining the wood.
Another view of the assembled desk. Note that I secured each side pieces to the back panel with two dowels and one 2" black cabinet screw (cabinet screws have very good shear strength, so they'll keep the structure together very well in tandem with all the dowels).
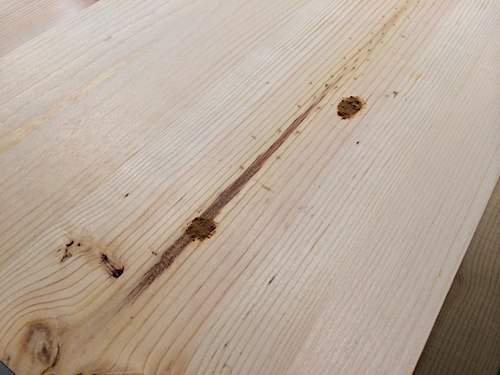
Here are the two holes I accidentally drilled through the top surface when making dowel holes. I had to fill them in with wood putty. Luckily, one of the holes was in a rough grainy area, so it is barely visible now; the other one sticks out a little, but looks like a small knot, so no problem. I sanded these two patches down with 220 grit sandpaper after a few hours' dry time so they were flush with the surface.
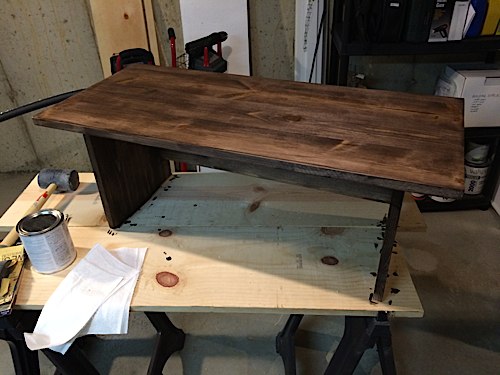
One coat of stain down, two to go; the first coat is always rough and patchy. If you're going for a distressed or antique look, one coat may be all you need. I wanted a desk that looked nice in a modern office environment, so I wanted a more muted and even color.
Second coat of stain complete. I used one new foam applicator brush per coat. I used to use old rags, but it's a little easier to stain evenly with a foam brush. Staining brushes also work well, but are much more expensive, and require a little more skill to use. A few tips for staining:
- Stir, never shake, the stain (same goes for poly). You don't want to introduce any little bubbles—they'll never disappear!
- Patience is key; load up the brush about halfway, then press it out into a row or two of stain. Go back and forth and even out the stain with firm strokes, then feather the edges. It's not a race!
- Keep working from a wet edge—don't start on one section, then go to another, then join the two; that makes for uneven finishes.
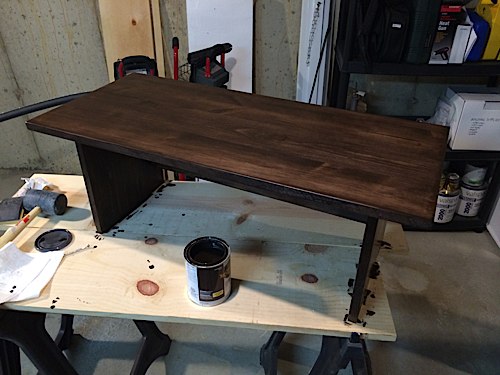
Third and final coat of stain applied; the surface coloring and grain is much more uniform. The first day's work was done, and I let the stain dry overnight.
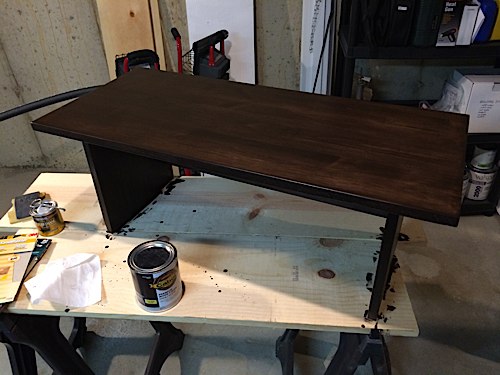
After one coat of polyurethane, a faint shine starts to appear when looking at the surface opposite a light source. At this point, the surface was a little more smooth, but still had a few rough spots. I applied the polyurethane much the same as the stain—foam applicator brushes, stir gently, and work from a wet edge, feathering out each stroke.
During the second coat, I snapped a quick picture of the just-applied polyurethane drying—while you apply it, you'll notice a milky white color; as it dries, it levels out a little and dries perfectly clear (if you have clear polyurethane, that is).
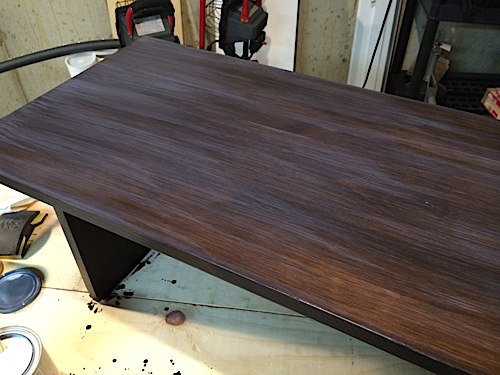
After two coats of polyurethane, the surface is looking pretty nice, and it's smooth to the touch. I could've stopped here, but wanted one more coat for insurance—since this is going to be used daily, for ~8 hours a day, I want a surface that can take a few scratches and a cold beverage!
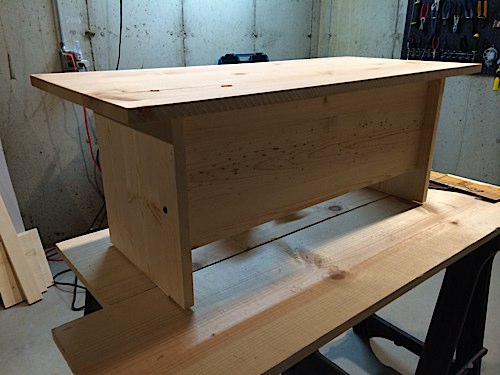
After the third and final coat of polyurethane, the desk is looking great! I put on all the coats of stain and poly while the desk was assembled, knowing that some inner surfaces (where the wood joins) would be bare, but if I had a few more days and was more patient, I would've stained and waxed each board separately, so every square inch was stained and finished. Maybe next time...
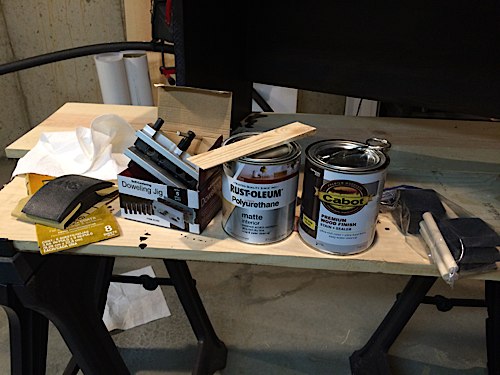
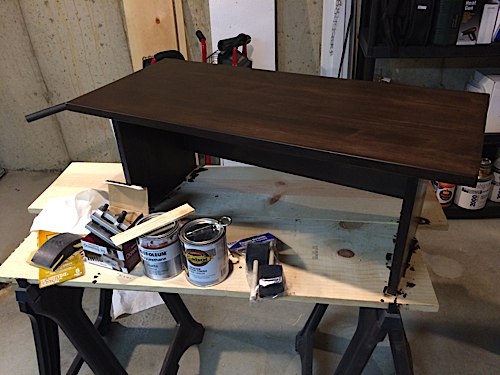
Materials I used, from left to right: 80/120/220 grit sandpaper and sanding block, cheap Harbor Freight doweling jig (1/4" wood dowels), Rust-Oleum clear polyurethane (mixed using some cheap wood shims I had laying around—didn't have any spare paint stirrers), Cabot espresso-colored stain, pack of 6 generic foam brushes.

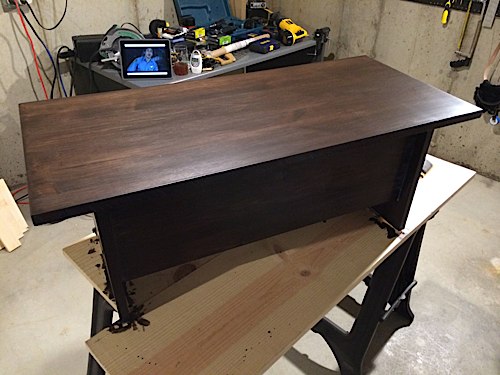
One more picture from the back of the finished standing desk. The iPad in the background was the source of much entertainment in the form of Prime Instant Video, and the Diet Pepsi in the foreground was the last of many sodas consumed in the making of this project.
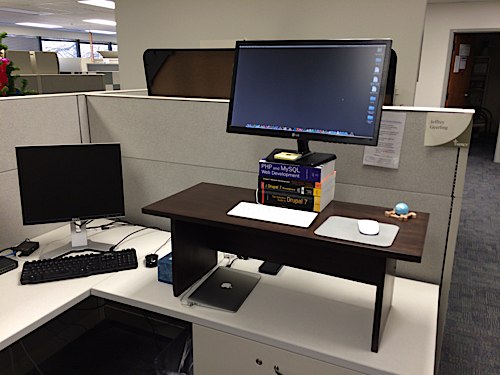
Finally, I leave you with an image of the standing desk in its final location. The surface is 13" higher than the desk top, providing a slightly-more-than-90° typing angle (so I don't rest my wrists on the surface while typing), and I raised the 23" monitor 8" higher with some old technical books I had laying around. I use a Genuine Joe Anti-Fatigue Mat to help reduce strain on my feet while standing, and I also have my old desk chair standing by when I want to grab my laptop and work sitting, from the other side of the desk.
Total material cost, including the wood, stain, polish, brushes and sandpaper: about $60. It probably would've been cheaper to buy a pre-made standing desk like the one I mentioned in the introduction... but it wouldn't be nearly as solid, it wouldn't look half as good, and I wouldn't have the satisfaction of knowing I built it!
Comments
I just found out about a nice pre-built solution that's almost exactly what I built, the Miracle Desk; it's a slight bit more expensive, but everything's pre-cut and ready to assemble, and it comes in two heights. Looks like a neat solution if you don't have the time/means to DIY!
Recently I had swapped monitors with my wife and the one I had now was not height adjustable so I needed to increase the height by putting it on a box. That was OK for a few weeks and then I decided to make it a little higher by putting a book under it today.
Five minutes later I stumbled across your page while looking for stuff on standing desks and laughed out loud when I saw your monitor being held up by the same Drupal 7 guide that I had just installed.
Ha! There are few books so perfectly suited for raising up monitors; it's thick, it's sturdy, it's relatively square...