A couple months ago, Axzez reached out and asked if I'd like to test out the Interceptor—an ATX-style mini motherboard for the Raspberry Pi Compute Module 4, complete with 5 SATA ports.
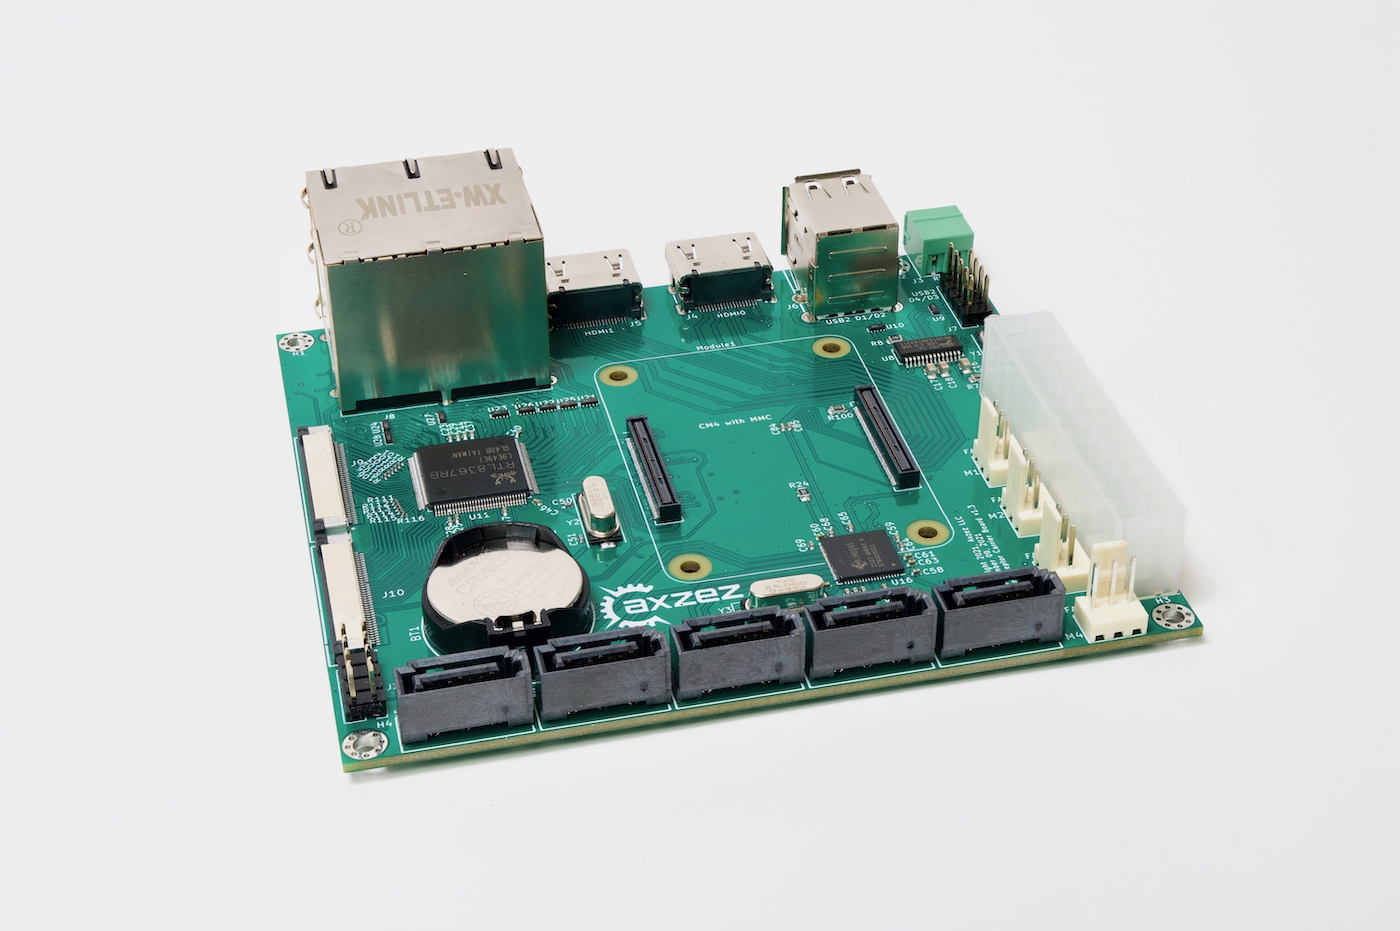
The board is meant to be used as an NVR (Network Video Recorder): You pop a Raspberry Pi Compute Module 4 on top, you plug in up to 5 SATA hard drives for storage, and then you plug IP cameras into the 3 extra LAN ports (via an RTL8367RB switch) on the back, and you can store IP camera footage on the drives, and access it over the network.
Axzez even builds a custom OS that can run either on eMMC storage, a USB flash drive, or over one of the SATA drives (though the latter option still requires a flash drive for the early boot stage).
I tested their OS, and tested every feature on the board—an RTC, front panel ATX power switch and power LED, all five SATA ports, two full-size HDMI ports, four 12v 3-pin fan headers, a USB 2.0 internal header and 2x rear USB 2.0 ports, and the 24-pin ATX power connector to power the board itself. Everything worked great out of the box, and the software (even at its early stage) seemed to perform adequately.
You can manage the behavior of the three extra LAN interfaces through their software, though they don't behave the same as multiple independent NICs like you might get with an Intel i340—these LAN ports are attached through the RTL8367RB chip internally, not directly wired into the Pi.
But around the time I received the Interceptor, I also got an email from Micro Center, and they offered to sponsor a video. I already shop at Micro Center quite frequently, so I took them up on the offer and decided to do something I've wanted to try for a few years, but never had the budget/motivation to do.
That is, I built a 'Raspberry Pi Gaming PC'—in this case, all-in around $500 (though this assumes you can pick up a Compute Module 4 at MSRP... good luck with that right now!).
I made a whole build video for it, and covered things like gaming at 120 Hz on the Raspberry Pi, but in this blog post I wanted to mention a few things about the Interceptor, and about a few other parts I used.
> Note: Yes, I know 'serious' gaming on a Raspberry Pi is silly. Pi's are best suited for things like retro gaming or running older games that run okay on Linux with very limited resources. But I like to try new and fun projects, and explore the boundaries of what's possible with limited hardware.
Testing the hardware
First of all, the Interceptor is in a form factor smaller than mini ITX, meaning there's not an easy way to mount it in standard ITX/ATX cases—luckily, Axzez makes a mini ITX board adapter, which I used to mount the board in the full-size ATX case I used in the video—though I spray painted mine matte black.
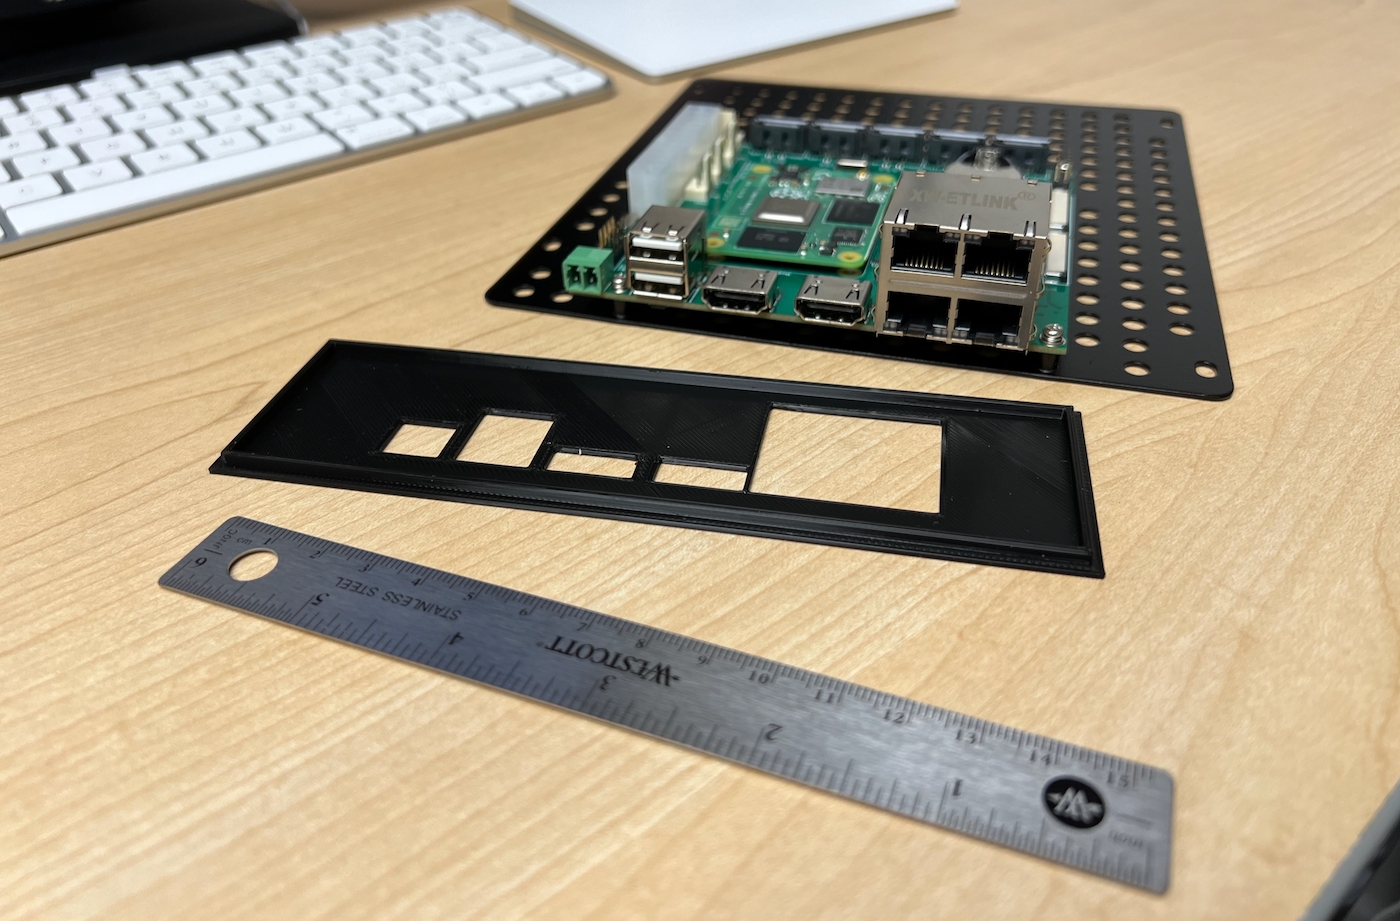
Since Axzez currently doesn't have an IO shield for their board, I decided to design one in OpenSCAD. I posted my design on Thingiverse: Axzez Interceptor IO Shield.
> Aside: It seems Thingiverse is abandonware these days... where do people go to share 3D printed designs now?
For cooling, I was going to use a little $8 fan + heatsink combo I picked up at Micro Center, but realized there wasn't a 5V power header on the board, and I didn't want to leech it off the USB header since I was using that for the front panel USB connections on my case.
So instead I used a CM1 Silent Heatsink Kit from Dickson Industries—Dickson Chow had emailed me a few weeks back and asked if I was interested in testing out his wild-looking aluminum heat sinks for the Pi, and I told him I'd be happy to test them out.
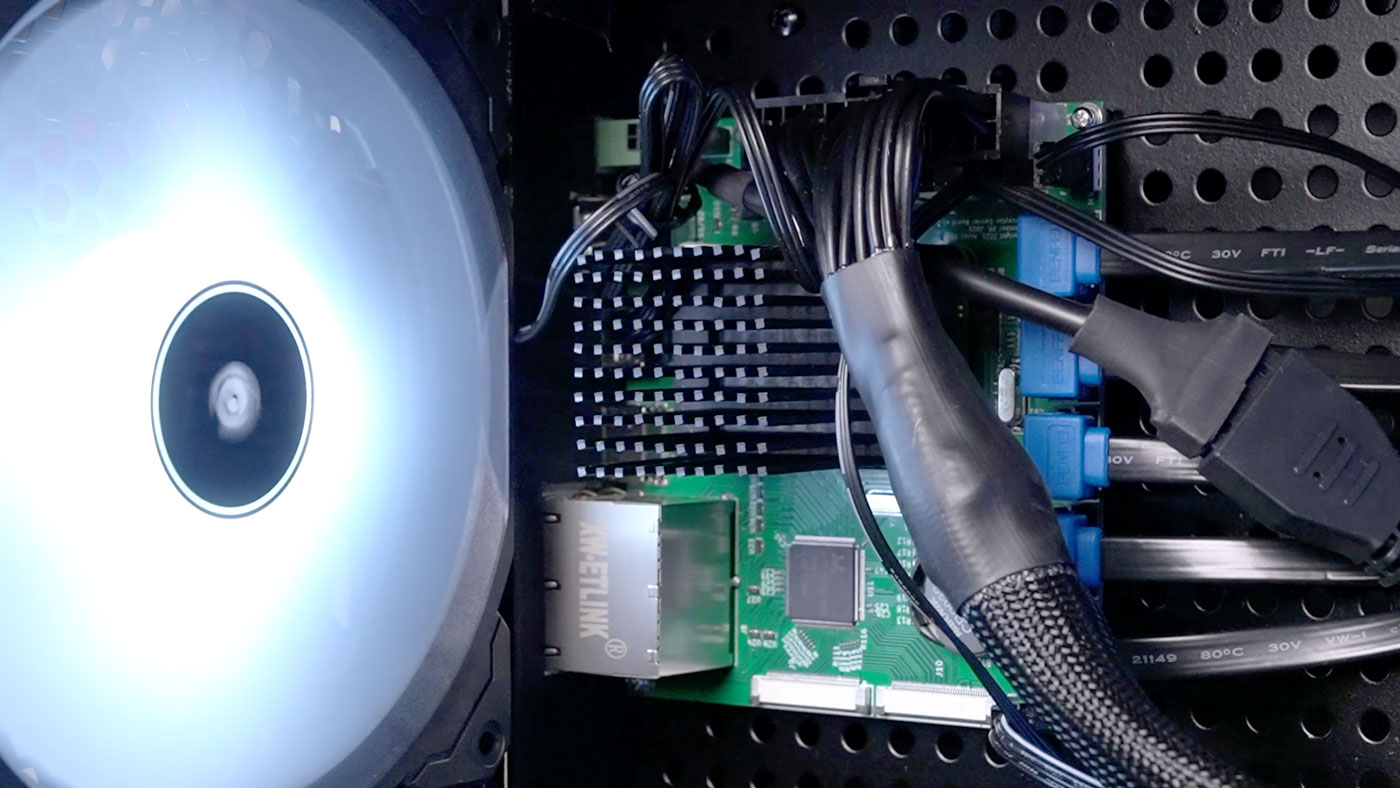
Well, this heat sink performed quite well in tandem with the ridiculously-oversized 140mm exhaust fan in the Asus case I was using. I haven't completed a formal thermal benchmark, but while gaming in heavy disk benchmarking use, the SoC never went above 40°C, which is a lot better than the 70-80°C it was getting with out a heatsink (with the same airflow from that massive fan).
That was with a 2.14 GHz overclock on the CPU, and 750 MHz on the GPU, too!
Speaking of benchmarks, I was able to get about 90 fps on low settings in Quake III Arena (while the Pi was outputting over 1080p at 120 Hz), and in RAID 10, I could read and write around 350-400 MiB/sec continuously.
Custom 1U rackmount case
Axzez is also developing a custom 1U rackmount case, and here's a picture of the first revision prototype:
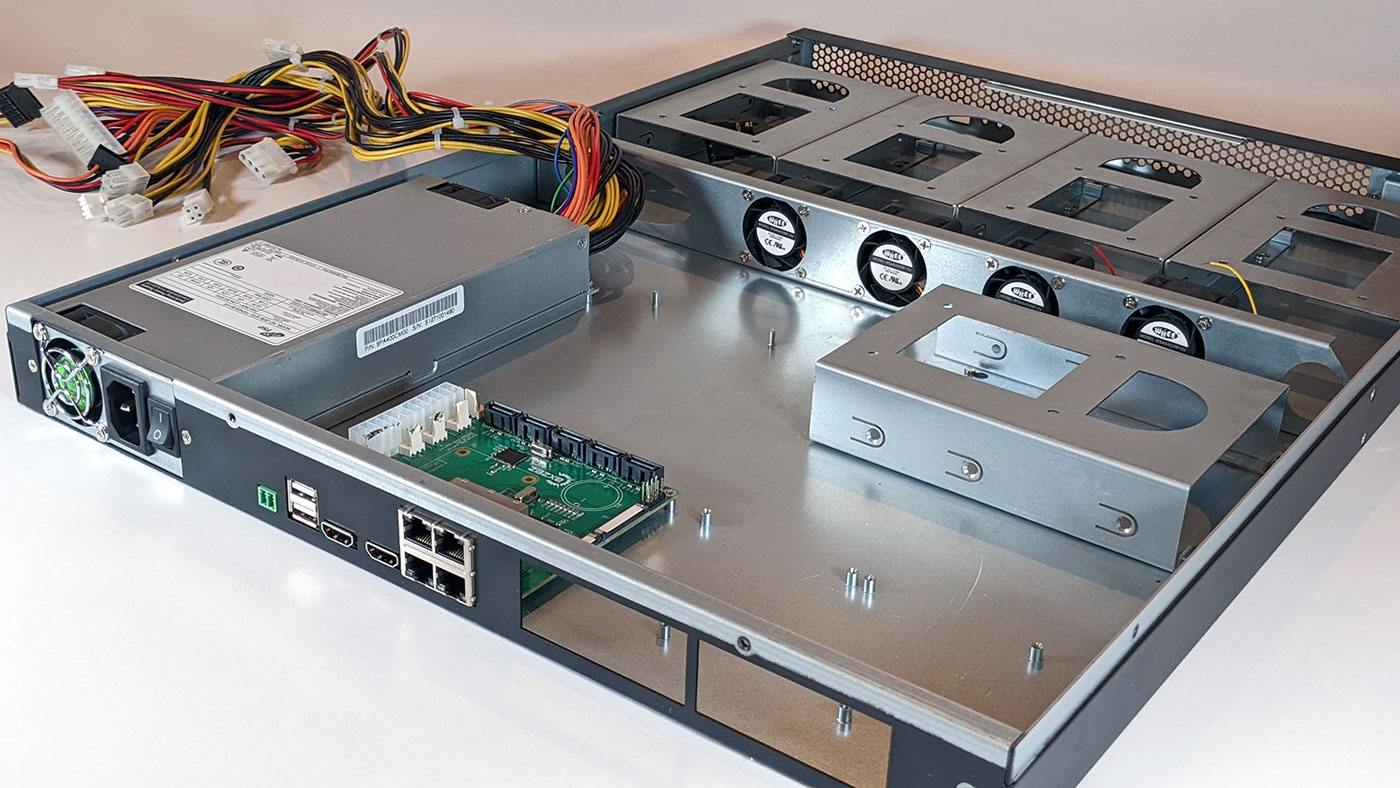
I believe this would mark the first time a commercial 1U case has been built specifically for a Raspberry Pi-based project. At least one that is sold through non-industrial markets!
The case would include a power supply, and has mounting points for 5 3.5" SATA hard drives and the Interceptor board. It also looks like it has room for further expansion through the edge connectors on the Interceptor—though Axzez still hasn't revealed their final plans yet!
The case should cost around $120 (plus the price of the PSU, which hasn't been nailed down yet), meaning an all-in cost on an Interceptor rackmount unit (sans hard drives) would be in the ballpark of $300-400, depending on the CM4 model you choose, and the final power supply cost.
I wish them luck, and it would be interesting if a Pi-based solution could crack into the NVR / surveillance market, which to this point has mostly proprietary software and hardware stacks. And the Interceptor's versatility means it could also be run in a variety of other ways, too, maybe even as a boring 1 Gbps NAS device—with two HDMI outputs!
Conclusion
You can order Axzez's Interceptor for $99. I believe the next batch will be shipping soon—right now you have to sign up for availability notifications.
And Dickson Industries' CM1 Silent Heatsink Kit costs $29 CAD and ships from Canada, with a lead time of 3-4 days.
Thanks again to Micro Center for sponsoring the video and build, and in case you were wondering, yes, I'm still working on getting a graphics card working on the Pi. In the mean time, GitHub user TobleMiner has a framebuffer console rendering through an SM750 on the CM4, and Coreforge has some basic 3D graphics rendering through an older Radeon card. My work on the RX 6700 XT with the AMDGPU driver has seen some progress... but only a little so far.
Comments
Shannon Kerr here, co-founder of Axzez LLC. Our image actually includes swconfig from OpenWRT. So you can configure each of the 4 ports however you would like. By default we define one port as wan and three ports as lan. For example, you can configure each port with a static IP on separate subnets, or you could run a dhcp server and bridge them to wifi.
So, you could use this as a router, ALSO?
Would this be your best RPi based SATA raid setup for home yet? Or in your opinion you have another you would rather prefer for home use with Security Camera, Home Assistant, Media Server, Private Cloud all in one?
Jeff,
Is Axzez still a going concern? There's no "News" on their about page, and I note there's been no activity on their FB account in a month, the downloads page is devoid of downloads, and there are no recent forum entries since one of mine a week or so ago. I have one of the Interceptor boards and would love a bit more support - sadly their site offers very little easily located support information aside from following near random links in the forums. I was able to install their custom image once, but subsequent attempts have utterly failed and two of my CM4 boards in a state I'm not sure I will be able to find a way to recover from. Any chance you know some more??? TIA
Bob
I have remained in contact with them in the past month; I know right now they're a bit deep into work on some software, and on their PoE board integration. Since I believe it's only a couple people on the team, they might just be heads down, or maybe also taking a week off or something. Just make sure you shoot an email or give a little more time.
Jeff, Thanks for the reply. I was finally able to get the board with their build up and running, so for the moment I can let go... I'm looking forward to OMV finishing the clean & resynching. I've set up 5-18TB seagate drive in a RAID 5 configuration. I did spend a fair amount of time vascillating between RAID 5 & 6, but ultimately choose storage over reliabilty. The rationale is this my second NAS/RAID system (also running the Asustor 4-drive system) and am still working out how to manage files, backup storage - both here and offsite. I have a AWS S3 account and am lucky the city of Longmont Colorado offers an ISP utility with symetric gig fiber and at a flat rate of on $70/month, so my only expense is related to the bandwidth charges by Amazon. For a brief perios I was uploading 1TB backups daily, til I got the $200 bill... Anyway, I'm rambling. Thanks for your Blog, research and YT Channel. I just realized you are a Patreon creator; I most certainly will join your supporters!
Hi,
i have Problems to find out where the Pins for the Power LED and Power Button are.
Where are on this Pin Header J2 are Pin1? Sorry if thats a stupid question, i did one our to find the answer, but J2 seems nowhere explaied in detail.
So I bought one of these boards a while ago and I'm not sure what to do with it now. I could see making it into a backup NAS for my main NAS. How well would it work with random size SSDs that I have laying around? Are there any models for a 3d printed NAS case for these boards?