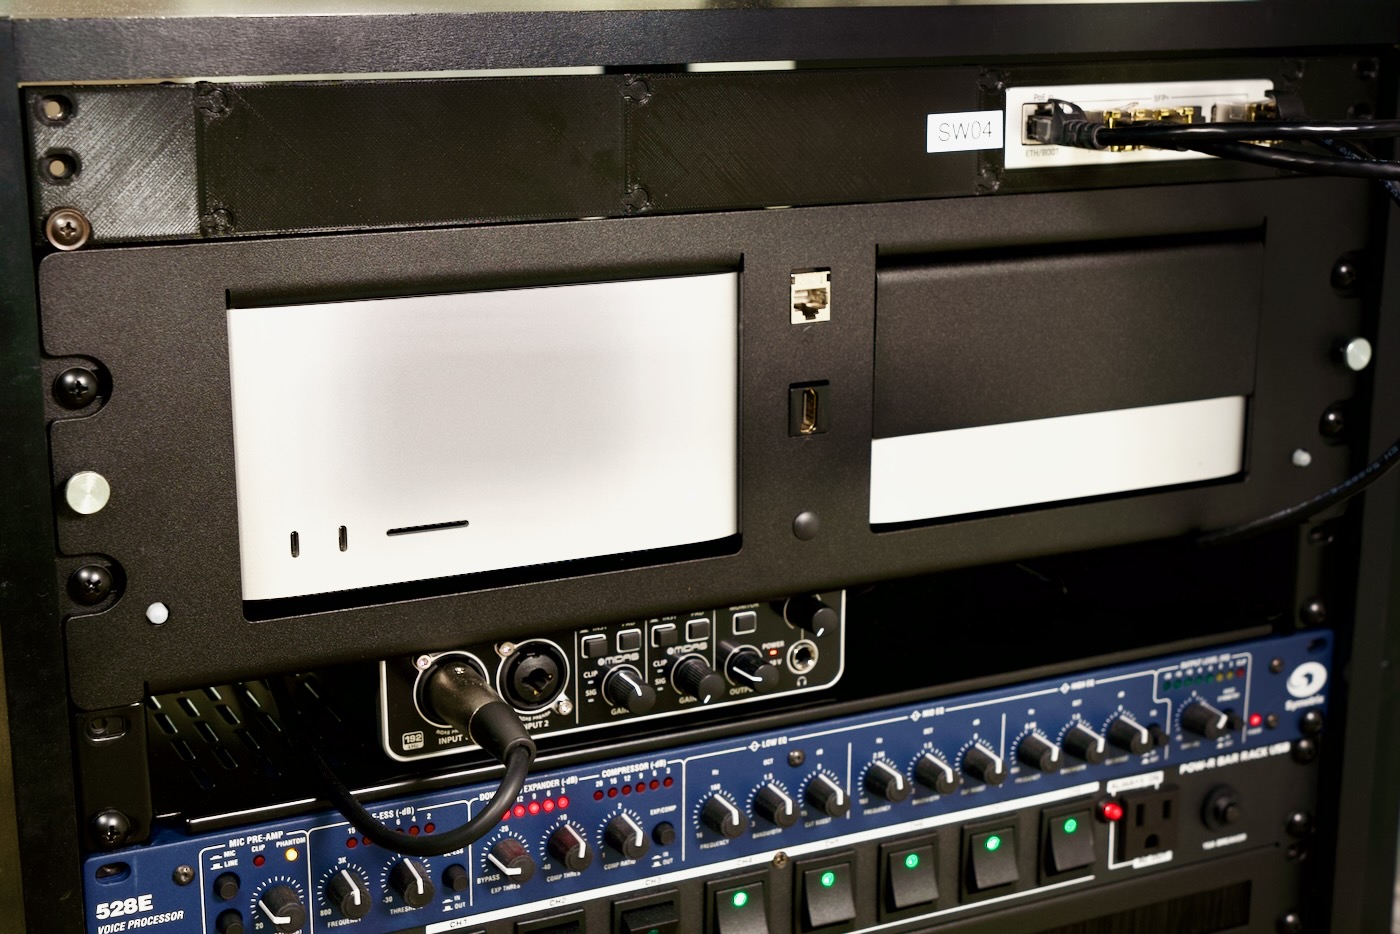
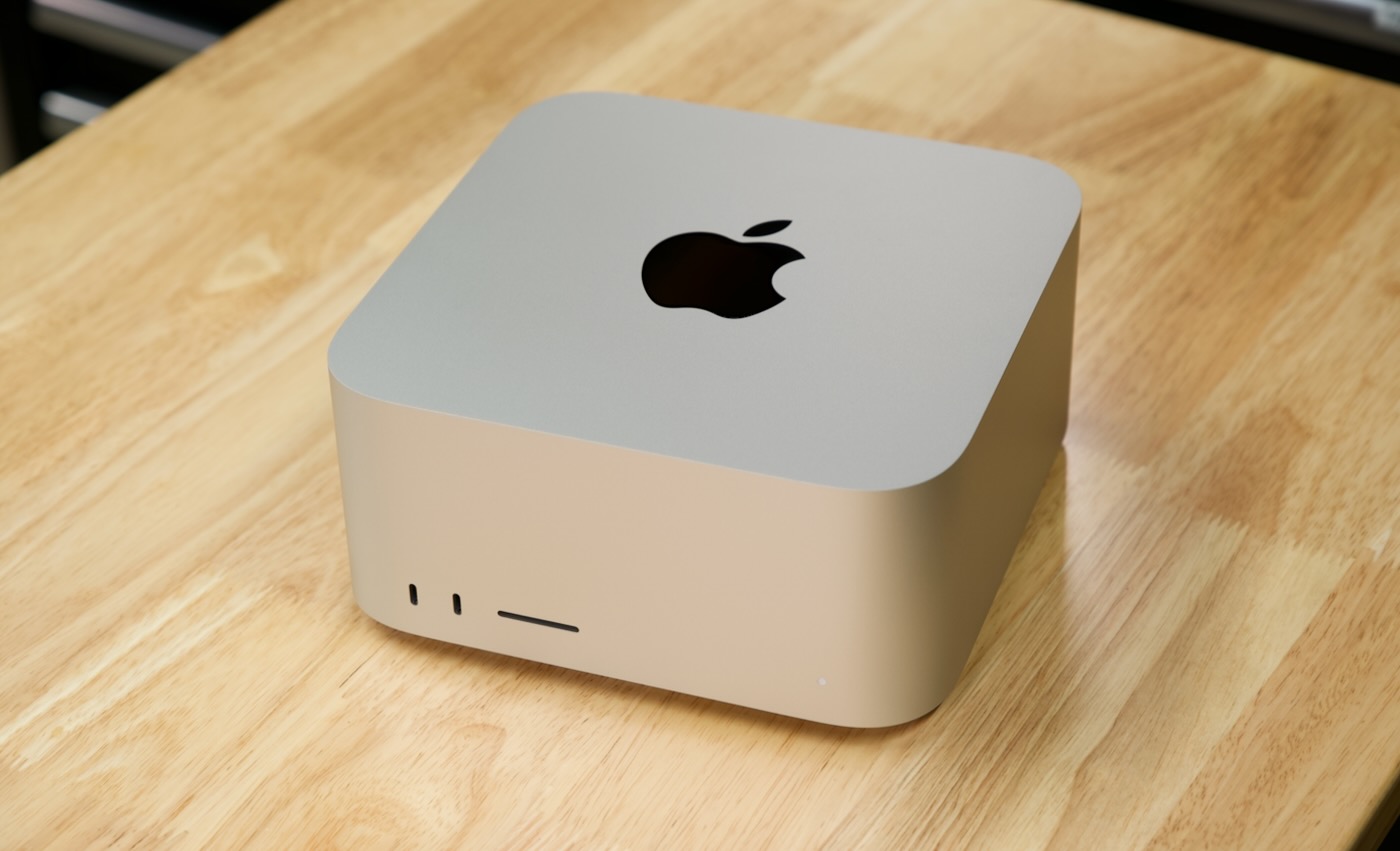
reviews

Mac Studio is 4x more efficient than my new AMD PC

Last month, I built an all-AMD PC to try out Linux Gaming with Steam and Proton, and so I'd have a faster native Linux build machine for my various compilation tasks.

This month, Apple introduced the Mac Studio, and as a now full-time video producer, it was a no-brainer for me to upgrade from an M1 Mac mini.

Mac Studio M1 Max Hero

My Mac Studio arrived Friday, and over the weekend, I spent some time benchmarking it against not only my M1 mini, but also my new AMD Ryzen 5 5600x PC build.

My Mac Studio's specs:

BliKVM - a PiKVM (KVM over IP) box based on the Compute Module 4

I received a couple BliKVM units recently, and since I don't have as much of a need (my only 'remote' PC is about 2' away from my desk...), I brought them to my Dad's radio station, and we set it up in their main on-air PC so operators could access the PC and fix problems at home, instead of driving in!

Check out our video on this board on the new Geerling Engineering YouTube channel:

You can buy the BliKVM on AliExpress, and try your luck finding a CM4 to use in it!

Home Assistant Yellow - Pi-powered local automation

I've dipped my toes in 'smart home' automation in the past.

Typically I approach 'smart' and 'IoT' devices as a solution to one simple problem, instead of trying to do 'all the things'.

For example, I wanted to make it easy for my kids to control a home theater with four different devices and complex audio/visual routing, so I bought a Harmony remote and programmed it to control TV, a game console, an Apple TV, and radio. I don't want Logitech to start controlling other aspects of my house, or to give intruders an avenue by which they could invade my home's network.

However, many smart devices require a persistent Internet connection to use them, and that I cannot abide.

Home Assistant Yellow - inside enclosure

Autofocus on a Pi - ArduCam's new 16MP camera

ArduCam with other Raspberry Pi Cameras - v2 HQ and Autofocus 16MP

ArduCam recently completed a successful crowdfunding campaign for a 16 megapixel Raspberry Pi camera with built-in autofocus.

The camera is on a board with the same footprint as the Pi Camera V2, but it has a Sony IMX519 image sensor with twice the resolution (16 Mpix vs 8 Mpix) and a larger image sensor (1/2.53" vs 1/4"), a slightly nicer lens, and the headline feature: a built-in autofocus motor.

Autofocus performance

Getting right into the meat of it: autofocus works, with some caveats.

First, the good. Autofocus is quick to acquire focus in many situations, especially in well-lit environments with one main subject. Using ArduCam's fork of libcamera-still or libcamera-vid, you only need to pass in --autofocus and the camera will snap into focus immediately.

Raspberry Pi holds its own against low-cost ARM NAS

Earlier this year, I pitted the $549 ASUSTOR Lockerstor 4 NAS against a homebrew $350 Raspberry Pi CM4 NAS, and came to the (rather obvious) conclusion that the Lockerstor was better in almost every regard.

Jeff Geerling holding Raspberry Pi Radxa Taco NAS board and ASUSTOR Drivestor 4 Pro

Well, ASUSTOR introduced a new lower-cost NAS, the $329 Drivestor 4 Pro (model AS3304T—pictured above), and sent me one to review against the Raspberry Pi, since it make for a better matchup—both have 4-core ARM CPUs and a more limited PCI Express Gen 2 bus at their heart.

Around the same time, Radxa also sent me their new Taco—a less-than-$100 Raspberry Pi Compute Module 4 carrier board with 5x SATA ports, 1 Gbps and 2.5 Gbps Ethernet, an M.2 NVMe slot, and an M.2 A+E key slot. (The Taco will soon be available as part of a kit with a CM4 and case for around $200.)

The specs evenly matched, at least on paper:

I built a $5,000 Raspberry Pi server (yes, it's ridiculous)

When I heard about Radxa's Taco—a Raspberry Pi Compute Module 4-powered NAS/router-in-a-box—I knew what must be done.

Load it up with as much SSD storage as I can afford, and see what it can do.

Raspberry Pi CM4 Taco NAS with 48 TB of SSD storage

And after installing five Samsung 870 QVO 8TB SSDs and one Sabrent Rocket Q NVMe SSD—loading up every drive slot on the Taco to the tune of 48TB raw storage—I found out it can actually do a lot! Just... not very fast. At least not compared to a modern desktop.

Special thanks to Lambda for sponsoring this project—I was originally going to put a bunch of the cheapest SSDs I had on hand on the Taco and call it a day, but with Lambda's help I was able to buy the 8TB SSDs to make this the most overpowered Pi storage project ever!

CutiePi - a Raspberry Pi CM4 Linux Tablet

A few weeks ago, I got my hands on an early prototype of the CutiePi.

CutiePi Tablet with Raspberry Pi mug

Unlike many other Pi 'tablet' projects, this one is actually more of a, well, tablet, since it is based on the diminutive Compute Module 4. And because of that, and a custom main board, the CutiePi is less than half as thick as the other decent modern Raspberry Pi tablet on the market, the RasPad—plus it has a cute handle:

CutiePi Back

It has an 8" 1280x800 multi-touch display, a 5000 mAh battery, USB 2.0, USB-C power (you can use the tablet while charging), micro HDMI for an external monitor or TV, and a microphone, speaker, and 5MP 1080p rear-facing camera.

Raspberry Pi Zero 2 powers the Null 2 RetroPie gaming handheld

As a kid, I never had a Game Boy, Game Gear, or any other handheld console. Heck, as luck would have it I've never owned a Nintendo Switch, either.

I've played console and PC games, I've only used handhelds twice: once in middle school, when a friend let me borrow his Game Gear for a day, and last year year when my dad brought over his Nintendo Switch—which my kids quickly commandeered.

I guess out of a sense of jealousy, I decided the first thing I should do with Raspberry Pi's latest hardware, the Pi Zero 2 (see my review here), is build myself a handheld retro gaming console.

Null 2 kit on Tindie

And what better way than with the Null 2 kit (pictured above, from it's Tindie page), a kit integrating off-the-shelf components on a custom PCB, wrapped up nicely in a custom acrylic case.

Look inside the Raspberry Pi Zero 2 W and the RP3A0-AU

Today, Raspberry Pi released their new Zero 2 W, and it includes a new Raspberry Pi-branded chip, labeled RP3A0-AU.

I was able to get early access to the Zero 2, and I have a full review of the device on my YouTube channel, but I wanted to share more of the X-ray images I took of the device to reveal its inner workings, and because I just think they look cool. Also, I paid a bit of money to get these pictures, so might as well share!

First, here's what the Zero 2 W looks like in person:

Raspberry Pi Zero 2 W

And here's what it looks like via X-ray:

Raspberry Pi Zero 2 W - X-ray vision