No stranger to rack-mounting Macs that were never meant for the task, I reached out to MyElectronics to see if they had a rackmount solution for the Mac Studio when I bought mine in March.
They said they were already working on a Mac Studio Rack Mount system, and they'd gladly send me one to review, since they knew how much I loved rackmounting my M1 Mac mini and all the Raspberry Pis I run in my homelab.
Well, it finally arrived. For this review, they provided the variation that was set up for 1 Mac Studio and 1 Mac mini, with the power button mechanisms preinstalled in the correct locations (fun fact: the power button swapped sides from the mini on the Studio). You can adapt the unit to use 2 Mac Studios, or even 1 Studio and 2 Raspberry Pis, or 1 Studio and 1 Apple TV—and there are other accessories you can use to configure it how you want on MyElectronics' store.
In addition to this blog post, I posted a video review:
MyElectronics' rack mount kit - overview
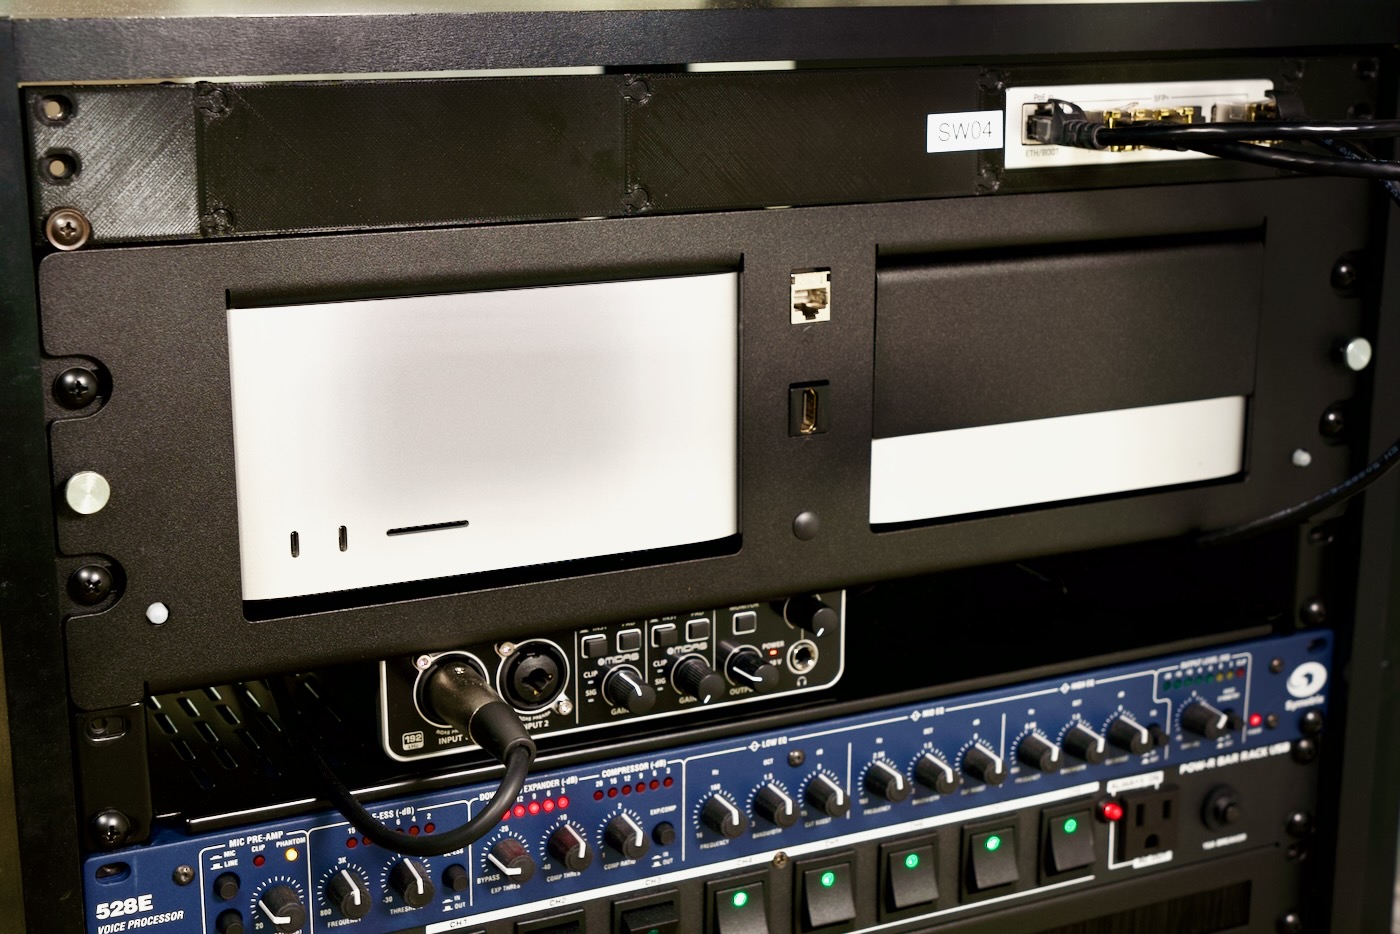
The kit MyElectronics sent included the main rack unit, preconfigured for a Mac Studio and a Mac mini, and the power button mechanisms were installed in the appropriate place—on the left for the Mac Studio, and on the right for the Mac mini:
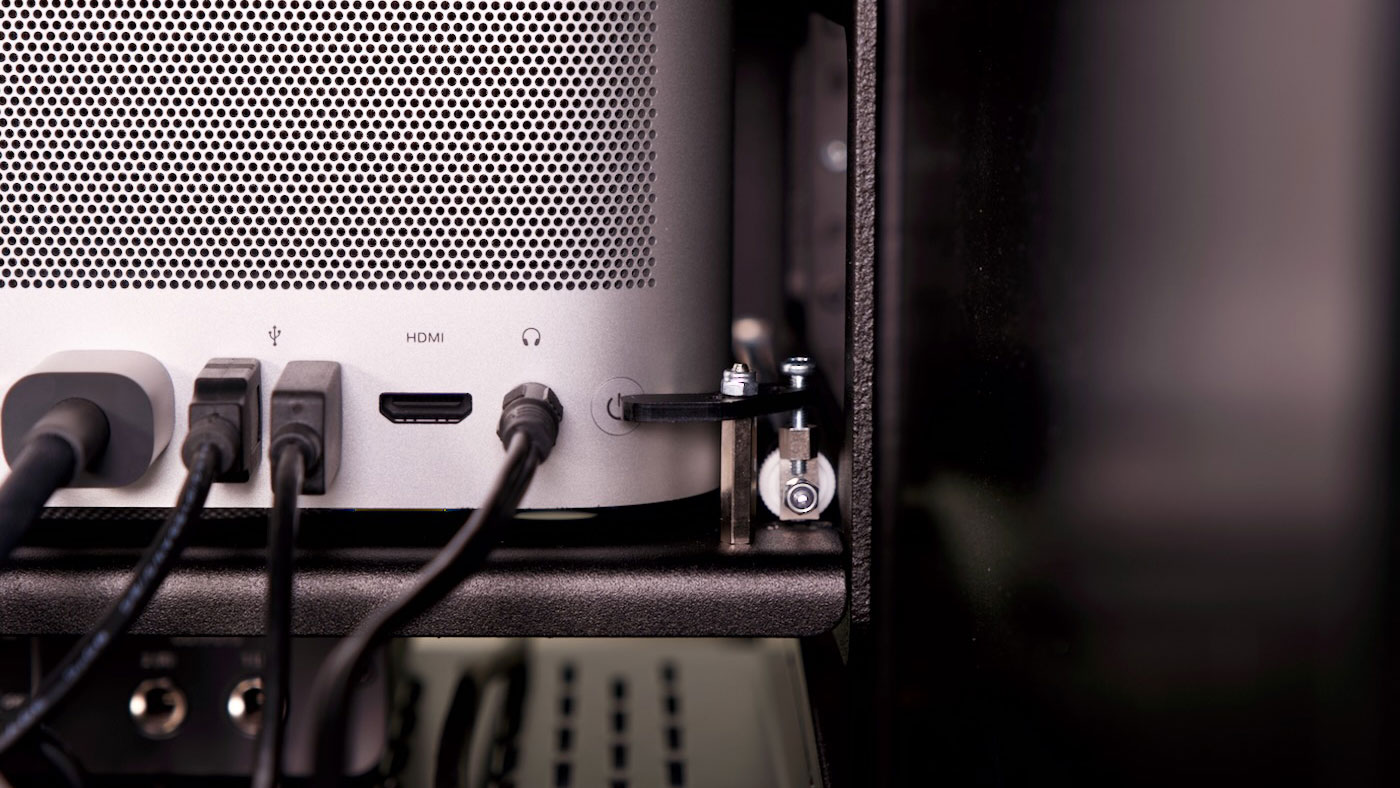
They also sent a few keystone connections and pigtails for Cat6A Ethernet (capable of 10 Gbps since both my Macs have 10G Ethernet), HDMI 2.0, and USB 3.0. The front of the unit has two keystone jacks you can pass through from the back of the Macs.
Since the Studio thankfully has front IO in the form of two USB-C ports (I have the Max—the Ultra has front panel Thunderbolt 4!), and an SD card reader, I passed through Ethernet and HDMI from the Mac mini. I normally operate that computer headless, and run Asahi Linux on it for testing.
They also sent a panel with six keystone jacks on it—I could use that in lieu of the mini, for more IO if I didn't want a second computer in there. You can also buy a dual Raspberry Pi faceplate, or an Apple TV faceplate, if that's more your style.
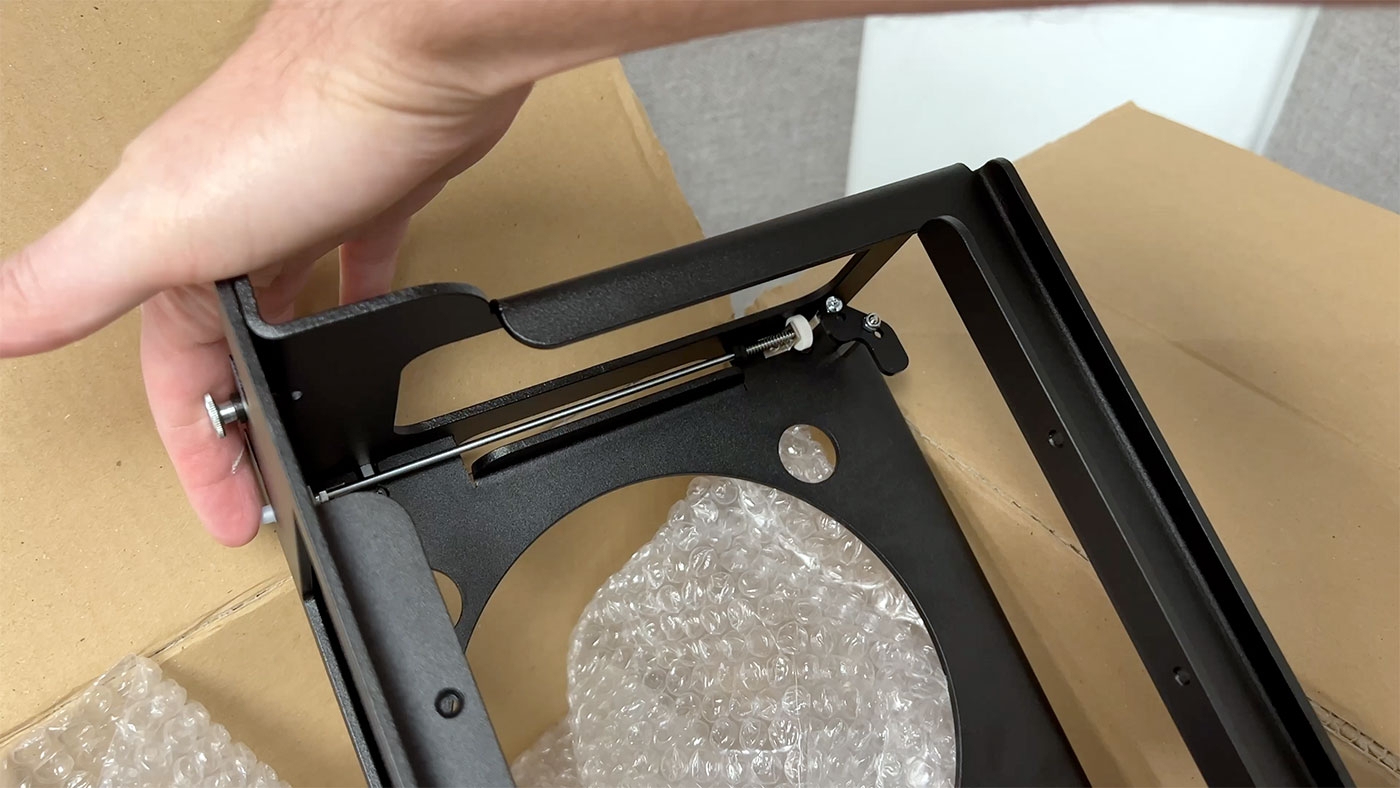
The hardware is all well-put-together. The metal is thick enough it doesn't deform at all, and the powder-coated finish is excellent. If I had one complaint, it's the way they implemented the keystone jacks:
Because each jack has a separate metal backing plate, secured via a single screw/standoff, the plates flex a little when you try snapping in a jack. In the end it works fine, but it was more frustrating having to use a screwdriver to install the bottom jack since the tolerances for keystone connectors is all over the board.
If the metal keystone plate was one piece with two screws, it would make a more rigid installation.
It's a small gripe, though, and doesn't really deter from the finished install, it just means the connectors can move a tiny bit when you plug things into them.
Installing my Macs
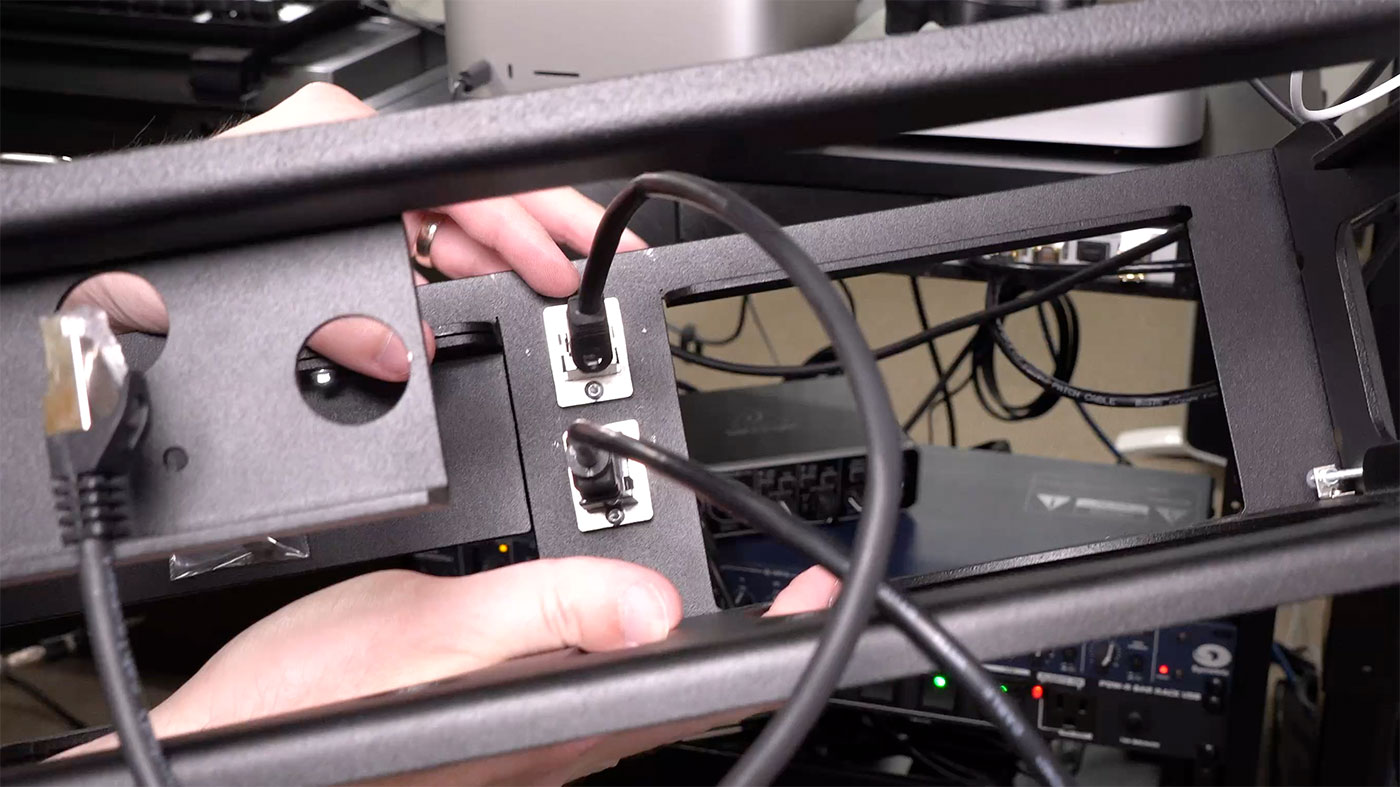
To install the Macs, you first remove the front faceplate, which is held in with two thumbscrews. These screws aren't captive—make sure you hold on to them as you unscrew them or you'll have to do the 'find where that screw bounced off to' dance!
They sit inside a circular cutout, and the mini is also held down at the rear by a metal plate that extends from the top of the rack mount frame.
Then you make put the front faceplate back over the macs, and screw in the thumbscrews.
Wire up everything in the back, and you're good to go!
Fit and finish
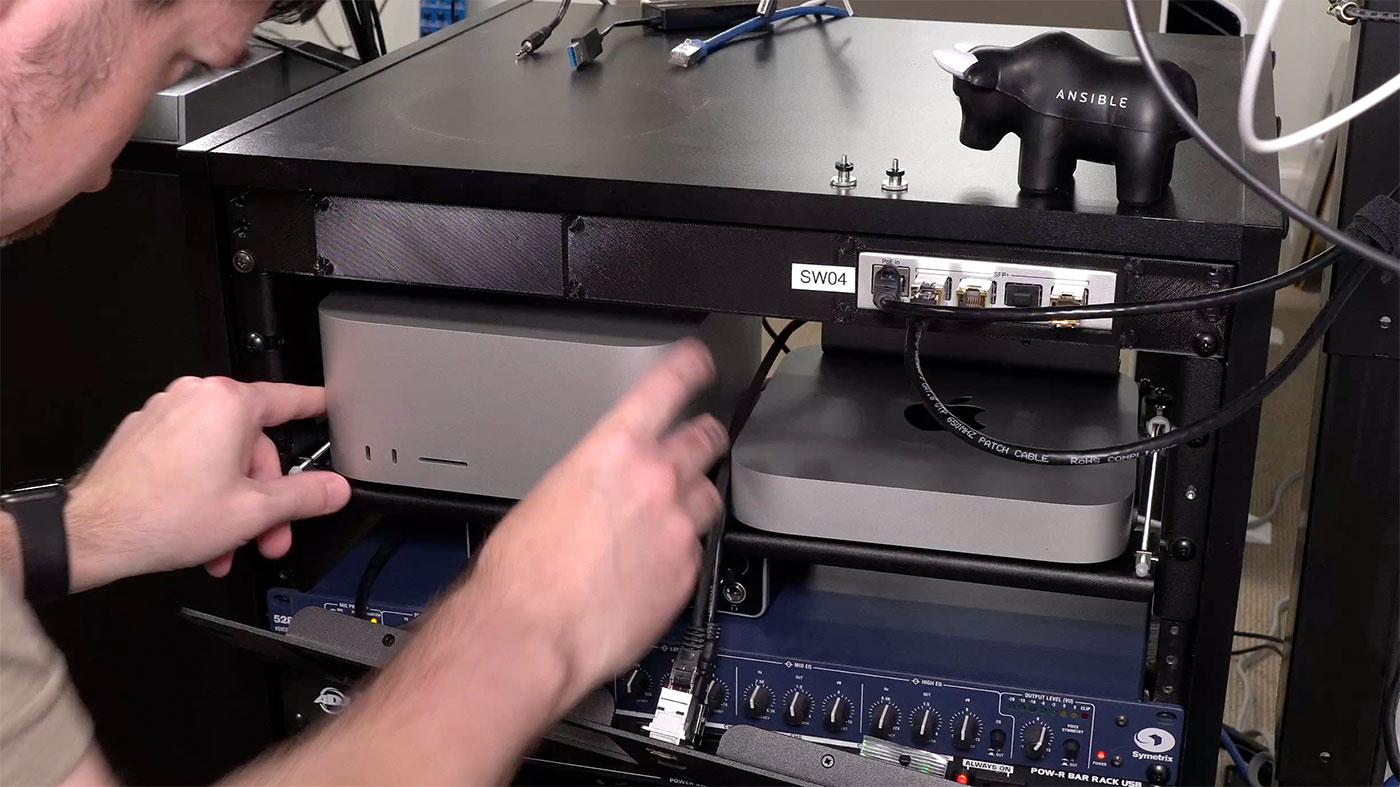
The fit is almost perfect—there's maybe a millimeter of play on either Mac, and it's good enough I can plug cables into the front with confidence.
It doesn't seem to mar any of the surfaces on the Mac, either.
The power button mechanism seems to be spot-on, and gives solid contact every time it's pressed from the front:
I have two concerns with the design, though both are minor, and how much the affect you depends on your rack setup:
- There are no integrated cable management 'fingers' in the rear to which you could zip tie cables for a more secure installation. If using this in a road bag, I'd be worried over time cables could wiggle free unless you have your own cable management holding things in place.
- Air intake, due to Apple's strange design of the Studio especially, is provided through four holes cut into the bottom, as well as an extended vertical cutout on the front. On my M1 Max Mac Studio, it's not an issue—I've not seen any real difference in temperatures. But on an M1 Ultra, it could constrain airflow in some cases.
All in all, I'm happy to have my two Macs back in my rack. Especially the Studio, since I can now plug and unplug SD cards one-handed, without the computer sliding around on my desk.
You can buy the Mac Studio 3U Rack Mount for 1 or 2 Mac Studios for around $260 plus shipping, or the Mac mini 1U Rack Mount for 1 or 2 Mac minis](https://www.myelectronics.nl/us/mac-mini-rackmount-kit-104427956.html) for around $180 plus shipping. MyElectronics provided the unit displayed in this blog post for review purposes.
Comments
Cool! It's a budget Mac Pro!