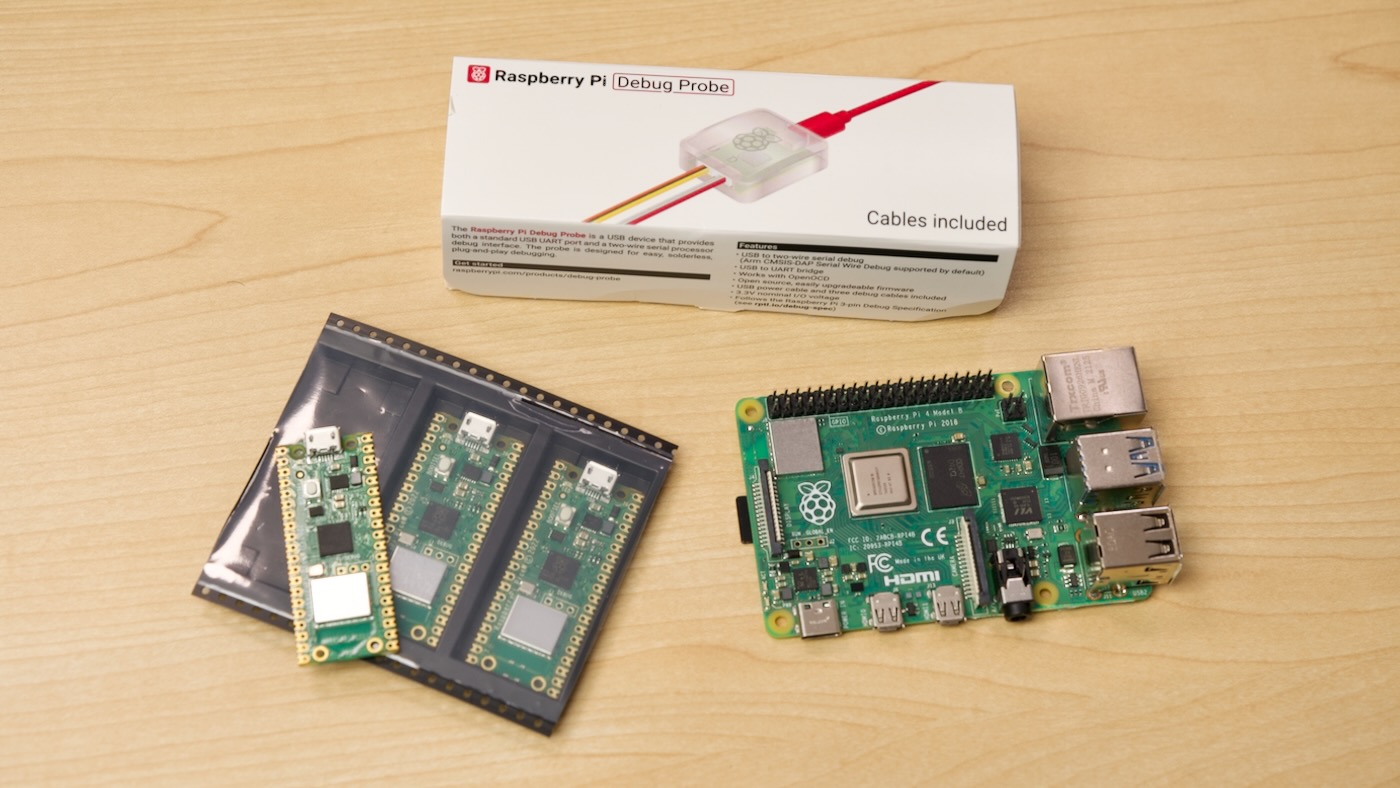
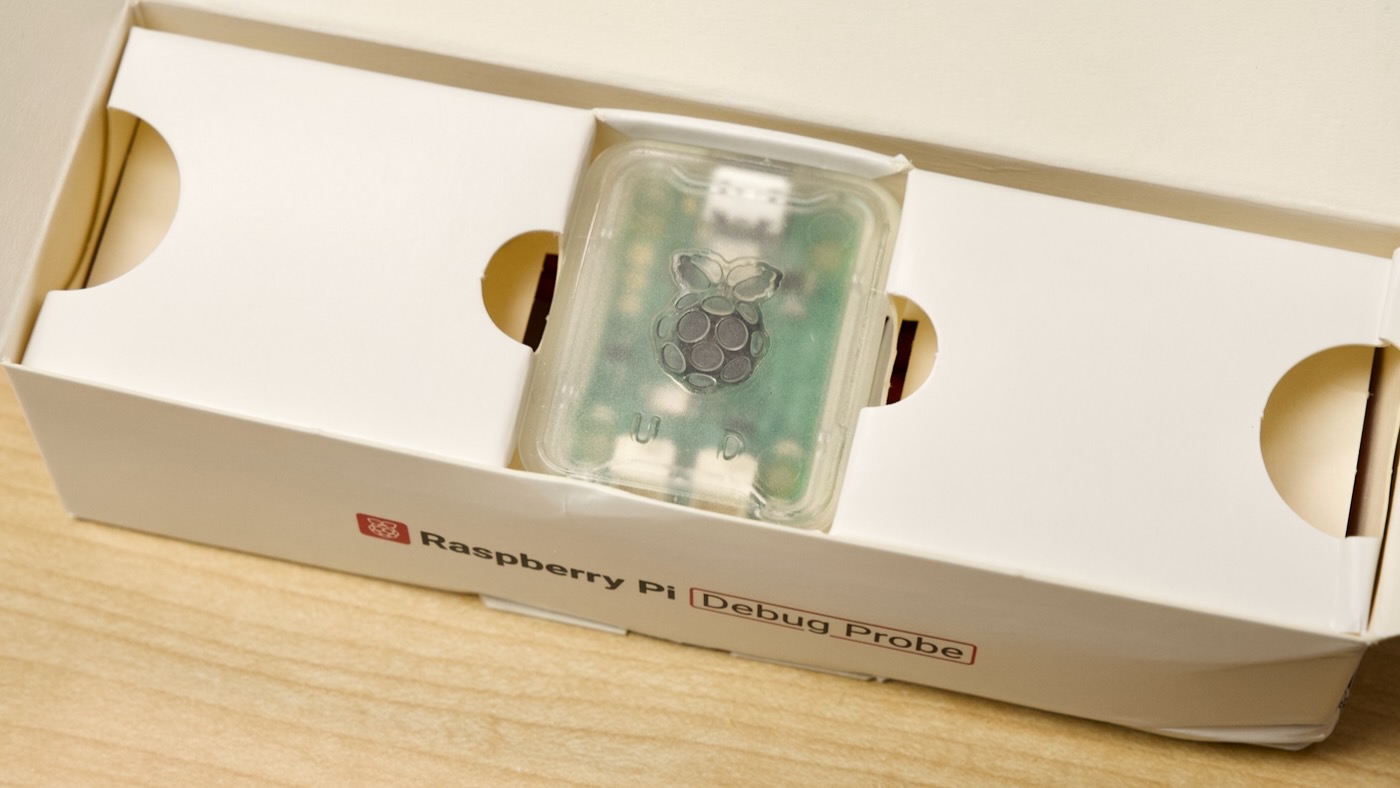
Yesterday, in tandem with Raspberry Pi's announcement of their new $12 Debug Probe, I received one in the mail (pictured above).
The Debug Probe is powered by an RP2040, and lets you connect from USB to UART (serial) or SWD (Serial Wire Debug), perfect for debugging most embedded devices.
UART is useful to connect to a device's console when you don't have a display or other means of controlling it, and you can find UART/serial/console ports on almost any device with a processor or microcontroller.
SWD is useful when debugging ARM SoCs, like the RP2040 used on the Raspberry Pi Pico. I have also used it in the past when updating the firmware on my Turing Pi 2, which was using another ARM chip to run its BMC, or Board Management Controller.
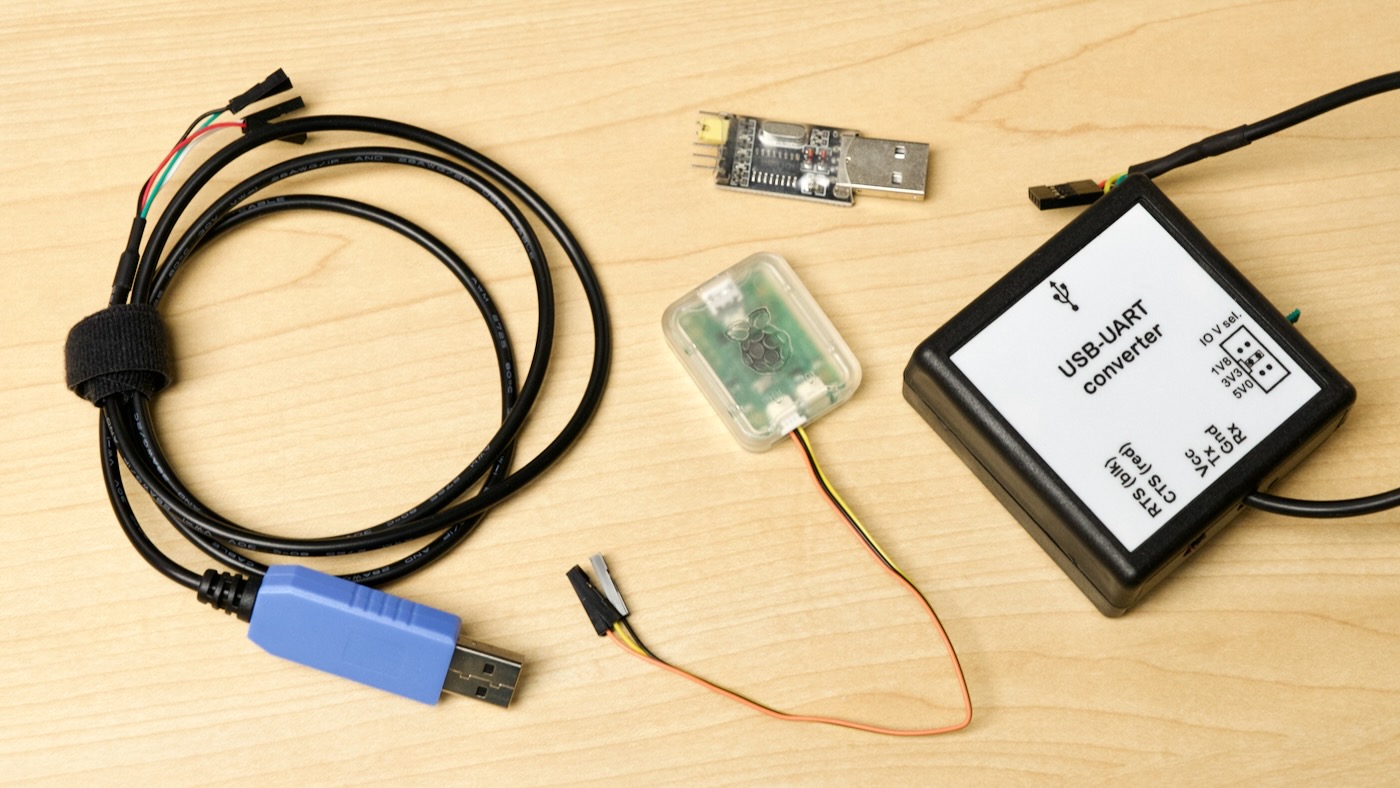
Traditionally, you could find USB to UART adapters with varying levels of support for a couple bucks up to tens of dollars, but looking in my UART bin, I think I cover some of the more popular non-branded adapters many electronics nerds might have laying around:
The Debug Probe adds on SWD and has a separate port for that, so it competes also with SWD devices like this knock-off of the SEGGER J-Link BASE Debugger, which costs $500!
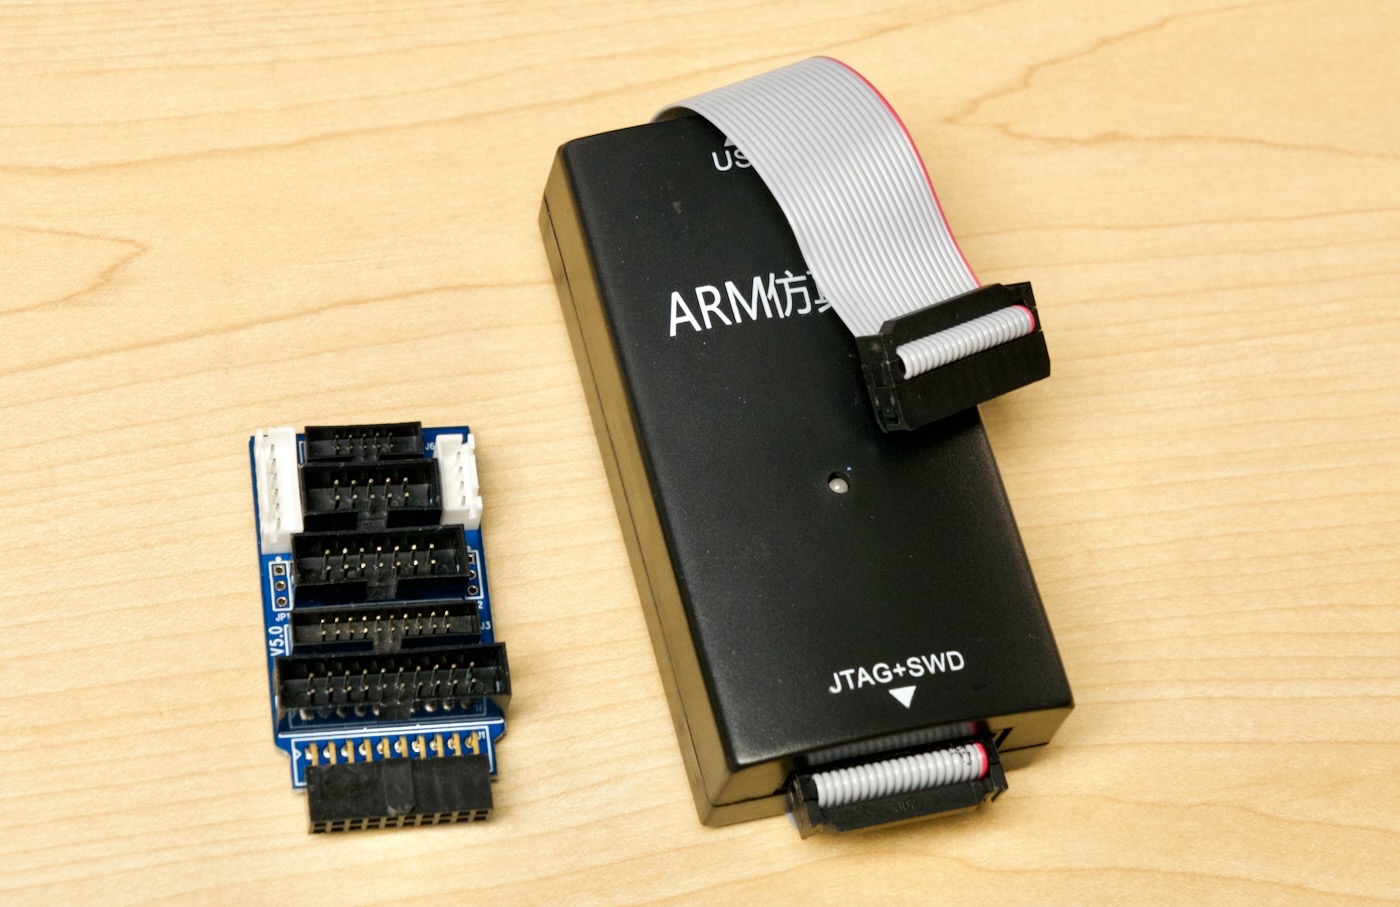
The SEGGER EDU can be purchased for educational and non-commercial use for $70, but that's still a pretty steep price to pay to get into the SWD debugging game.
So for a grand total of $12 for Pi's Debug Probe, what do you get?
What you get in—and on—the box
A lot of people ask "why would you buy Raspberry Pi when there are a thousand overseas knockoff boards that are half the price?"
Well, let's open up the Debug Probe and I'll show you one good reason—under the lid, you're greeted with a simple illustration, explaining the included accessories' purpose and the pinout for the included breakout wires.
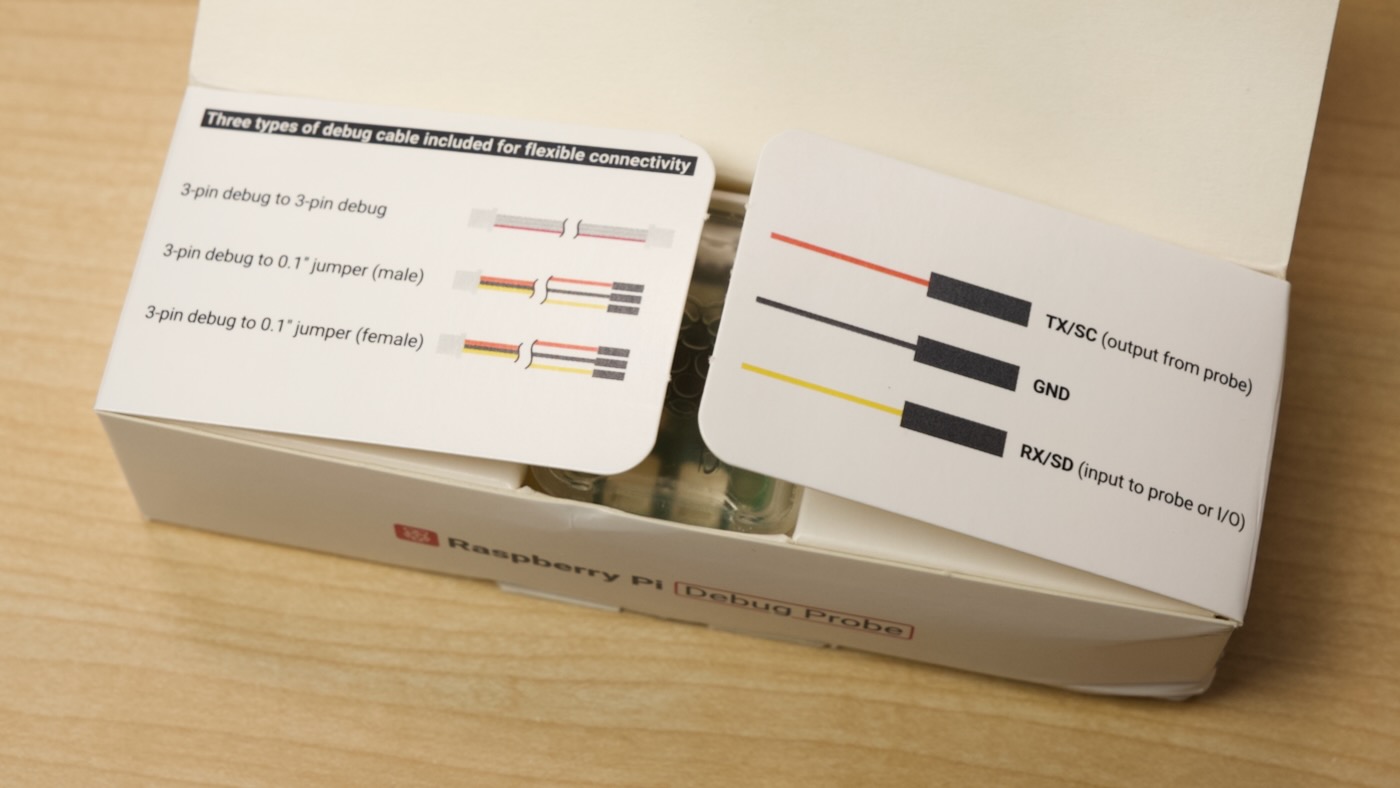
It's this whimsical and simple addition that makes working with Pi products that much nicer. Many other devices come in an antistatic bag, or are just tossed in a sealed plastic bag. And you often rely on blog posts or notes at the bottom of an Adafruit product page to get you started using it.
If I head over to the Debug Probe product page there are detailed images and full, easy-to-digest first-party documentation!
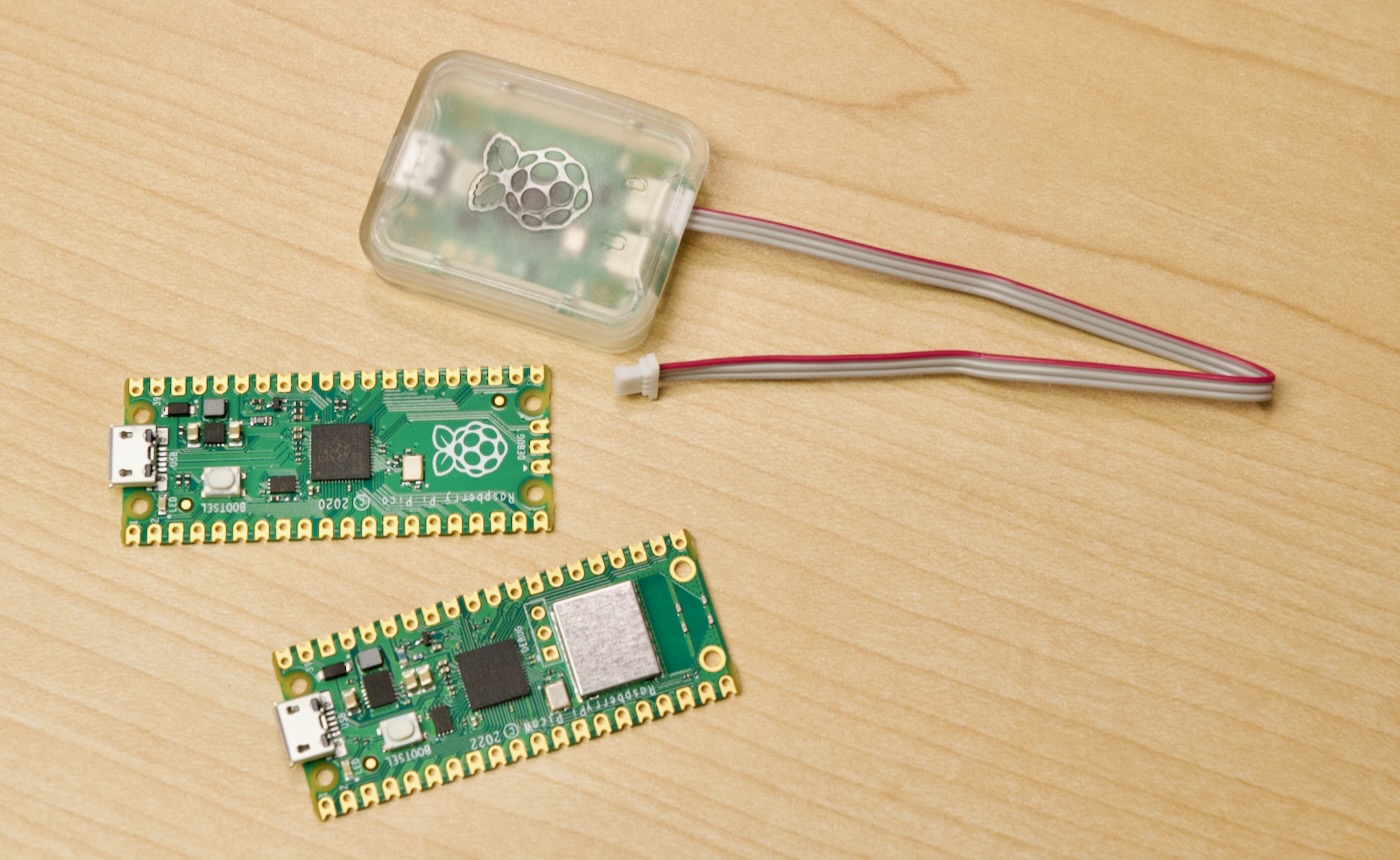
But after opening those documentation flaps, there's the debug probe, in it's cute little translucent snap-together case:
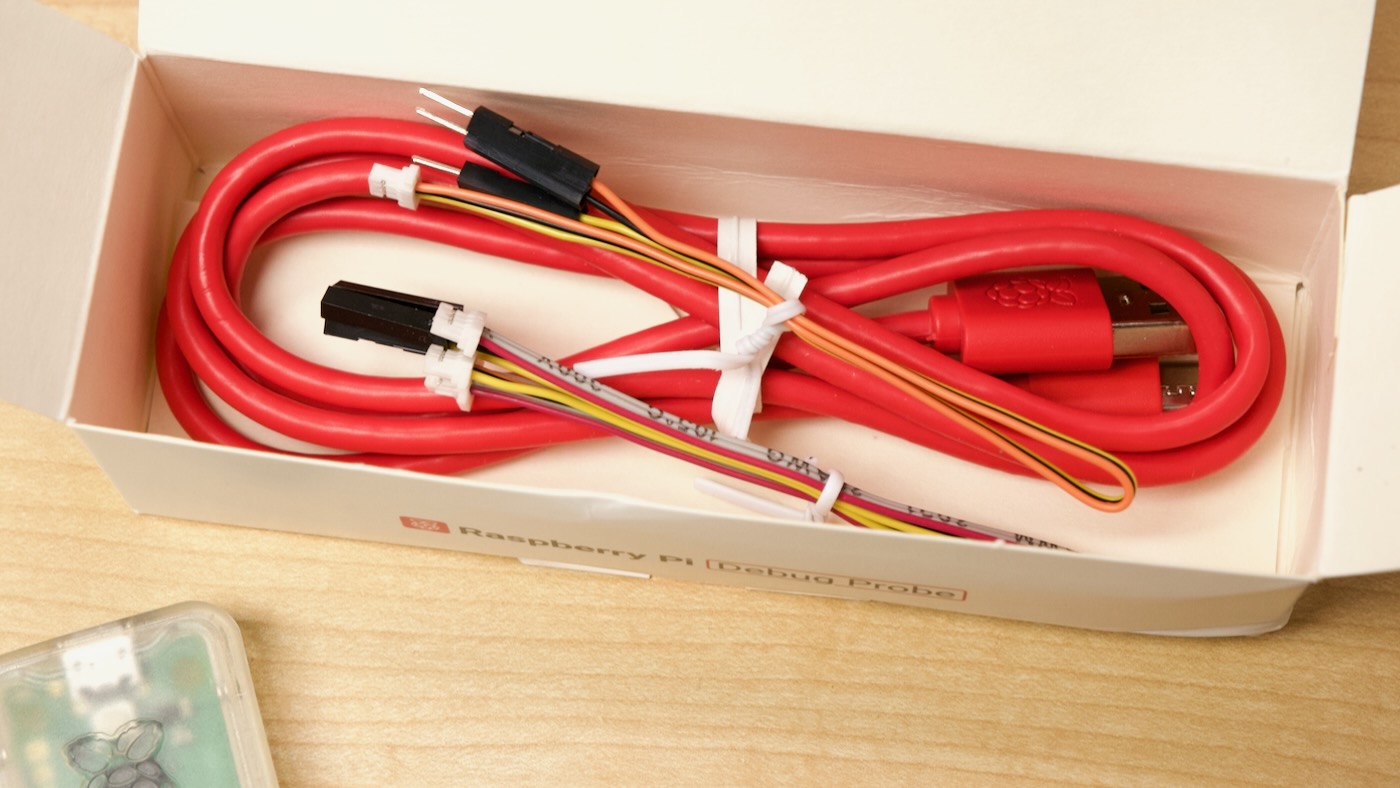
And setting that aside, the cables are neatly packed underneath:
It is a little annoying that Pi stuck with micro USB on this board:
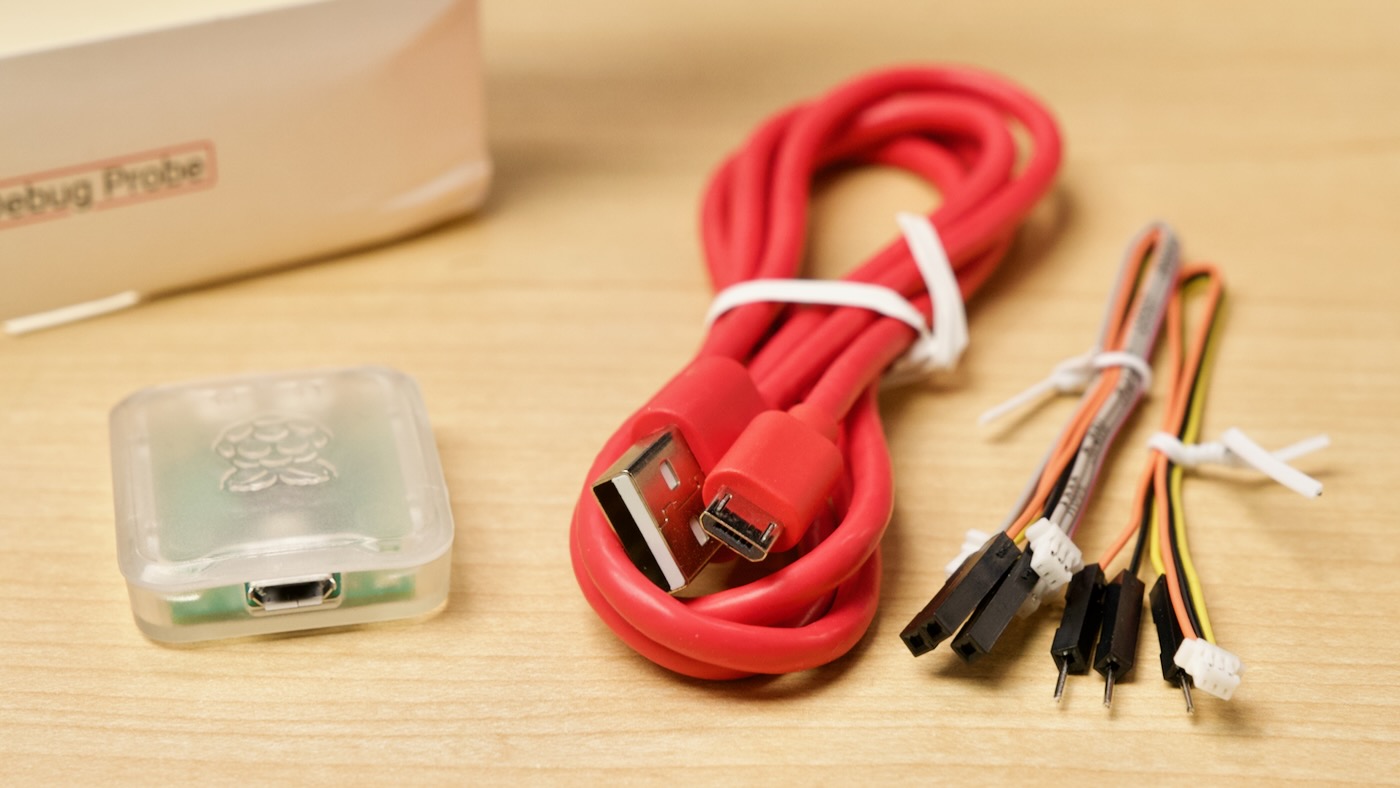
USB-C is now fairly standard across a variety of embedded devices, so having another device that necessitates hanging onto a micro USB cable is a little annoying. Maybe they'll make a v2 with USB-C once they get through whatever massive supply of micro USB ports and cables they have laying around. At least they're consistent in using it across the 'embedded' and lower-power products (Pico, Zero, Debug Probe, and Keyboard).
Serial UART debugging
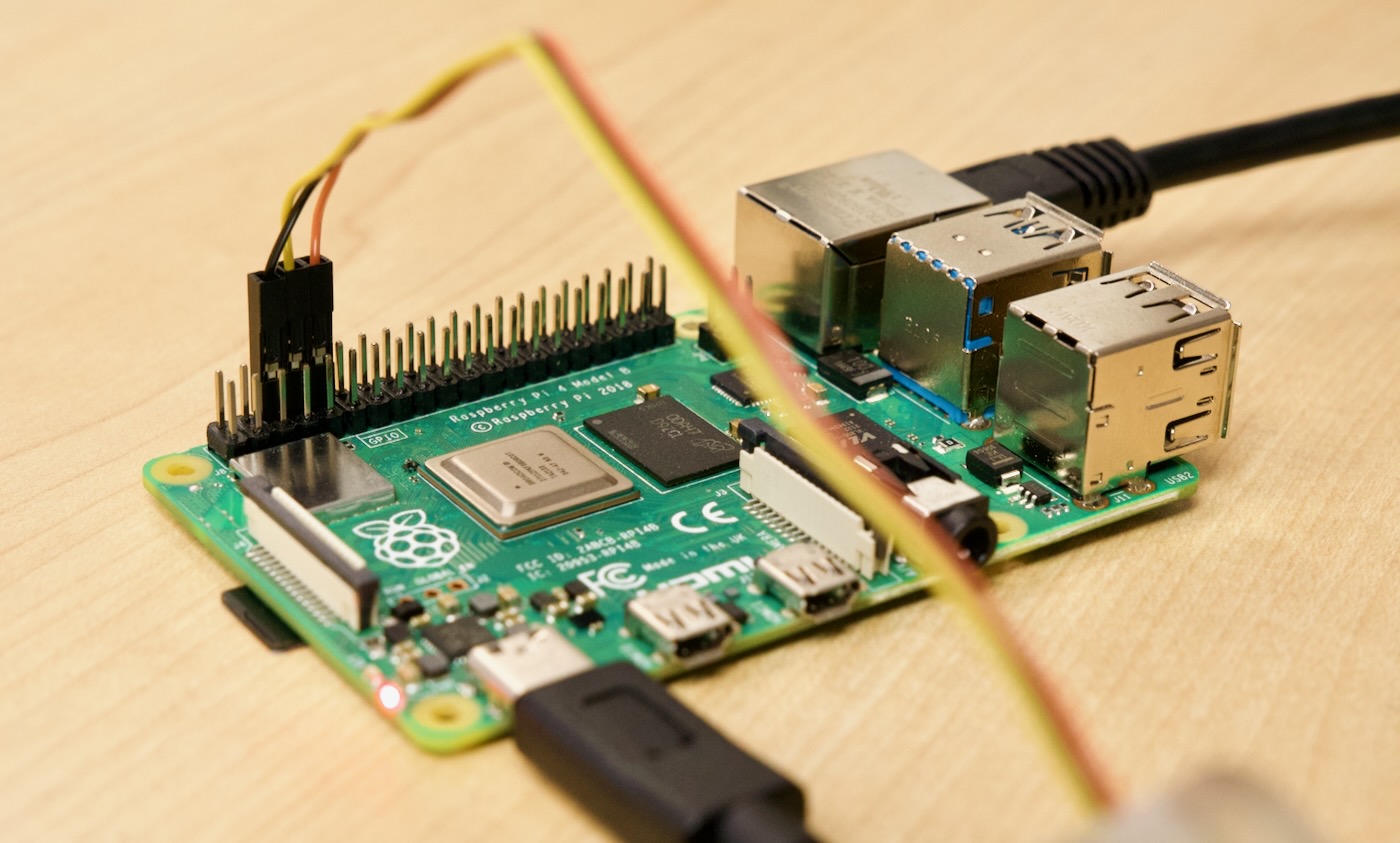
Since I'm not set up to debug anything in particular on a Pico currently, and some of my other ARM-based boards are packed away right now, I wanted to quickly test the Probe on a Raspberry Pi, just checking if I can see its console output over UART (see my older article that goes more in-depth on UART/Serial debugging on the Raspberry Pi).
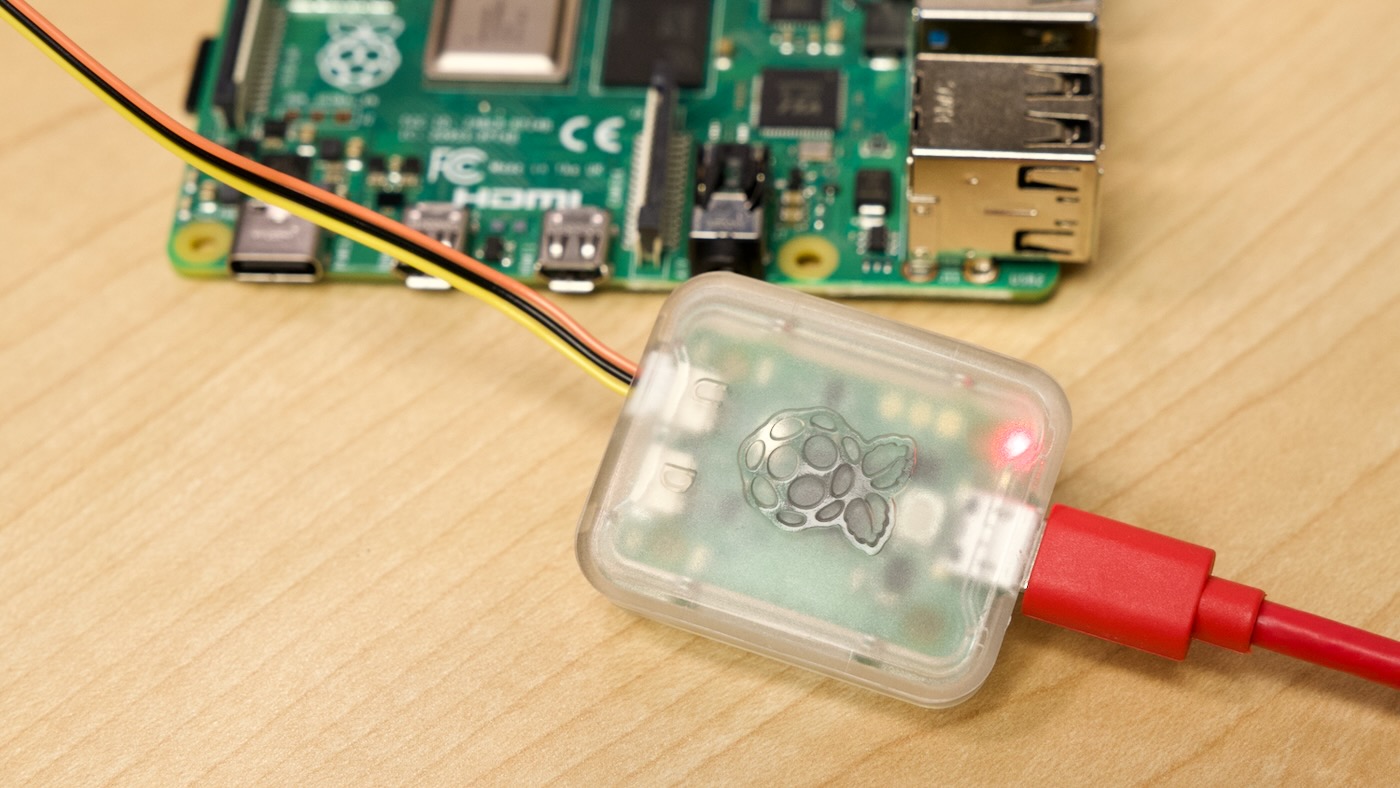
I plugged in the box to the appropriate pins on the Pi 4—Black to GND, Orange to GPIO 14/pin 8 (UART TX, and Yellow to GPIO 15/pin 10 (UART RX):
Then I plugged the Probe into my Mac's USB port and ran lsusb, and saw:
Bus 002 Device 001: ID 2e8a:000c 2e8a Debug Probe (CMSIS-DAP) Serial: E6616407E330212C
A good first sign. The Debug Probe has a bright red LED that lights when it is powered, which is a nice touch:
I also looked inside /dev and found the device /dev/tty.usbmodem2102. I opened up CoolTerm and set the Port to usbmodem2102, and baud rate to 115200. Then, after making sure the Pi had enable_uart=1 configured in its /boot/firmware/config.txt file, I rebooted the Pi and watched CoolTerm:

It works!
To make working over the serial connection a little easier, I also set 'Raw mode' for CoolTerm's Terminal Mode, disabled 'Local Echo', and set the Enter Key Emulation setting to 'CR' so I wouldn't get duplicate lines when hitting enter.
Debugging a Pico
As I mentioned earlier, I don't have any active Pico projects that I could tap into with SWD and didn't have time to set up a demonstration—I'm trusting that Raspberry Pi's documentation is solid.
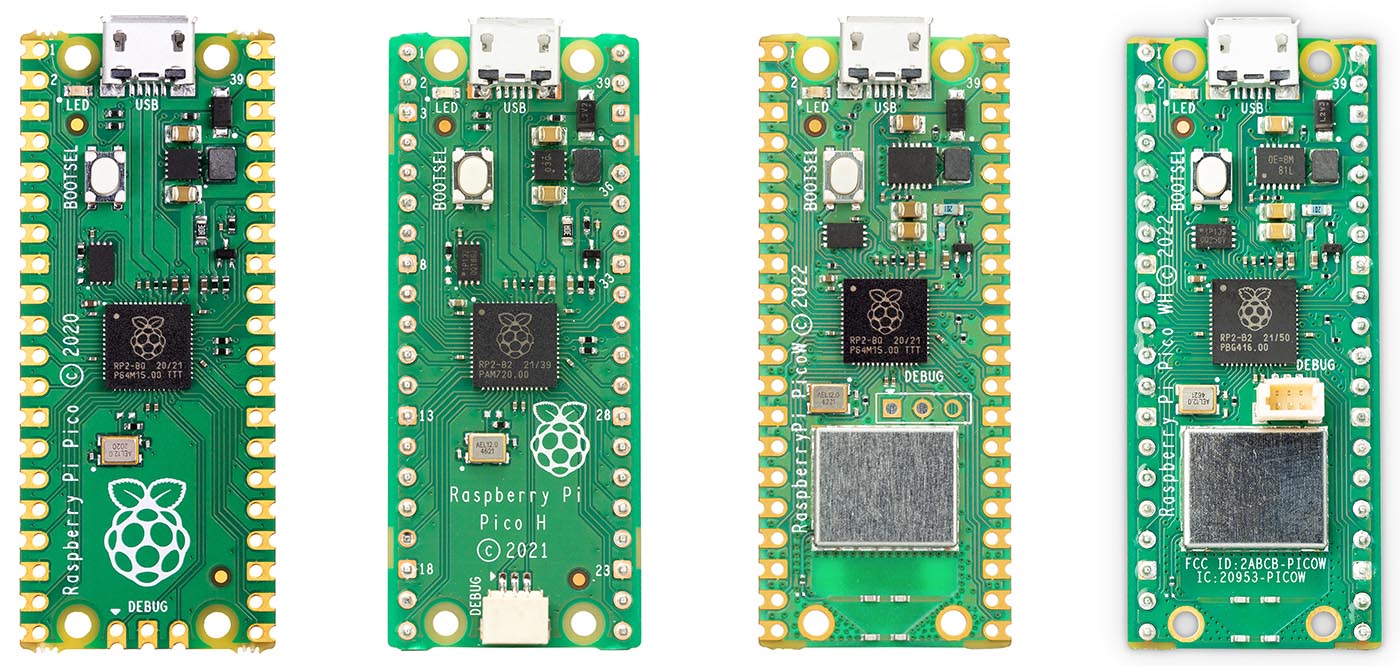
But I did want to point out a hardware difference between the Pico and Pico W:
The Pico's headers are located on the edge of the board, whereas the Pico W's headers are located towards the middle, very near the RP2040 chip.
Raspberry Pi sells the version I have pictured, or 'H' varieties with presoldered JST headers—see the 2nd and 4th pictures in this series from Pi's website:
If you have the version without the headers, it might be easiest to solder on some male headers and then use the female pin adapter. Though you may find a JST through-hole header you could solder in the pins on the non-H boards.
Conclusion
Besides the SEGGER J-Link, there are other devices capable of SWD, at least, that won't break the bank:
- Black Magic Probe ($75): This is probably the closest thing to the Debug Probe, in spirit. It is a little pricey but gives you JTAG in addition to SWD, and has a lot of tested support for various SoCs—the Debug Probe officially supports Pi devices like the Pico, not everything under the sun.
- SAMD11C SWD Programmer Stick (OSHW): This is an open source hardware device you could build on your own, if you so choose.
- SWD Programmer & Debugger ($15): Just SWD, but a tidy little alternative nonetheless.
In the end, I'm happy to toss this Debug Probe into my bin with my other probes—the fact that it runs on an RP2040 itself means the firmware will be maintained and updated over time. And it is likely many compatibility bugs will be worked out so the Debug Probe will get a lot of mileage for a $12 device!
Since I glossed over the SWD support, I didn't even mention the current software side using OpenOCD.
For more reading on SWD and OpenOCD, check out these articles:
Comments
There are two more alternatives: the PicoProbe uses a standard Pico (USD4) and is well documented at the Raspberry moi website; the Segger J-LINK EDU Mini is a compact version of the EDU and goes with excellent software, including GUI Ozone (USD18).
There are also the ST-Link Device either sold separately or as part of every Nucleo dev board.
There's also cheap Chinese ST-Link knockoffs and you can usually flash these with the Blackmagic probe firmware as well.
Other cheap options are flashing a Bluepill or Blackpill board with Blackmagic probe firmware.
The Black Magic Probe deserves some love, using that with GDB works lovely.
Is it possible to use the Raspberry Pi Debug Probe as a Raspberry Pi pico?
(Aware that it is with a limited number of GPIOs)
I am wondering if it is possible to upload custom firmware, e.g. my own firmware or pico ducky firmware.
Yes, it's just an RP2040 inside, same as the Pico.
CH552 as SWD flasher, the chip itself is 30 cents. I soldering one of a proto stripboard, as the large pins are easy for hand soldering:
https://www.youtube.com/watch?v=8z3C3DQkNcM
Great article! I wanted to point out that the description of how the wires should be attached and the photo differ in how the yellow and orange wires (TX and RX) are connected. The photo appears to be correct.