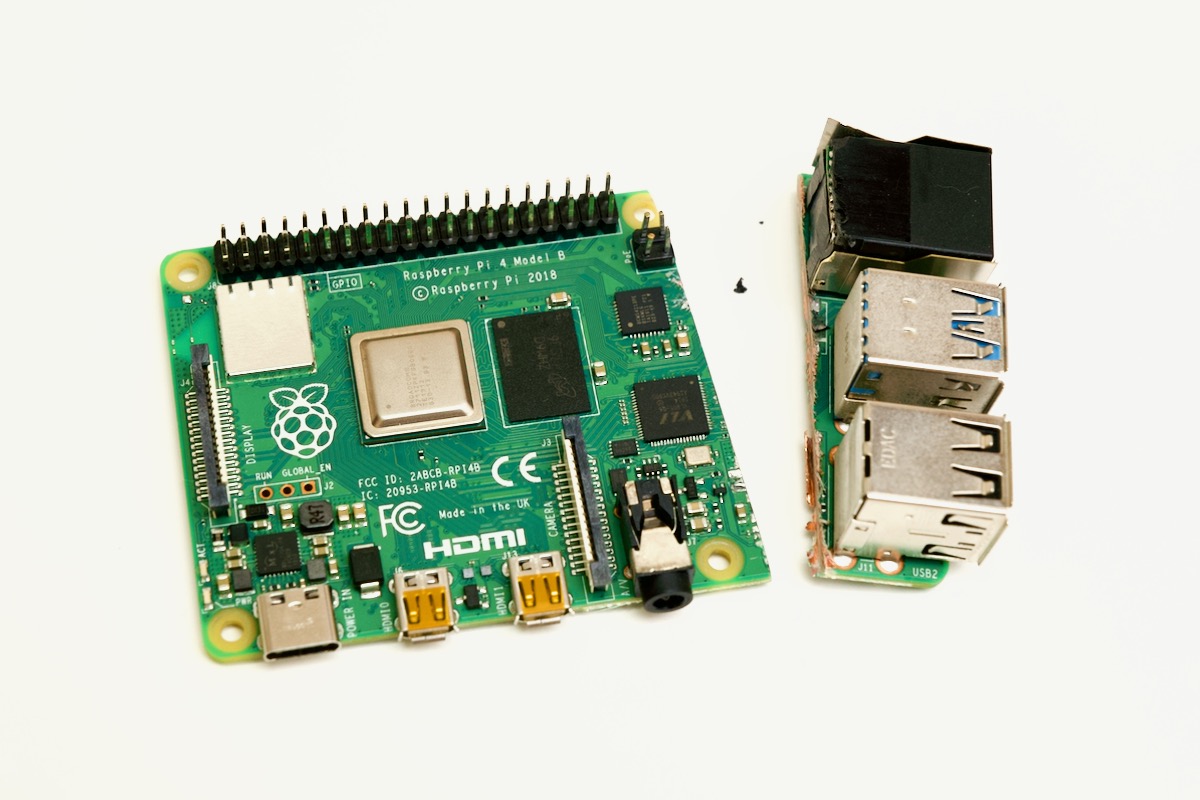
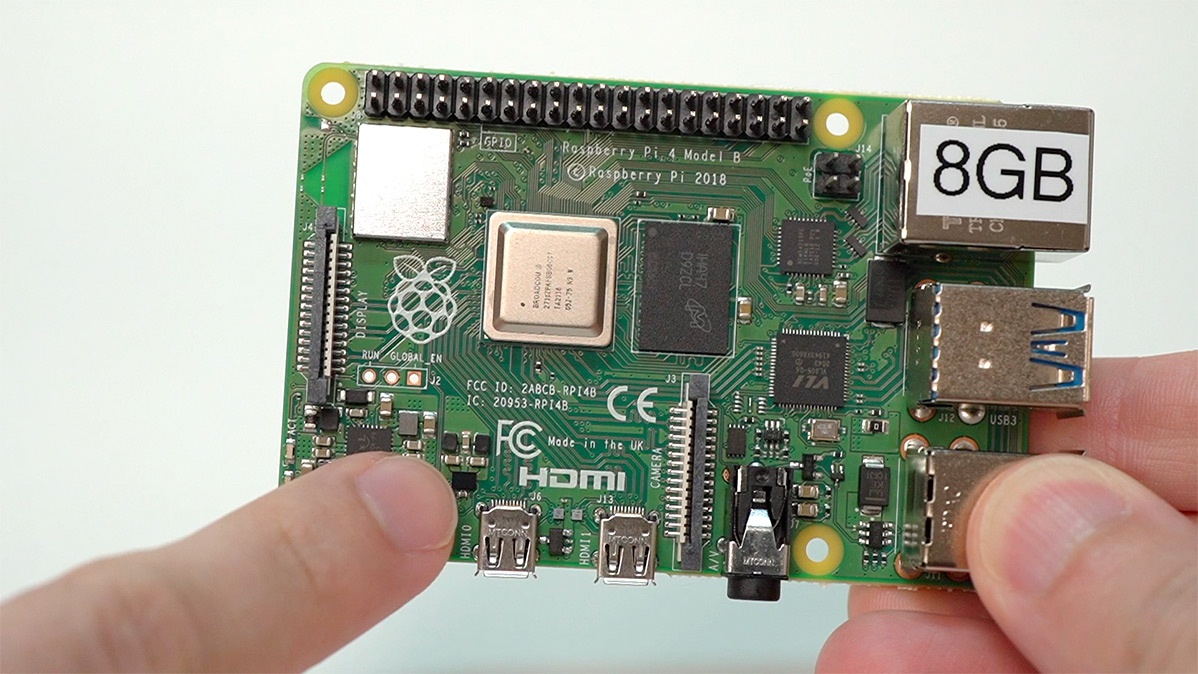
This blog post starts with the question: If I cut the ports off a Raspberry Pi 4 model B, will it still work?
My early conclusion? Sorta.
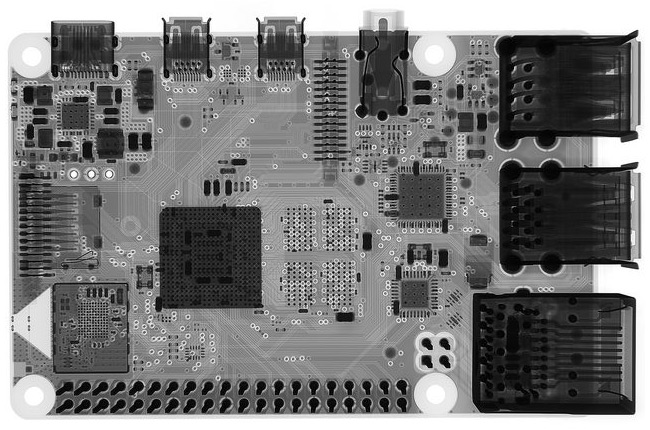
With most Raspberry Pi generations, there is a full-featured model B, and a smaller, trimmed-down model A. The Pi 4 never had a model A, so I thought it would be interesting to see if I could make one. I looked at the Pi 4 with this really cool X-ray tool, as well as using this album of X-ray images from reddit user u/xCP23x:
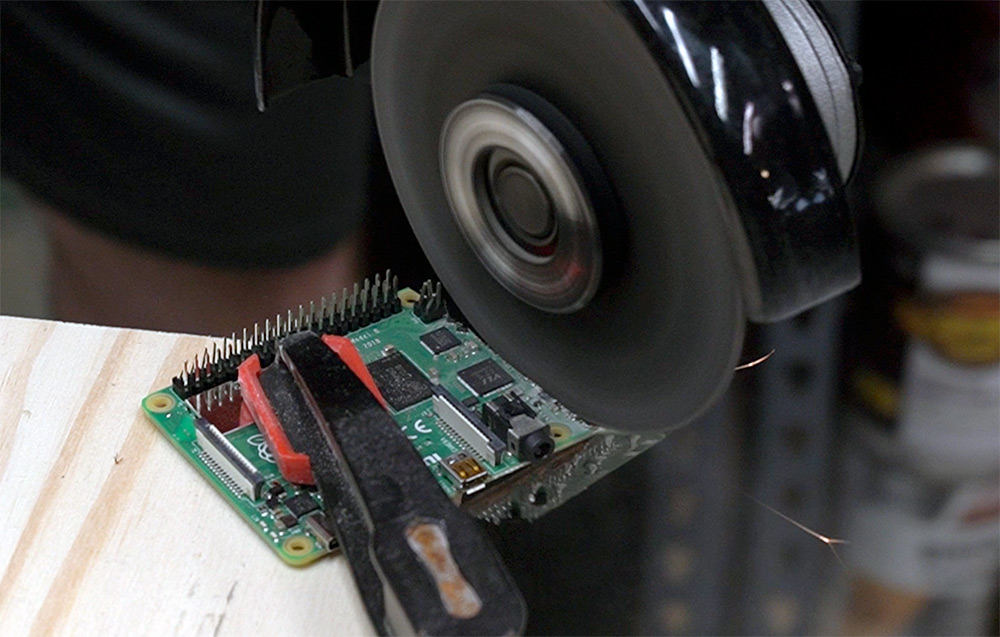
The cut was calculated to try to avoid anything important, though as we'll find later it may not have been measured carefully enough.
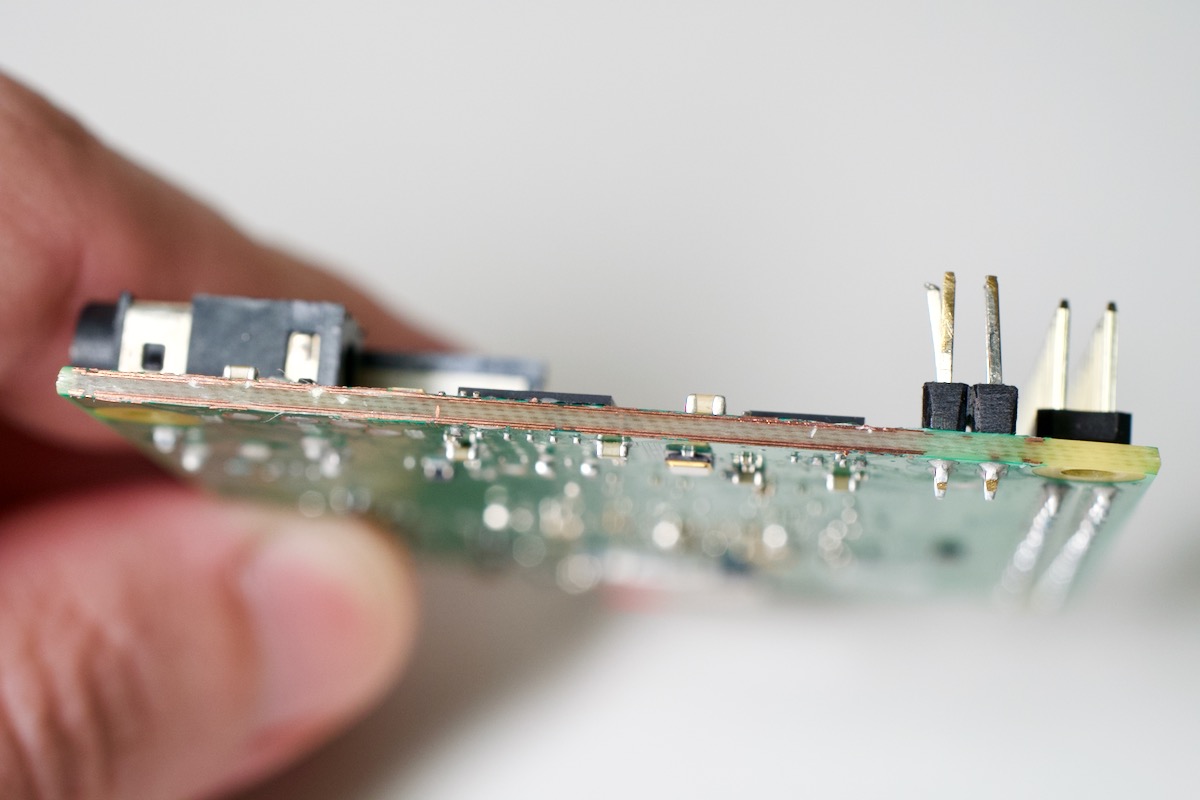
After the cut, I cleaned up the edge with fine-grit sandpaper, some tweezers to grab off a few ICs and capacitors that were clinging by one edge, and then a bit of rubbing alcohol. I wanted to make sure no internal traces or ground planes were shorted, and I was satisfied with the edge:
I took the Pi over to my desk, half expecting something to catch fire. But I plugged it into a switched outlet, turned it on... and the LEDs seemed to light up as if something was working!
But there wasn't any HDMI output. No rainbow screen, nothing. So something wasn't quite right. I tried sanding the edge a little more, and put a fresh copy of Raspberry Pi OS on a microSD card, but to no avail. The green activity LED would blink a couple times, then go really dim. And if I waited a while, it would start getting brighter.
So at this point it seemed like some sort of power issue. But something was working—otherwise that series of activity blinks at the beginning wouldn't happen.
Why won't it boot?
It seemed like the Pi must be dying somewhere in the middle of the bootloader—the one little piece of the Pi puzzle that's unfortunately closed source. So I asked for help in this thread in the Raspberry Pi Forums.
The first thing I learned was that the circuit next to the audio jack—which I had cut right through—was apparently part of the Pi's switching power supply. Forum user trejan pointed out that this part of the power circuit was actually moved over next to the USB-C port on newer 8 GB Pi revisions.
I was going to throw in the towel, but forum user cleverca22 said the first few blinks of the ACT LED meant SPI flash was being read properly, and he thought we could get UART through the Pi's serial port.
For a good explanation of UART, serial ports, and getting console access to the Pi, please check out my blog post Attaching to a Raspberry Pi's Serial Console (UART) for debugging.
In the course of working on this now-undead-Pi, I learned a LOT about what it actually takes to boot a Raspberry Pi. And I'll explain parts of it here, but if you want the full story, check out my YouTube video on the topic:
The Raspberry Pi boot process
Using a custom recovery.bin file from cleverca22, I was able to get the Pi to boot into the VideoCore VPU, and could access that part of the System on a Chip via UART on the Pi. But trying anything else would result in a lockup.
To try to figure out the next steps in debugging, it was important to understand the boot flow on the Pi:
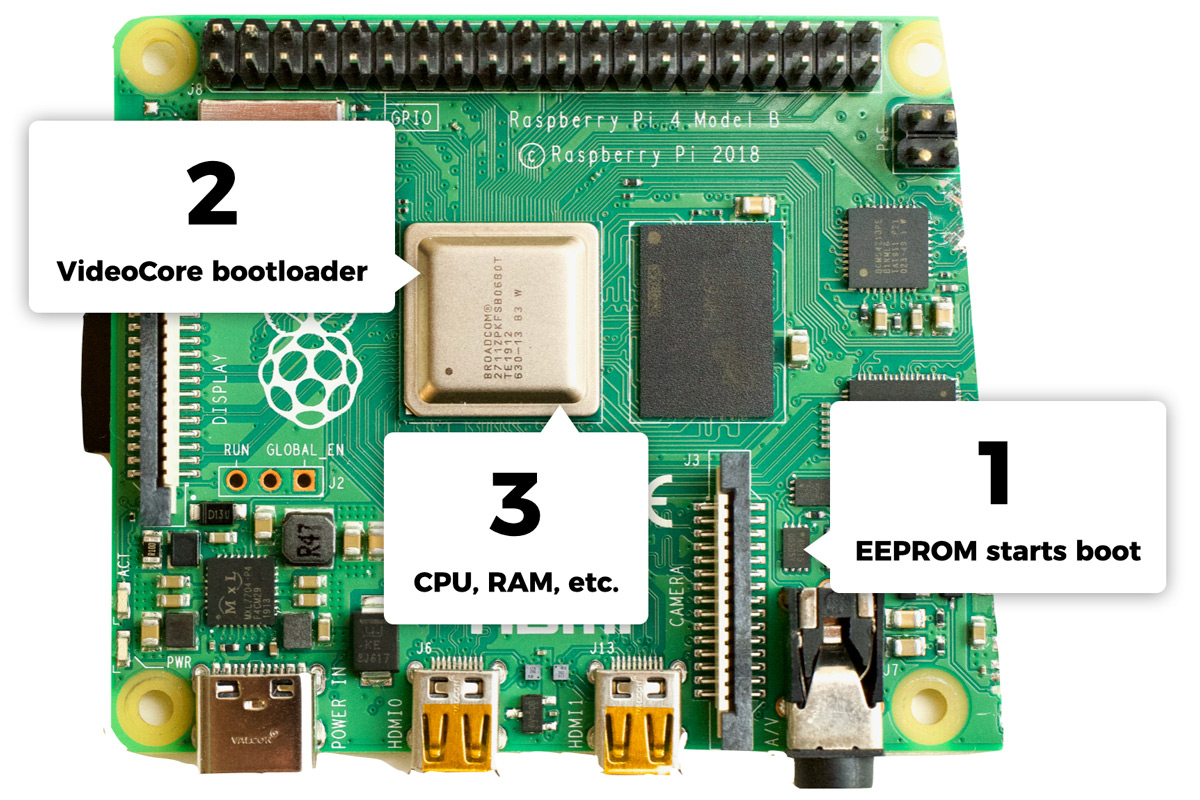
When the Raspberry Pi boots up, the first thing that fires off is the tiny little EEPROM chip (1), using a protocol called SPI, or Serial Peripheral Interface. It contains 'bootloader' code that fires off everything else on the Pi, starting with the VideoCore graphics core (2) inside the Pi's System on a Chip.
For every byte that's read from the EEPROM, the green activity LED flashes once. So when we I was seeing it blink a couple times, there were actually tons of bytes getting sent through the SPI interface to get the Pi booting up.
From that point, the VideoCore GPU takes over and executes a bootloader, and from there things like the CPU, SDRAM, and other subsystems start coming on line (3).
So something between when the VideoCore takes over and when the CPU comes online is breaking.
At this point, cleverca22 suggested I try re-flashing the Raspberry Pi's EEPROM.
I grabbed a copy of the bootloader firmware from the rpi-eeprom repo, enabled UART in it following cleverca22's instructions, and copied it off to a microSD card.

Unfortunately... when I booted the Pi with that card, the activity LED just stayed green, and it didn't seem like the Pi would do anything. It must be trying to initialize some bit of hardware that's broken.
So right now, the furthest I can get is running a custom recovery.bin file that boots me up inside the VPU, or Video processor. I can't get access to the ARM CPU or the system memory.
Next Steps
But there are still some other things I might be able to try, like desoldering the USB and network chips, rebuilding part of the power circuit by hand, or debugging even further through some test pads on the bottom of the Pi.
In any case, that'll be for a future post. I just ordered a Quick 861DW hot air rework station... and once that arrives, no circuit board will be safe!
Comments
Smh
To be honest, i can't decide if i should be concerned, in awe, shocked, or all of the above...
This article got recommended to me right after i read an article on the increasing raspberry pi prices because of the supply shortage.
And then this maniac decided the best course of action would be to destroy a perfectly good Raspi 4B?
Congratulations, you absolut madlad!
I love your work, keep it coming :)
Greetings from Germany!
Waste of time and a good board!!
The only time that time is wasted is when nothing is learned.
Absolutely agree!
How was it a waste of time? They did find out a lot about the boot process of a raspberry pi
Kind of wasteful project.
Not sure we learned anything other than you broke it.
Learning a lot more about the early stage boot process of the Pi has been valuable, and just like JerryRigEverything's destructive tests of iPhones, helping discover different failure modes, and how far you can go to get something broken working again, can help other people who are either deciding on a certain product (if it's resilient enough to survive being cut in half...) or trying to repair their own Pi (you'd be surprised how many people accidentally short a bit of the PSU that's recoverable with just a soldering iron).
Anyone that says this was a waste of time clearly is not an engineer, we take things apart to the point of destruction to learn and better ourselves and I'm absolutely certain bigclive on YouTube would agree with me on that one as well. Great video, lots to learn and fascinating at the same time as always, thanks Jeff!!
i don't think this article is much of a waste. we saw about the boot process of a pi and debugging the pi with uart if it wouldn't boot. the only time wasted is that the pi couldn't boot.
And yet... I'm still hoping to get this Pi to boot, so it wouldn't be a waste in any sense at that point ;)
Hi Jeff,
This was an extremely insigtful video and post which has happened to come in VERY handy for me personally as i currently have a Pi4 4GB that i bought as faulty and it has exactly the same symptoms as your interestingly!
I managed to get as far as running the custom recovery.bin file that cleverca22 made for you which like you i was thrilled to see any kind of life out of what i thought was a dead Pi!
I just need to figure out why i cant perform the next steps as per the thread :(
I have also noticed that a single component of the power supply (the one that Red Shirt Jeff cut through) on my board appears to be damaged and i dont know what it is, but i am hoping that i can harvest a spare from another Pi.
I am curious to see how you get on with yours as you are a far more competant engineer than i!
Kind Regards,
Josh
Why was this in my news ticker? The guy cut his pi in half and it doesn't work... It's not a shocker!
I mean... I don't blame the guy for experimenting, but why was this recommended to me? Lol
Im not hating on you, Jeff... Just confused at the algorithm of Google. Good luck on your project, and I hope you can figure out what's wrong.