Edit: There's an even easier way to install PhotoRec now, assuming you have installed Homebrew, and you're comfortable in the command line:
brew install testdisk
sudo photorec
Then follow the prompts to start recovering files.
As a photographer who's taken and processed at least 200,000 photos in the past couple decades, you'd think I have a solid workflow that results in zero lost files... but you'd be wrong. 99% of the time, I follow the workflow:
- Import photos from memory card.
- Make sure backup of imported photos completes (so I have two local copies—I also have one copy back up to a cloud storage provider, so two local and one cloud backup).
- Format the memory card.
A lot of photographers shoot with two memory cards, and have photos written to both—that way the 2nd card would be a double-failsafe. But for most jobs, I don't do that. And one of my digital cameras doesn't even have two memory card slots, so this isn't an option!
Anyways, more often than I'd like to admit, I do something dumb, like:
- Import photos from memory card.
- Don't make sure all the photos were actually imported (e.g. Finder locked up during a copy, somehow photo software only imported some photos, etc.).
- Don't wait for backup of imported photos to complete.
- Format the memory card.
This is risky, and maybe one time out of a hundred, it results in me wiping out a portion (or all) the photos I thought I had just imported!
Fortunately for my sake, SD cards and the images stored on them can almost always be recovered, if you know the right tools to use.
Earlier today I did this again, so I thought I'd document exactly how I recover photos using a free and open source tool called PhotoRec. I did this on macOS, but the process is very similar if you're on Linux or Windows:
- Insert your SD or microSD card.
- Download PhotoRec (it's part of the
TeskDisksuite of software, by CGSecurity). - Expand the compressed archive, then right-click on
photorec(inside thetestdisk-X.Yfolder, whereX.Yis the version you downloaded), and click 'Open' - In the prompt that comes up, click Open to allow the unidentified app to be opened (see why here).
- Terminal will open up and prompt your for your administrator, or 'sudo' password. Enter it and press 'Enter'.
- A disk selection prompt will appear; use the arrow keys to choose the
/dev/diskXdrive (whichever one is your SD or microSD card), and press 'Enter'. - Choose the partition for your disk; usually it's the one that is labeled like 'HPFS - NTFS' (and not 'No partition'). Then press 'Enter'.
- Choose 'other' for the filesystem type. 99% of the time, for SD cards, they will not be 'ext' filesystems.
- Choose 'Free' to just look at the unallocated space; or 'Whole' if the Free scan doesn't find all the photos you want to recover.
- Follow the directions to choose a directory into which recovered photos will be stored. (
..is up one directory, and.represents the current directory).
Once the directory is selected (after you press C), the card will be scanned for recoverable files. This could take some time.
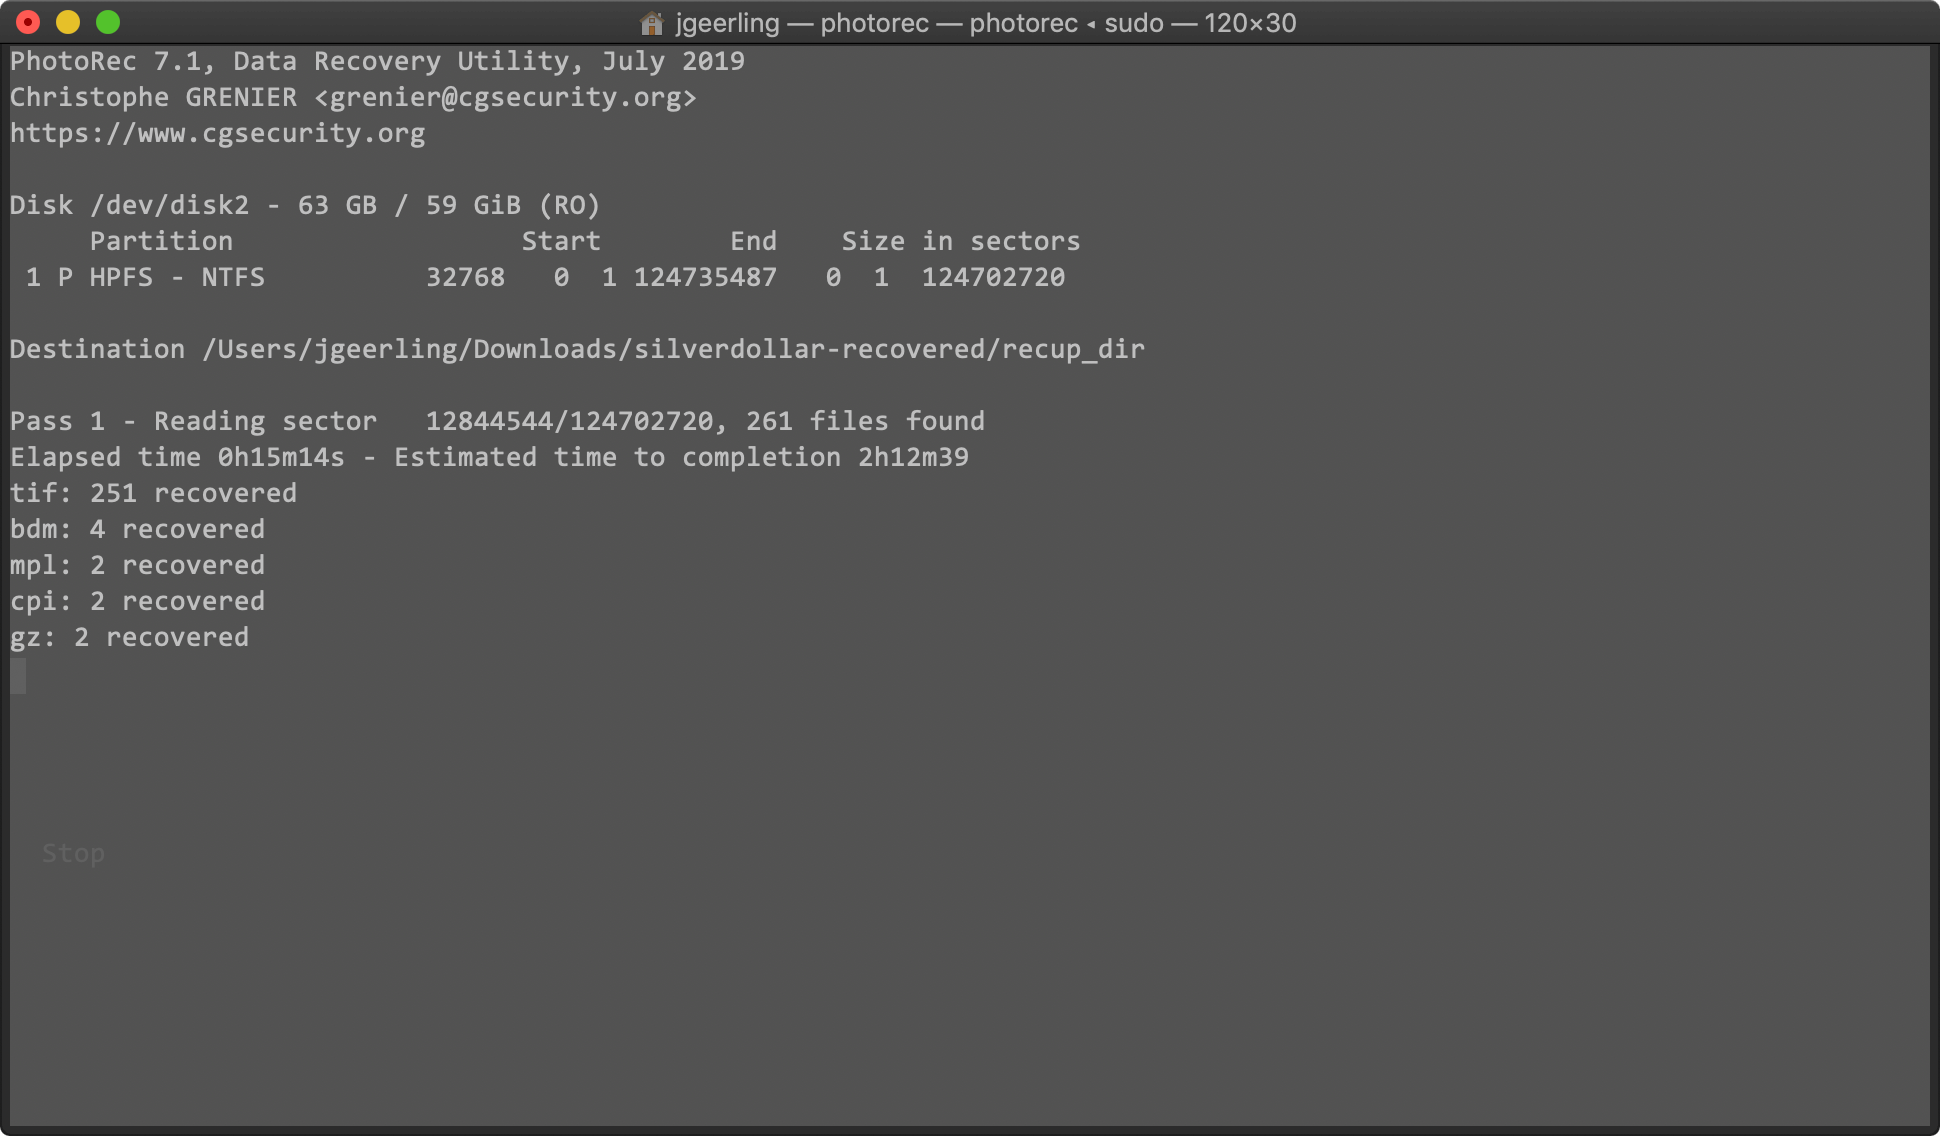
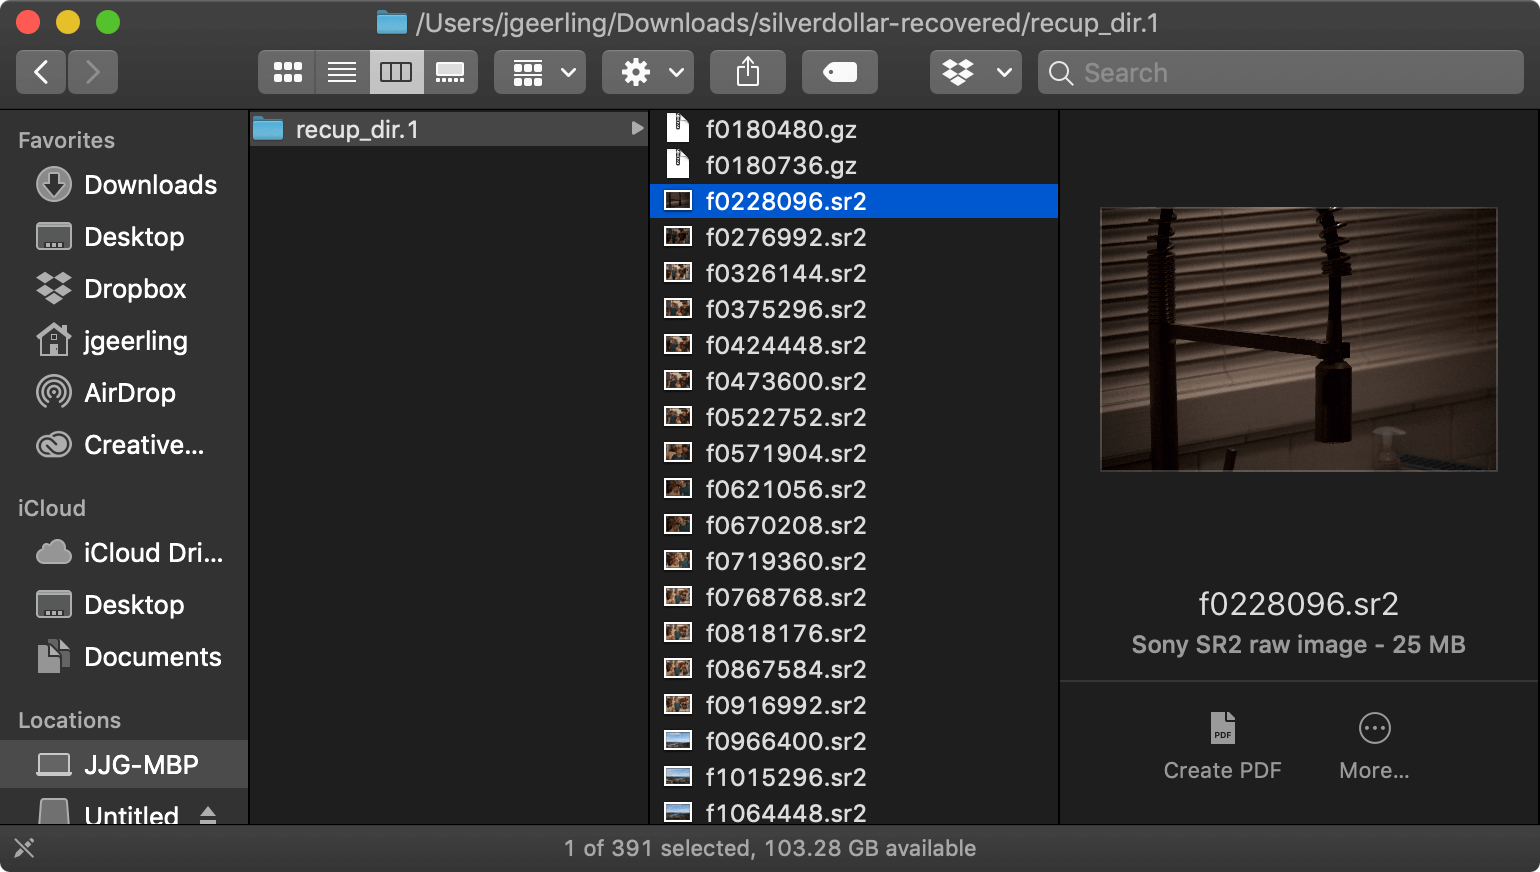
After what could be a very long wait (especially if you're using a 64 GB or larger card, and have a slower reader or cheaper card that can't read as fast), you should see an output directory with tons of images (and often a few other kinds of files):
Hopefully you're good to go! If not, you can re-scan but with 'Whole' if the 'Free' scan didn't work. There are other alternatives, too, but in most cases, if PhotoRec can't recover your images, other alternatives won't work any better.
Comments
I have a small C program in my bin folder, that does something similar: https://github.com/srgvg/dotfiles/blob/master/bin/saveimg.c
Hey, don't know how it works exactly on OS X, and I know it's already too late, but it should be possible to use rsync to copy your files. Run rsync 2 times to make sure that everything is properly synced, this is what I do for important files :)
2021 M1 Mac update:
brew install testdisksudo photorec