NOTE: This blog post was written prior to Ansible including the
gluster_volumemodule, and is out of date; the examples still work, but Ansible for DevOps has been since updated with a more relevant and complete example. You can read about it here: Simple GlusterFS Setup with Ansible (Redux).
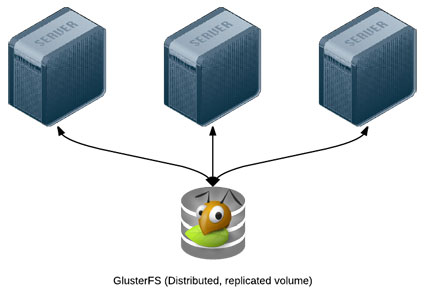
Modern infrastructure often involves some amount of horizontal scaling; instead of having one giant server, with one storage volume, one database, one application instance, etc., most apps use two, four, ten, or dozens of servers.
Many applications can be scaled horizontally with ease, but what happens when you need shared resources, like files, application code, or other transient data, to be shared on all the servers? And how do you have this data scale out with your infrastructure, in a fast but reliable way? There are many different approaches to synchronizing or distributing files across servers:
- Set up rsync either on cron or via inotify to synchronize smaller sets of files on a regular basis.
- Store everything in a code repository (e.g. Git, SVN, etc.) and deploy files to each server using Ansible.
- Have one large volume on a file server and mount it via NFS or some other file sharing protocol.
- Have one master SAN that's mounted on each of the servers.
- Use a distributed file system, like Gluster, Lustre, Fraunhofer, or Ceph.
Some options are easier to set up than others, and all have benefits—and drawbacks. Rsync, git, or NFS offer simple initial setup, and low impact on filesystem performance (in many scenarios). But if you need more flexibility and scalability, less network overhead, and greater fault tolerance, you will have to consider something that requires more configuration (e.g. a distributed file system) and/or more hardware (e.g. a SAN).
GlusterFS is licensed under the AGPL license, has good documentation, and a fairly active support community (especially in the #gluster IRC channel). But to someone new to distributed file systems, it can be daunting to get set it up the first time.
Configuring Gluster - Basic Overview
To get Gluster working on a basic two-server setup (so you can have one folder that's synchronized and replicated across the two servers—allowing one server to go down completely, and the other to still have access to the files), you need to do the following:
- Install Gluster server and client on each server, and start the server daemon.
- (On both servers) Create a 'brick' directory (where Gluster will store files for a given volume).
- (On both servers) Create a directory to be used as a mount point (a directory where you'll have Gluster mount the shared volume).
- (On both servers) Use
gluster peer probeto have Gluster connect to the other server. - (On one server) Use
gluster volume createto create a new Gluster volume. - (On one server) Use
gluster volume startto start the new Gluster volume. - (On both servers) Mount the gluster volume (adding a record to
/etc/fstabso the mount is permanent).
Additionally, you need to make sure you have the following ports open on both servers (so Gluster can communicate): TCP ports 111, 24007, 24009-24010, 38465-38466 (or 49152-49153 for Gluster 3.4+), and UDP port 111. (You need to add an additional TCP port in the 49xxx range for each extra server in your Gluster cluster.)
Configuring Gluster with Ansible
The following example is adapted from the gluster.yml file I'm using for my Raspberry Pi Dramble cluster (a cluster of Raspberry Pis running a Drupal 8 website).
First, we need to punch a hole in the firewall for all the required ports. I am using the geerlingguy.firewall role on all my servers, so in my vars files, I added:
firewall_allowed_tcp_ports:
  - 22
  - 80
  # For Gluster.
  - 111
  # Port-mapper for Gluster 3.4+.
  # - 2049
  # Gluster Daemon.
  - 24007
  # 24009+ for Gluster <= 3.3; 49152+ for Gluster 3.4+ (one port per server).
  - 24009
  - 24010
  - 24011
  # Gluster inline NFS server.
  - 38465
  - 38466
  - 38467
firewall_allowed_udp_ports:
  - 111
Next, I'll include the geerlingguy.glusterfs role in my playbook to install GlusterFS on my servers (like most of the geerlingguy roles, this role works with Debian, Ubuntu, RedHat, and CentOS):
  roles:
    - geerlingguy.firewall
    - geerlingguy.glusterfs
Then, I include a separate task include file with the Gluster configuration in my main playbook:
  tasks:
    - include: gluster.yml
Inside that file:
---
- name: Ensure Gluster brick and mount directories exist.
  file:
    path: "{{ item }}"
    state: directory
    owner: root
    group: www-data
    mode: 0775
  with_items:
    - "{{ gluster_brick_dir }}"
    - "{{ gluster_mount_dir }}"

# Gluster volume configuration.
- name: Check if Gluster volumes already exist.
  shell: "gluster volume info"
  changed_when: false
  register: gluster_volume_info

- name: Connect to Gluster peers.
  shell: "gluster peer probe {{ item }}"
  register: gluster_peer_probe
  changed_when: "'already in peer list' not in gluster_peer_probe.stdout"
  failed_when: false
  with_items: groups.webservers
  when: "'Volume Name: gluster' not in gluster_volume_info.stdout"

- name: Create Gluster volume.
  shell: "gluster volume create {{ gluster_brick_name }} {{ gluster_brick_config }}"
  register: gluster_volume_create
  changed_when: "'successful' in gluster_volume_create.stdout"
  when: "inventory_hostname == groups.webservers[0] and 'Volume Name: gluster' not in gluster_volume_info.stdout"

- name: Ensure Gluster volume is started.
  shell: "gluster volume start {{ gluster_brick_name }}"
  register: gluster_volume_start
  changed_when: "'successful' in gluster_volume_start.stdout"
  when: "inventory_hostname == groups.webservers[0] and 'Volume Name: gluster' not in gluster_volume_info.stdout"

# Mount configuration.
- name: Ensure the Gluster volume is mounted.
  mount:
    name: "{{ gluster_mount_dir }}"
    src: "{{ groups.webservers[0] }}:/{{ gluster_brick_name }}"
    fstype: glusterfs
    opts: "defaults,_netdev"
    state: mounted
The first task ensures the brick and mount directories exist and have the appropriate permissions for our application. Next, gluster peer probe links all the servers together. Then, on only one of the servers (in this case, the first of the webservers inventory group), the Gluster volume is created and started.
Finally, an entry is added to /etc/fstab and then the volume is mounted at gluster_mount_dir (using Ansible's mount module, which configures /etc/fstab and mounts the volume for us).
There were a few different Jinja2 variables I used to make the Gluster configuration and volume mounting simple and flexible (a task include like this is very flexible and could be used for many different server configurations). Define these variables separately, like so:
gluster_mount_dir: /mnt/gluster
gluster_brick_dir: /srv/gluster/brick
gluster_brick_name: gluster
# Note: This is hardcoded for 2 webservers. Adjust accordingly.
gluster_brick_config:
  "replica 2 transport tcp
  {{ groups.webservers[0] }}:{{ gluster_brick_dir }}
  {{ groups.webservers[1] }}:{{ gluster_brick_dir }}"
Most of these vars are self-explanatory, but the gluster_brick_config variable deserves a little more explanation. That variable tells Gluster to set up two replicas (one full replica on each server), using the tcp transport method, then it lists each server that will have a share of the volume, followed by the path to that share.
If you have two servers, this should work perfectly. If you have three servers, you will need to adjust the configuration to either use three replicas or use a different data partitioning scheme. If you have four or more servers, you just need an even number of replicas to allow Gluster to replicate data appropriately.
Summary
Deploying distributed file systems like Gluster can seem challenging, but Ansible simplifies the process, and more importantly, does so idempotently; each time you run the playbook again, it will ensure everything stays configured as you want.
Ansible 1.9.x's inclusion of the gluster_volume module will make this process even simpler, since the built-in module will handle edge cases and general configuration even better than we did above.
This example (derived from the Raspberry Pi Dramble project), and others like it, can be found in Ansible for DevOps.