usb

Trying every combination to flash my ASUS motherboard's BIOS

tl;dr: Use an old-fashioned USB 2.0 flash drive, format it FAT32, download the firmware, make sure it's named correctly, and use the motherboard's 'BIOS Flashback' option after powering off the computer.

This past week, I devoted far too much time to the task of updating my brand new motherboard's BIOS.

It started with a combo deal from Micro Center: a ASUS ROG Strix B650E-F Gaming WiFi motherboard, a Ryzen 9 7900x CPU, and a G.Skill Flare X5 Series 32GB DDR5-6000 memory kit, all for $599. Quite a beefy upgrade for the main PC I use to compile code and do random Linux-y tasks.
Using LibreELEC like a pro—management via SSH

For a recent project, I needed to install LibreELEC/Kodi on a Raspberry Pi Compute Module 4 with built-in eMMC storage.

Because it's inconvenient to be swapping the Pi around from the embedded display I was using it in to my preferred carrier board I use for flashing Pis and interacting with their filesystems, I wanted to manage my LibreELEC install over SSH.

It seems like whatever documentation the LibreELEC Wiki used to have for remote SSH access is missing, and all I could find were references to enabling SSH during a GUI setup wizard. If you didn't see that during initial setup, the easiest way is to add ssh to the end of the line in the system's cmdline.txt file, then reboot.

So I pulled the Pi, used usbboot to mount the fat32 volume on my Mac, and opened cmdline.txt and added ssh. Then I popped the Pi back in the embedded display, and started it up.

Sure enough, I could now SSH in:

Playing sounds with Python on a Raspberry Pi

Today I needed to play back an MP3 or WAV file through a USB audio device on a Raspberry Pi, in a Python script. "Should be easy!" I thought!

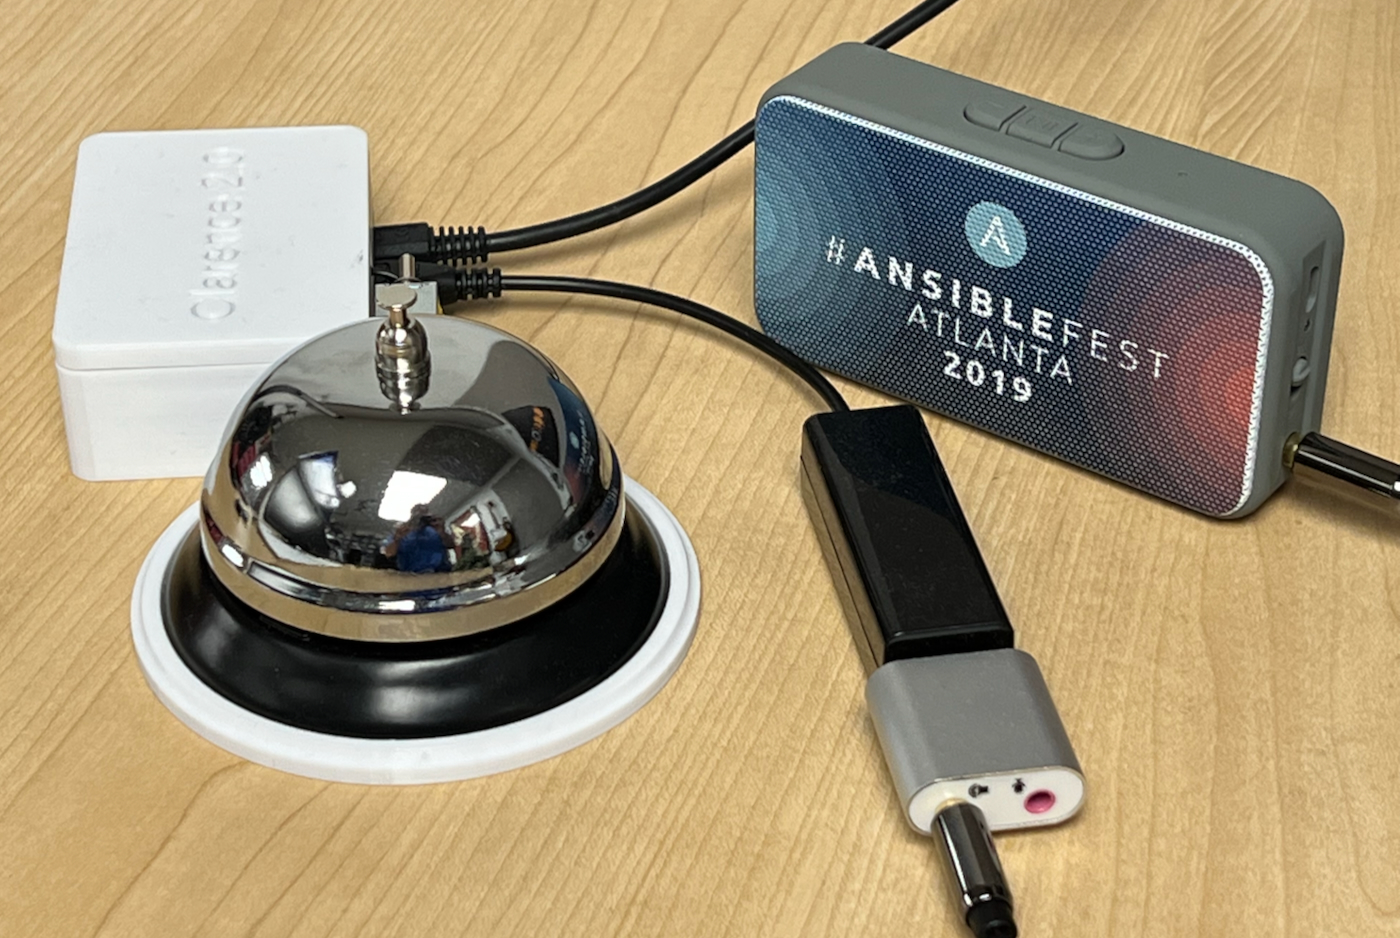
Clarence the Raspberry Pi Bell Slapper with USB audio output and speaker

Well, a couple hours later I decided to write this blog post to document the easiest way to do it, since I had to take quite a journey to get to the point where sound actually plays through the USB audio output.

The problem is most guides, like this simple one from Raspberry Pi's project site, assume two things:

Using 4G LTE wireless modems on a Raspberry Pi

For a recent project, I needed to add cellular connectivity to a Raspberry Pi (actually, an entire cluster... but that's a story for a future time!).

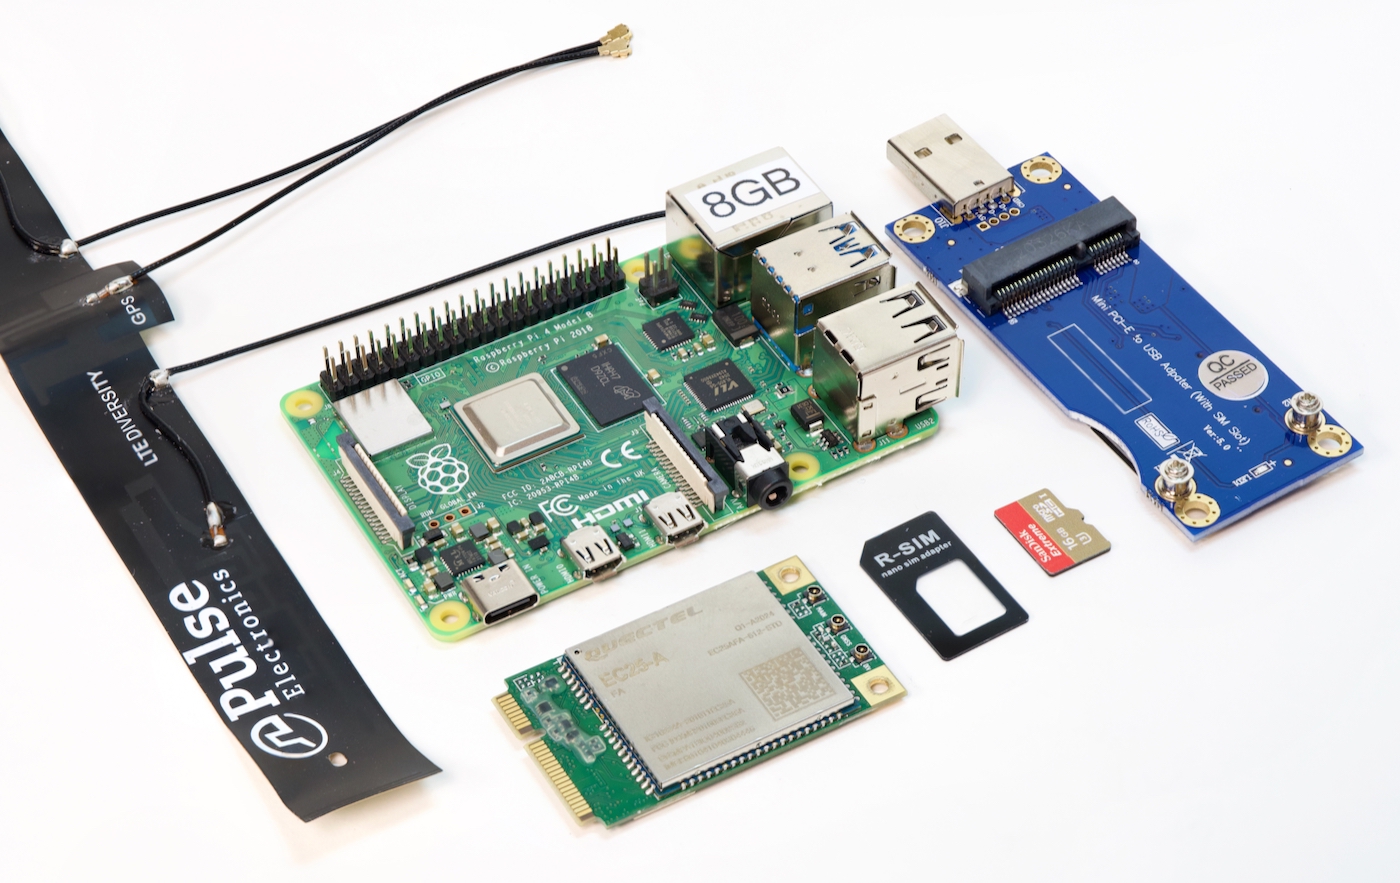
Raspberry Pi 4 model B with 4G LTE wireless Quectel modem and antenna and USB adapter

I figured I'd document the process in this blog post so people who follow in my footsteps don't need to spend quite as much time researching. This post is the culmination of 40+ hours of reading, testing, and head-scratching.

There doesn't seem to be any good central resource for "4G LTE and Linux" out there, just a thousand posts about the ABC's of getting an Internet connection working through a 4G modem—but with precious little explanation about why or how it works. (Or why someone should care about random terms like PPP, ECM, QMI, or MBIM, or why someone would choose qmi_wwan over cdc_ether, or ... I could go on).

Hopefully you can learn something from my notes. Or point out places where I'm glaringly wrong :)

The Raspberry Pi makes a great USB webcam for $100

There are many Raspberry Pi projects where I spend a few hours (or dozens of hours) building something with a Pi, and realize at the end that not only could I have purchased an off-the-shelf product to do the same thing for half the component cost, but it would work better too.

But this is not one of those projects:

Pi Webcam on Tripod - Pi Zero W and HQ Camera

The Raspberry Pi and its HQ camera make a surprisingly potent webcam, and if you want to cover the basics, and rival the image quality of all but the highest-end dedicated webcams, you can do it for under $100.

Still frame grab from recording on Dell XPS 13 using Raspberry Pi Webcam

Above is a single frame from a recording I did with the HQ Camera on my Raspberry Pi Zero W connected as a standard USB webcam using the Camera app on Windows 10 on my Dell laptop.

USB 2.0 ports not working on the Compute Module 4? Check your overlays!

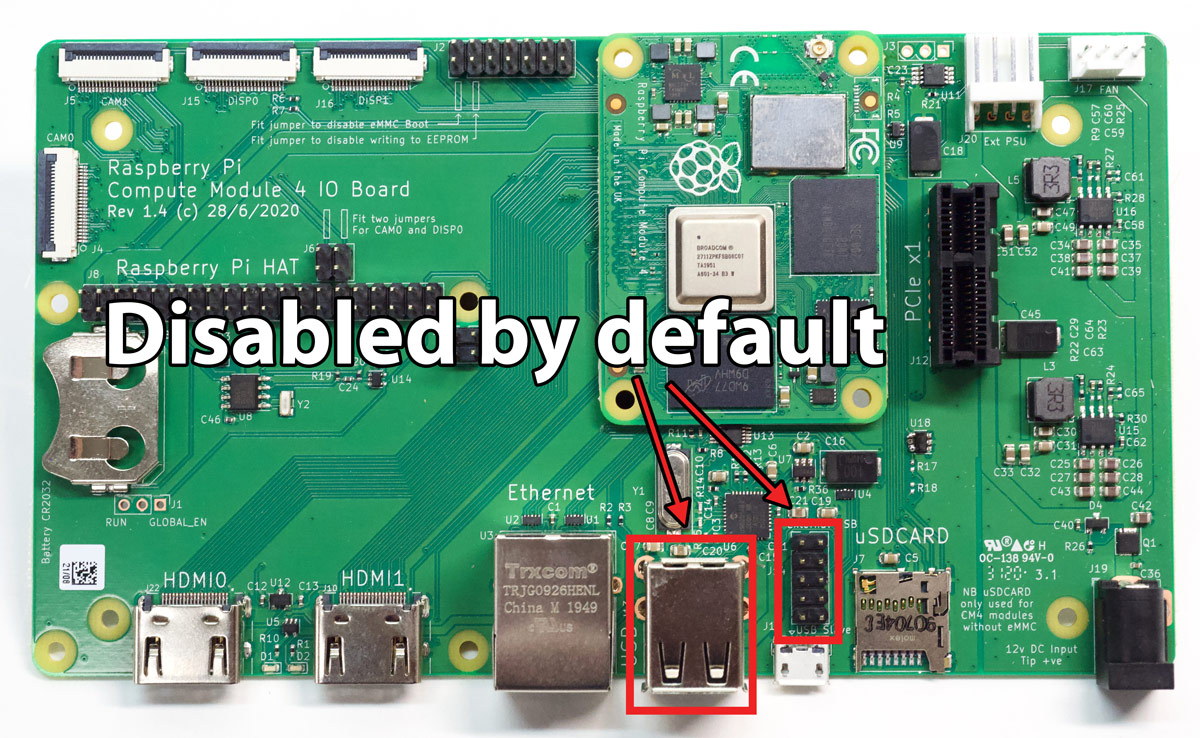
Out of the box, to conserve power, the new Raspberry Pi Compute Module 4 doesn't enable its built-in USB 2.0 ports.

Compute Module 4 IO Board USB 2.0 ports are disabled by default

You might notice that if you plug something into one of the USB 2 ports on the IO Board and don't see it using lsusb -t. In fact, you see nothing, by default, if you run lsusb -t.

To enable the USB 2.0 ports on the Compute Module 4, you need to edit the boot config file (/boot/config.txt) and add:

dtoverlay=dwc2,dr_mode=host

Then reboot the Pi. Now you should be able to use the built-in USB 2.0 ports!

How to flash Raspberry Pi OS onto the Compute Module 4 eMMC with usbboot

The Raspberry Pi Compute Module 4 comes in two main flavors: one with built-in eMMC storage, and one without it. If you opt for a Compute Module 4 with built-in eMMC storage, and you want to write a new OS image to the Compute Module, or manually edit files on the boot volume, you can do that just the same as you would a microSD card—but you need to first make the eMMC storage mountable on another computer.

This blog post shows how to mount the eMMC storage on another computer (in my case a Mac, but the process is very similar on Linux), and then how to flash a new OS image to it.

Video Instructions

In addition to the tutorial below, I published a video version of this post covering installation and usage of rpiboot for flashing the eMMC on Windows, Ubuntu, Raspberry Pi OS, or macOS:

Raspberry Pi USB Boot - UASP, TRIM, and performance

In the past few weeks, I reviewed USB drive performance on the Raspberry Pi 4, and the importance of UASP support for USB drive performance.

Both posts generated great discussion, and there were three things I wanted to cover in this follow-up, namely:

  1. Which drives support UASP
  2. Real-world performance benchmarks
  3. TRIM support

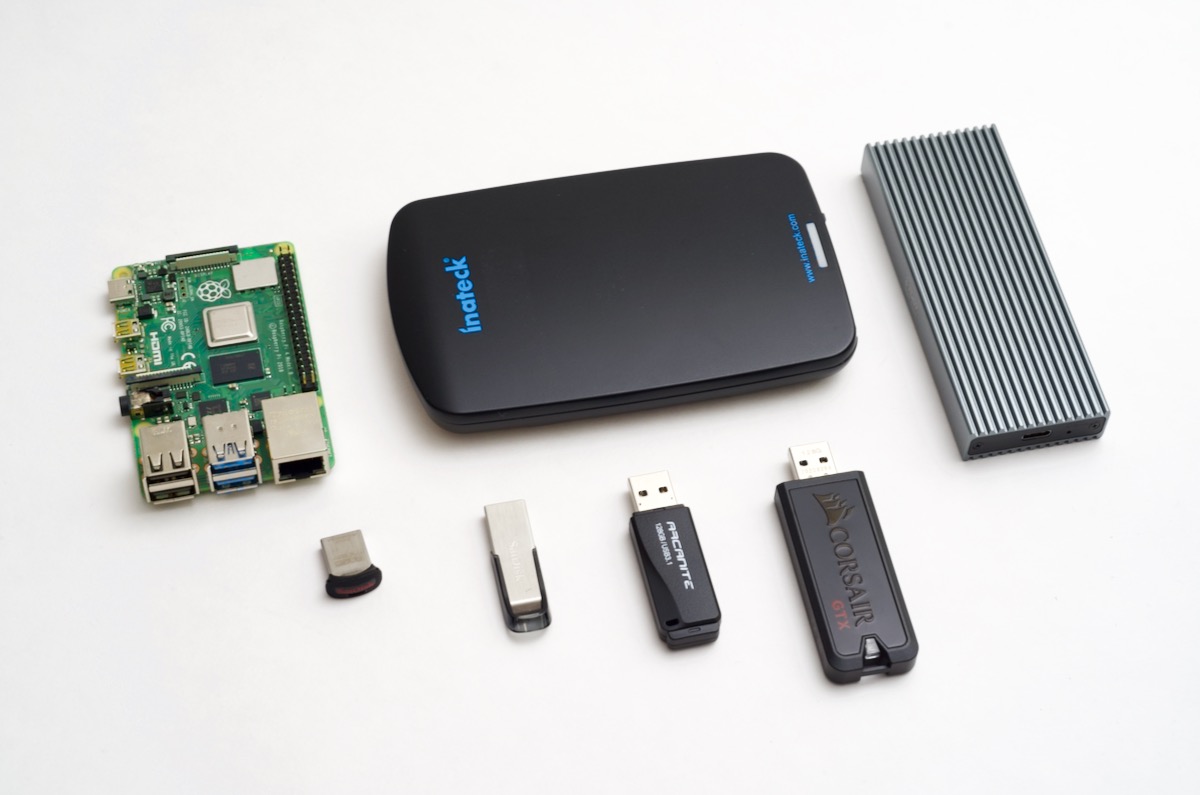
For reference, here are all the products I'm testing in this post (product links are to their Amazon product page, starting from top middle, clockwise):

USB Performance testing - SATA SSD, NVMe, and Flash drives

Enabling TRIM on an external SSD on a Raspberry Pi

I've been doing a lot of benchmarking and testing with the Raspberry Pi 4 and SSDs connected via USB. I explored UASP Support, which USB SSDs are the fastest, and I'm now booting my Pis from USB SSDs.

Anyways, one thing that I have wondered about—and some people have asked me about—is TRIM support.

I'm working on a new video for my YouTube channel that will go into some more detail on which of the drives I tested support TRIM, but while I was researching for that video, I also found that TRIM support in Linux is not as simple as it seems at first glance—it's definitely not plug-and-play, in my experience.

While internal microSD cards seem to support TRIM out of the box, none of the external USB drives I tested supported it out of the box. They all needed a little help!

The fastest USB storage options for Raspberry Pi

For years, I've been maintaining benchmarks for microSD cards on the Raspberry Pi, but I only spent a little time testing external USB storage, due to historic limitations with the Pi's USB 2.0 bus.

But the Pi 4 cleared away the limitations with a full-speed USB 3.0 bus offering much better performance, so I've done a lot of testing with USB boot, and with all the USB SSDs I had at my disposal. You can see some of those results in this blog post and video on booting a Pi 4 via USB.

After posting my tests concerning UASP support in USB SATA adapters, I got an email from Rob Logan mentioning the performance of some other types of drives he had with him. And he even offered to ship a few drives to me for comparisons!

There's also a video that accompanies this blog post, for the more visually-inclined: