nas

Answering Questions about the PetaPi

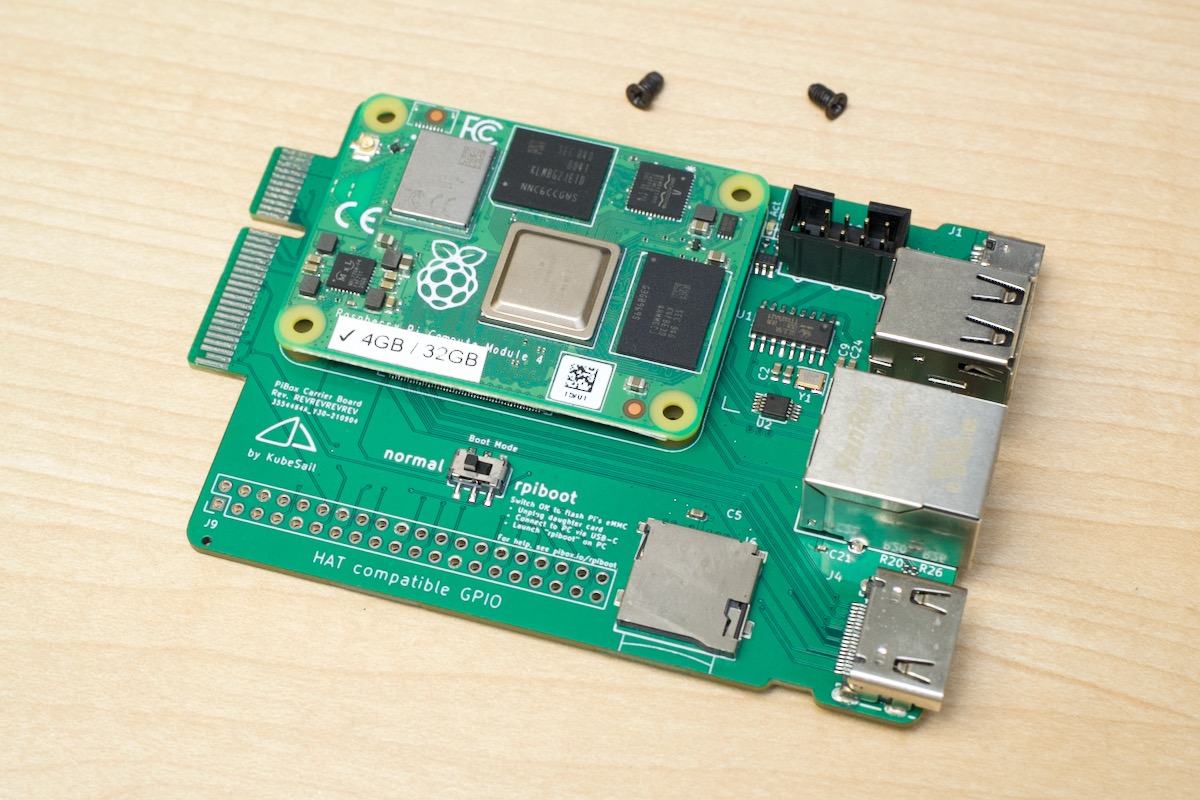
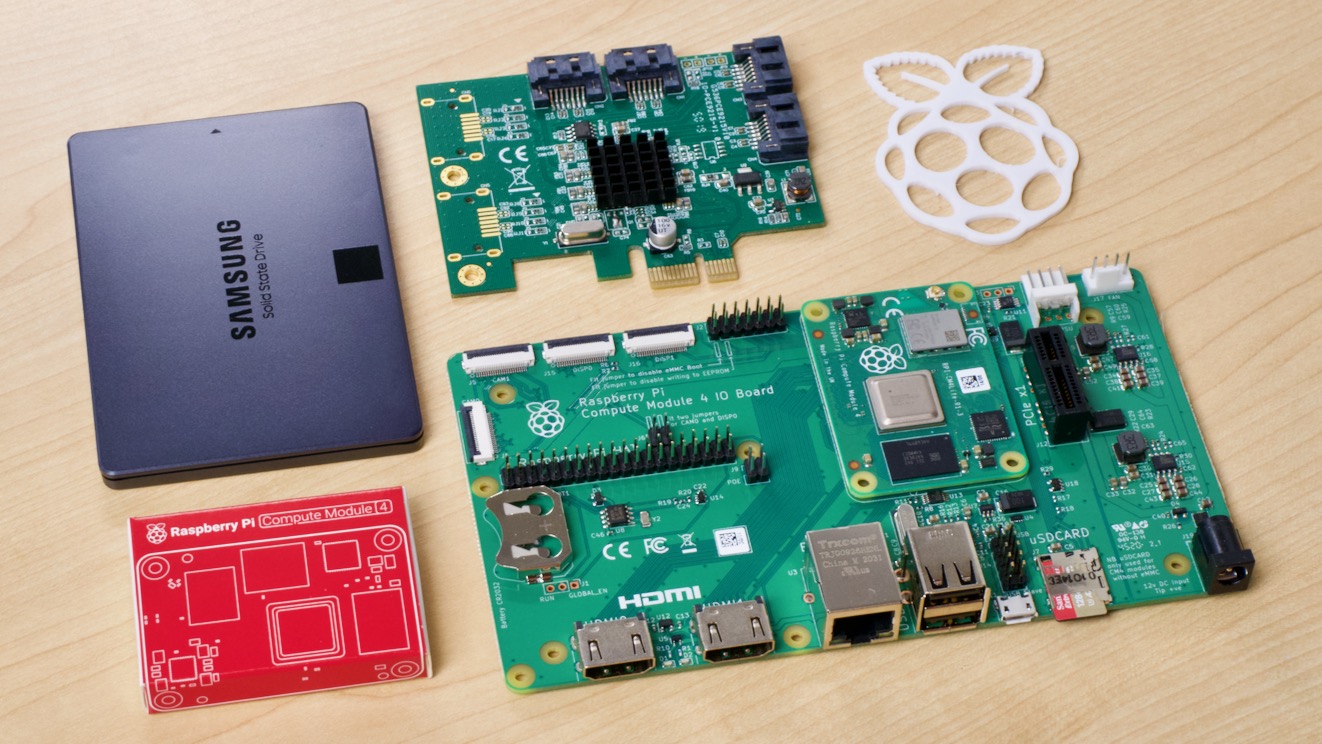
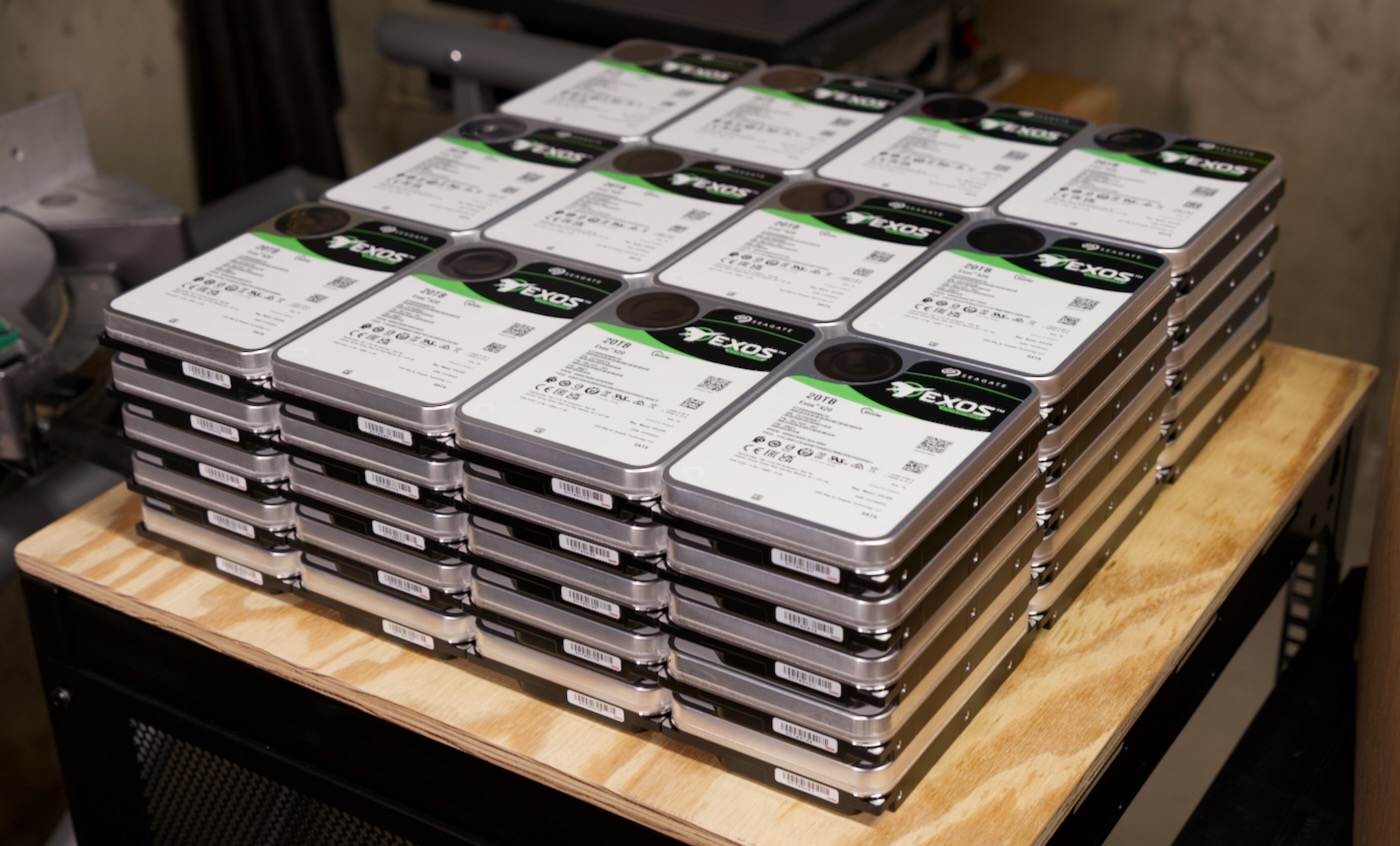
A few weeks ago, I posted a video about the Petabyte Pi Project—an experiment to see if a single Raspberry Pi Compute Module 4 could directly address sixty 20TB hard drives, totaling 1.2 Petabytes.

Petabyte of Seagate Exos Hard Drives

And in that video, it did, but with a caveat: RAID was unstable. For some reason, after writing 2 or 3 GB of data at a time, one of the HBAs I was using would flake out and reset itself, due to PCI Express bus errors.

The Petabyte Pi Project

I haven't had time to write up the details yet, but I wanted to share a project that's been many months in the making: The Petabyte Pi Project on YouTube.

I'm still doing follow-up testing based on feedback from Broadcom storage engineers, and will put out a much more in-depth blog post later, but the gist is:

Can a single Raspberry Pi cosplay as an 'enterprise' storage server, directly addressing 1 PB of storage?

Now... caveats abound here. What does 'enterprise' mean? And what does 'directly addressing' mean? Those things are all answered in the video linked above.

But to give a tl;dr: The Pi does not perform swimmingly. But... I did get a single array of 60 hard drives—20TB Exos HDDs to be exact—working in a 45Drives Storinator XL60 chassis, controlled only through a single Raspberry Pi Compute Module 4. Of course I had to rip out the Xeon guts and replace them with said Pi:

How I rip DVDs and Blu-Rays into my Mac (2022 Edition)

It's been more than a decade since I wrote Ripping Movies from Blu-Ray, HD-DVD and DVD, Getting them onto Apple TV, iPad, iPhone, etc.. Heck, back then I didn't write everything as a 'blog post'—that was labeled as an 'article' :P

In a surprising twist of fate, we went from a somewhat more centralized online media situation back then (basically, Netflix) to a hellscape of dozens of streaming services today. And in many cases, older movies can only be found as used and/or pirated DVDs on eBay!

Thus, I'm writing a fresh guide to how I rip DVDs and Blu-Ray discs into my Mac, then transcode them with Handbrake. Heck, some people who are deeper into the r/datahoarder rabbit hole even have dedicated transcoding servers so they can generate optimal archival copies in 4K, 1080p, etc. akin to how YouTube and other online platforms set up their files!

But for me, the basic process goes:

ASUSTOR Lockerstor 4RS Review - 1U 4-drive NAS

Over on the Geerling Engineering YouTube channel, my Dad and I just posted a video where we installed the ASUSTOR Lockerstor 4RS - AS6504RS at his radio station, to increase their raw network storage capacity from 4 to 16 TB:

.embed-container { position: relative; padding-bottom: 56.25%; height: 0; overflow: hidden; max-width: 100%; } .embed-container iframe, .embed-container object, .embed-container embed { position: absolute; top: 0; left: 0; width: 100%; height: 100%; }

In the video, we focused on the installation, though I highlighted the unit's top-line features at the beginning.

In this blog post, I'll quickly recap the main features, then give more impressions of the unit from our experience setting it up, and my Dad's use of it at the station since we recorded the video.

Deadbolt impacts some ASUSTOR NASes — check your backup plan!

ASUSTOR ARM NAS with four hard drives and cover removed

A few months ago, I wrote up a post covering my backup plan. In it, I talk about the 3-2-1 backup strategy:

  • 3 copies of all your important data
  • 2 different media
  • 1 offsite

In that post, I mentioned I back everything up with two local copies (two separate NAS units), and a third offsite copy on Amazon Glacier Deep Archive.

My Backup Plan

I've had a number of people ask about my backup strategy—how I ensure the 6 TB of video project files and a few TB of other files stays intact over time.

3-2-1 backup plan

Over the past year, since I got more serious about my growing YouTube channel's success, I decided to document and automate as much of my backups as possible, following a 3-2-1 backup plan:

  • 3 Copies of all my data
  • 2 Copies on different storage media
  • 1 Offsite copy

The culmination of that work is this GitHub repository: my-backup-plan.

The first thing I needed to do was take a data inventory—all the files important enough for me to worry about fell into six main categories:

6 backup categories

Making sure symlinks work on CIFS/SMB mounted shares

I was recently working on some backup scripts to make sure I could clone all my GitHub repositories to my NAS, which I have mounted to a Raspberry Pi that handles all my backups.

I'm using gickup to run through all my GitHub repos and clone them locally, and I configured it to clone each repo directly into my NAS share, which is mounted over CIFS using something like:

sudo mount -t cifs -o uid=pi,username=myuser,password=mypass //my-nas-server/Backups /Volumes/Backups

Most repositories cloned correctly, but a few had symlinks inside, and when git was cloning them, the process would error out with:

I built a $5,000 Raspberry Pi server (yes, it's ridiculous)

When I heard about Radxa's Taco—a Raspberry Pi Compute Module 4-powered NAS/router-in-a-box—I knew what must be done.

Load it up with as much SSD storage as I can afford, and see what it can do.

Raspberry Pi CM4 Taco NAS with 48 TB of SSD storage

And after installing five Samsung 870 QVO 8TB SSDs and one Sabrent Rocket Q NVMe SSD—loading up every drive slot on the Taco to the tune of 48TB raw storage—I found out it can actually do a lot! Just... not very fast. At least not compared to a modern desktop.

Special thanks to Lambda for sponsoring this project—I was originally going to put a bunch of the cheapest SSDs I had on hand on the Taco and call it a day, but with Lambda's help I was able to buy the 8TB SSDs to make this the most overpowered Pi storage project ever!

Kubesail's PiBox mini 2 - 16 TB of SSD storage on a Pi

Kubesail Raspberry PiBox mini 2 front side exposed

Many months ago, when I was first testing different SATA cards on the Raspberry Pi Compute Module 4, I started hearing from GitHub user PastuDan about his experiences testing a few different SATA interface chips on the CM4.

As it turns out, he was working on the design for the PiBox mini 2, a small two-drive NAS unit powered by a Compute Module 4 with 2 native SATA ports (providing data and power), 1 Gbps Ethernet, HDMI, USB 2, and a front-panel LCD for information display.

The Hardware

The PiBox mini 2 is powered by the Compute Module 4 on this interesting carrier board:

PiBox mini carrier board with Raspberry Pi Compute Module 4

Raspberry Pi OS now has SATA support built-in

After months of testing various SATA cards on the Raspberry Pi Compute Module 4, the default Raspberry Pi OS kernel now includes SATA support out of the box.

SATA card and Samsung SSD with Raspberry Pi Compute Module 4 IO Board

In the past, if you wanted to use SATA hard drives or SSDs and get native SATA speeds, and be able to RAID them together for redundancy or performance, you'd have to recompile the Linux kernel with SATA and AHCI.

Sure you could always use hard drives and SSDs with SATA to USB adapters, but you sacrifice 10-20% of the performance, and can't RAID them together, at least not without some hacks.

There's a video version of this post: SATA support is now built into Raspberry Pi OS!