debian

Set a static IP address with nmtui on Raspberry Pi OS 12 'Bookworm'

Old advice for setting a Raspberry Pi IP address to a static IP on the Pi itself said to edit the /etc/dhcpcd.conf file, and add it there.

But on Raspberry Pi OS 12 and later, dhcpcd is no longer used, everything goes through Network Manager, which is configured via nmcli or nmtui. If you're booting into the Pi OS desktop environment, editing the IP settings there is pretty easy.

But setting a static IP via the command line is a little different.

First, get the interface information—you can get a list of all interfaces with nmcli device status:

$ nmcli device status
DEVICE         TYPE      STATE                   CONNECTION         
eth0           ethernet  connected               Wired connection 1 
lo             loopback  connected (externally)  lo                 
wlan0          wifi      disconnected            --                 

In my case, I want to set an IP on eth0, the built-in Ethernet.
Resolving 'Temporary failure in name resolution' on Pi OS 12 Bookworm

Raspberry Pi OS version 12 (based on Debian 12 Bookworm) uses NetworkManager instead of dhcpcd for managing network connections, DNS resolution settings, DHCP, etc.

I've already mentioned using nmcli and nmtui for managing WiFi settings, but I ran into a strange issue after installing Docker on a fresh Raspberry Pi OS installation today. Suddenly DNS stopped working.

Trying to ping anything on the Internet gave me:

$ ping www.google.com
ping: www.google.com: Temporary failure in name resolution

As always, It was DNS. It was like DNS just gave up the ghost! Trying to change settings via nmtui seemed to not work (I tried DHCP for IPv4 with manual DNS, and that wasn't working).

Luckily, I found this post and followup comments mentioning the proper nmcli incantation to override DNS settings for an interface, so here it is (assuming built-in Ethernet):

apt_key deprecated in Debian/Ubuntu - how to fix in Ansible

2023 Update: Ansible now has the ansible.builtin.deb822_repository module, which can add keys and repositories in one task. It's a little more complex than the old way, and requires Ansible 2.15 or later. See some common deb822_repository examples here, for example, the Jenkins tasks below can be consolidated (though the structure of the templated vars would need reworking):

- name: Add Jenkins repo using key from URL.
  ansible.builtin.deb822_repository:
    name: jenkins
    types: [deb]
    uris: "https://pkg.jenkins.io/debian-stable"
    components: [binary]
    signed_by: https://pkg.jenkins.io/debian-stable/jenkins.io-2023.key
    state: present
    enabled: true

For many packages, like Elasticsearch, Docker, or Jenkins, you need to install a trusted GPG key on your system before you can install from the official package repository.

Ansible playbook to upgrade Ubuntu/Debian servers and reboot if needed

I realized I've never posted this playbook to my blog... I needed to grab it for a project I'm working on, so I figured I'd post it here for future reference.

Basically, I need a playbook I can run whenever, that will ensure all packages are upgraded, then checks if a reboot is required, and if so, reboots the server. Afterwards, it removes any dependencies no longer required.

---
- hosts: all
  gather_facts: yes
  become: yes

  tasks:
    - name: Perform a dist-upgrade.
      ansible.builtin.apt:
        upgrade: dist
        update_cache: yes

    - name: Check if a reboot is required.
      ansible.builtin.stat:
        path: /var/run/reboot-required
        get_checksum: no
      register: reboot_required_file

    - name: Reboot the server (if required).
      ansible.builtin.reboot:
      when: reboot_required_file.stat.exists == true

    - name: Remove dependencies that are no longer required.
      ansible.builtin.apt:
        autoremove: yes

Install Python 3.9 on Raspberry Pi OS or Debian 10 (for Ansible or other uses)

I've started getting a lot of bug reports on my repos to the effect of "Ansible won't install on my Raspberry Pi anymore". Accompanying it is a debug message like one of the following:

$ python3 -m pip install ansible
...
No matching distribution found for ansible-core<2.13,>=2.12.0 (from ansible)

# Alternatively:
ERROR: No matching distribution found for ansible-core<2.13,>=2.12.0

The problem is ansible-core 2.12 has a new hard requirement for Python 3.8 or newer. And ansible-core 2.12 is included in Ansible 5.0.0, which was recently released. Raspberry Pi OS, which was based on Debian 10 ("Buster") until recently, includes Python 3.7, which is too old to satisfy Ansible's installation requirements.

There was recently a fix that makes it so Ansible 5.x won't get installed on these older systems, but who wants to get stuck on old unsupported Ansible versions?

There are three options:

HTGWA: Create a ZFS RAIDZ1 zpool on a Raspberry Pi

This is a simple guide, part of a series I'll call 'How-To Guide Without Ads'. In it, I'm going to document how I set up a ZFS zpool in RAIDZ1 in Linux on a Raspberry Pi.

Prequisites

ZFS does not enjoy USB drives, though it can work on them. I wouldn't really recommend ZFS for the Pi 4 model B or other Pi models that can't use native SATA, NVMe, or SAS drives.

For my own testing, I am using a Raspberry Pi Compute Module 4, and there are a variety of PCI Express storage controller cards and carrier boards with integrated storage controllers that make ZFS much happier.

I have also only tested ZFS on 64-bit Raspberry Pi OS, on Compute Modules with 4 or 8 GB of RAM. No guarantees under other configurations.

Installing ZFS

Since ZFS is not bundled with other Debian 'free' software (because of licensing issues), you need to install the kernel headers, then install two ZFS packages:

Microsoft repo and key are automatically added to Raspberry Pis

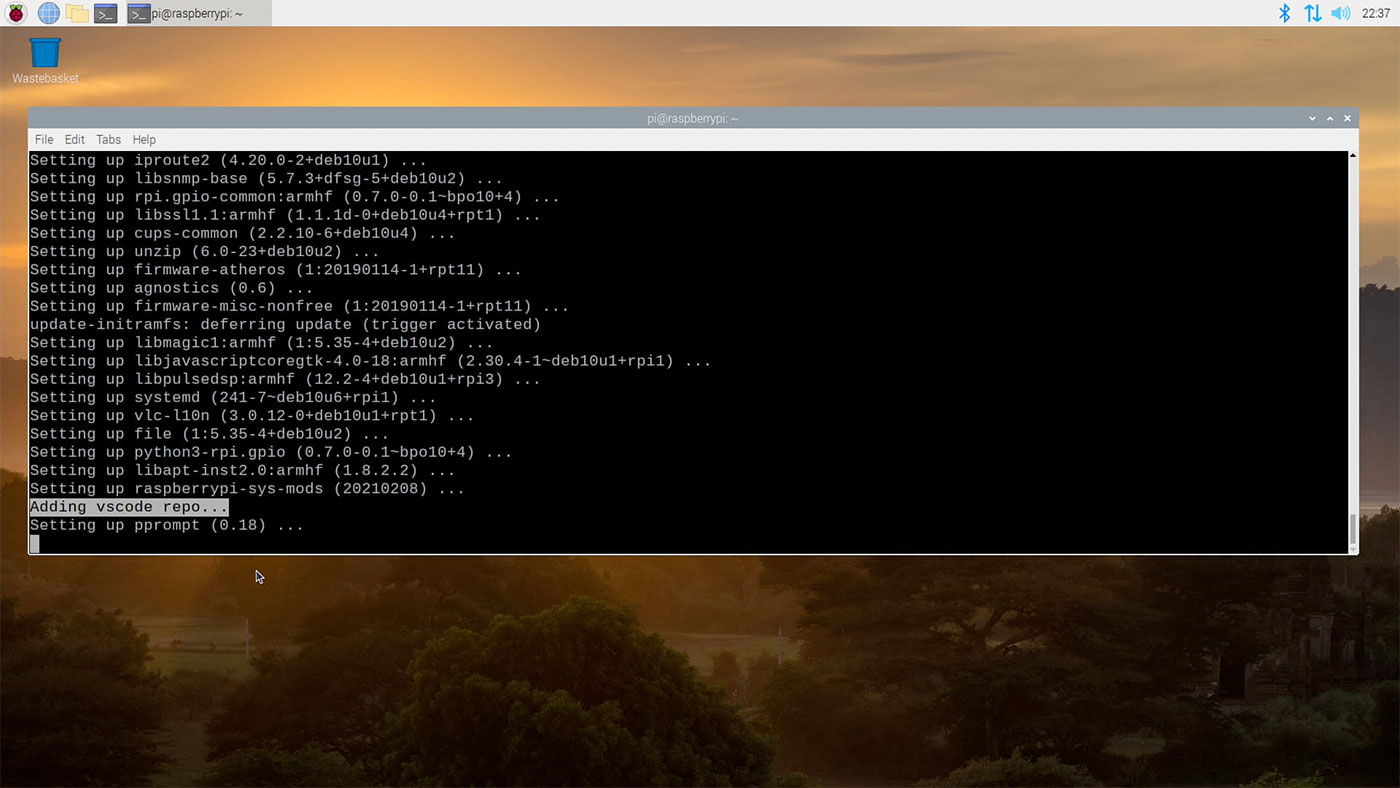
A couple weeks ago, I noticed when running apt-get upgrade on one of my Pi projects that a new repository was added.

VSCode Repository added to Raspberry Pi OS automatically during apt upgrade

It was a little odd, because Linux distributions don't typically 'inject' new repositories like this. And it was even stranger because this particular repository was for VSCode, from Microsoft.

The Raspberry Pi Foundation just posted an article to their blog about Visual Studio Code coming to the Raspberry Pi—but that post didn't address any of the controversy surrounding this change.

There's also a video that goes along with this post: Is Microsoft Spying on your Raspberry Pi?

What Happened

In late 2020, Microsoft released a version of VSCode compatible with the Raspberry Pi.

Cross-compiling the Raspberry Pi OS Linux kernel on macOS

After doing a video testing different external GPUs on a Raspberry Pi last week, I realized two things:

  1. Compiling the Linux kernel on a Raspberry Pi is slow. It took 54 minutes, and I ended up doing it 7 times during the course of testing for that video.
  2. If you ever want to figure out a better way to do something, write a blog post or create a video showing the less optimal way of doing it.

To the second point, about every fifth comment was telling me to cross-compile Linux on a faster machine instead of doing it on the Pi itself. For example:

cross compile raspberry pi kernel youtube comment

And on the Pi Forums, it seems like nobody worth their salt compiles the kernel on the Pi either, so I figured—since I'm probably going to have to do it again another thousand times in my life—I might as well put together a guide for how to do it on a Mac.

Enabling TRIM on an external SSD on a Raspberry Pi

I've been doing a lot of benchmarking and testing with the Raspberry Pi 4 and SSDs connected via USB. I explored UASP Support, which USB SSDs are the fastest, and I'm now booting my Pis from USB SSDs.

Anyways, one thing that I have wondered about—and some people have asked me about—is TRIM support.

I'm working on a new video for my YouTube channel that will go into some more detail on which of the drives I tested support TRIM, but while I was researching for that video, I also found that TRIM support in Linux is not as simple as it seems at first glance—it's definitely not plug-and-play, in my experience.

While internal microSD cards seem to support TRIM out of the box, none of the external USB drives I tested supported it out of the box. They all needed a little help!