Positron - an upside-down and portable 3D printer
I've been getting into 3D printing lately. I have an older Ender 3 V2 at home I bought during COVID. And in the past year I've acquired an Ender 3 S1, Bambu Labs P1S, and Prusa MK4.
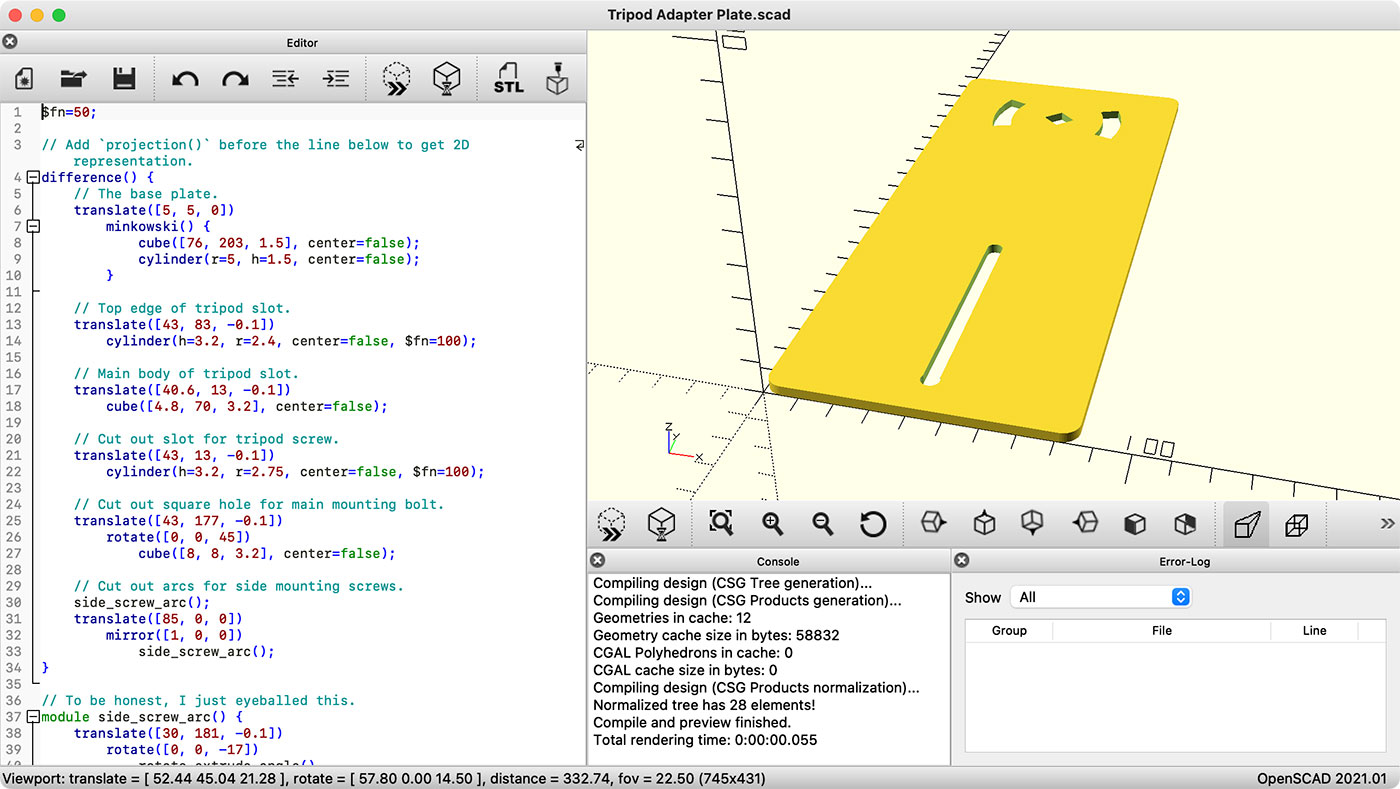
I also dove head-first into 3D CAD, and designed a number of small SBC cases or parts to help with things around the house.
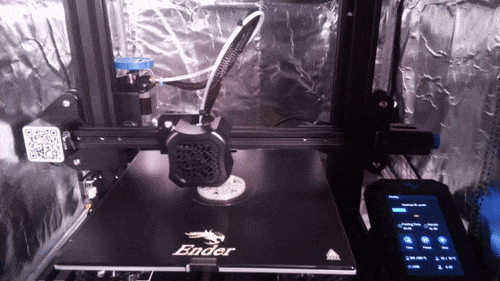
But I'd never built my own 3D printer from a kit—all the printers I've had were pre-built and at most, required assembling the prebuilt gantry or toolhead. That finally changed with the Positron V3.2: