![]()
I recently found a discount code through SlickDeals for $10 off the Elecrow 5" HDMI Touchscreen display for the Raspberry Pi. Since the Raspberry Pi was introduced, I've wanted to try out one of these mini screens (touchscreen or no), but they've always been prohibitively expensive (usually $60+).
This screen hit the right price (even regular price is $40, which is near my 'okay for experimentation' range), and I picked it up, not knowing what to expect. I've had mixed experiences with Pi accessories from Amazon, and had never tried a product from Elecrow.
This review will walk through my experience connecting the Pi, getting the screen working correctly, getting the _touch_screen working correctly, and then how the whole system works with a Raspberry Pi 3. (See my separate Raspberry Pi 3 model B review).
Plugging in the Raspberry Pi
The display is pretty solid, and comes well packed in styrofoam with four standoffs for mounting, a cheap plastic stylus, and a male-to-male HDMI daughter-card. Getting the Pi onto the board is easy enough; I used one standoff through one of the Pi's mounting holes (on the side with the HDMI plug), then seated the Pi directly on top of the GPIO slot on the display board, so so the HDMI ports would line up perfectly on the other side.
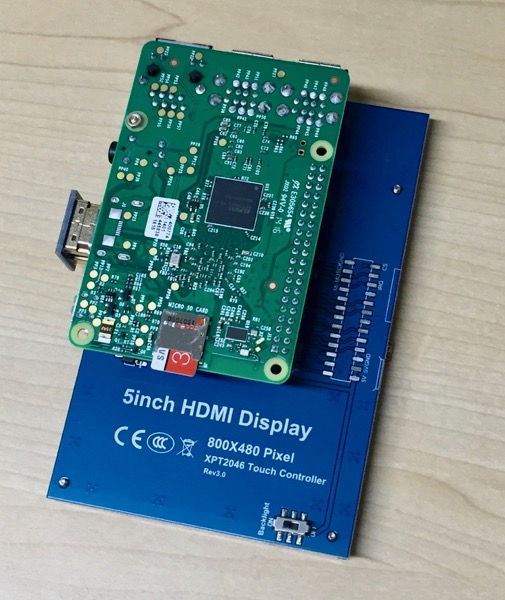
The HDMI daughter-card slips into the HDMI slots on both the display and the Pi, making the video connection.
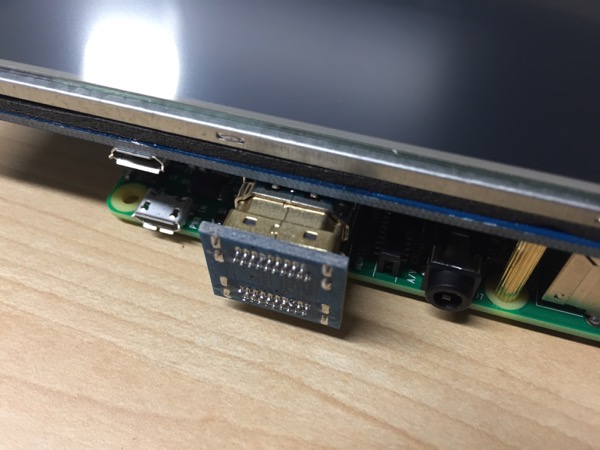
After assembly, the entire unit is pretty solid; though due to all the exposed leads, I'd still recommend at least using something static-free and non-conductive to house the unit!
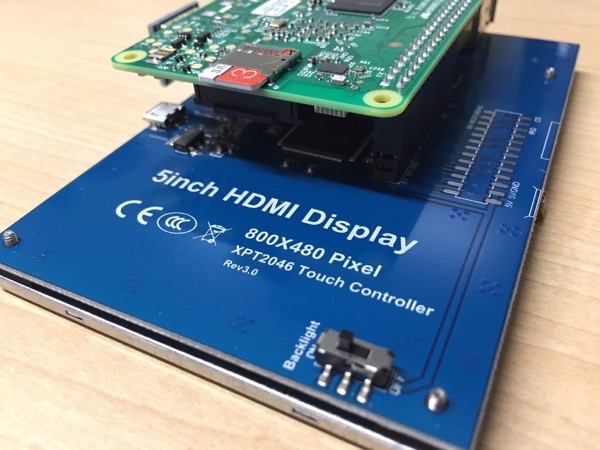
The Elecrow officially supports the Raspberry Pi 3 model B, but I tested it with a 2 model B as well. I didn't try it with a B+, but the hardware layout should work, so at least the HDMI display would work correctly (not sure about the touchscreen controls). The way the hardware is laid out, you seat the Raspberry Pi directly onto a GPIO socket (it takes up the first 13 sets of GPIO pins—pins 1-26), and then there's an included HDMI male-to-male daughtercard that slots in nicely to connect the HDMI output of the Pi to the HDMI input on the display.
There's an extra OTG USB plug on the display if you want to give it a separate power source, but if you plug it straight into the Pi's GPIO, it will leech off the 5V connection. As long as you have a good 2A power supply for your Pi, though, you shouldn't have to worry about supplying independent power to the display. In my usage, I only saw the overvolt indicator every now and then (just like I do in normal usage of the Pi 3, since it uses a bit more power than a 2!).
Getting full resolution over HDMI
When I first booted the Pi attached to the display, there was a large white area on the right, and only the left portion of the screen was being used by the Pi (it was only using 640x480 of the 800x480 display). To fix this, you have to set a few display options in the configuration file the Raspberry Pi reads during startup to switch certain hardware settings.
Edit /boot/config.txt (either while booted into Raspbian, or on another computer directly on the microSD card), making sure the following values are set:
# uncomment if you get no picture on HDMI for a default "safe" mode
#hdmi_safe=1

# uncomment this if your display has a black border of unused pixels visible
# and your display can output without overscan
disable_overscan=0

# uncomment if hdmi display is not detected and composite is being output
#hdmi_force_hotplug=1

# uncomment to force a specific HDMI mode (this will force VGA)
hdmi_group=2
hdmi_mode=1
hdmi_mode=87
hdmi_cvt=800 480 60 6 0 0 0
Reboot the Pi either via the UI or by entering sudo reboot in the Terminal. Once rebooted, the Pi should fill up the full 800x480 display.
Note: If the Pi boots up to a funny-looking screen and you can't see anything, you can either reformat the microSD card, or pull it, edit the /boot/config.txt file from another computer to fix it, and put it back in the Pi.
Getting the touchscreen working
Besides being a 800x480 HDMI display, the Elecrow also has a touchscreen overlay that allows simple one-point resistive touch detection on the screen. Note that at best, resistive touch is not nearly as responsive and intuitive as capacitive touch detection, which you're likely used to on any recent smartphone or tablet screen. But something is better than nothing, when it comes to building simple UIs for 'Internet of Things' devices or other fun things.
I tried to find some kind of downloadable driver for the XPT2046 touch controller, but didn't find a lot of helpful information. Elecrow's Wiki has some helpful information, a link to a setup PDF, a link to some configuration examples... but some of this seemed to be formatted incorrectly (likely due to bad copy/pasting or PDF formatting), so ignore that info and use this process instead (all commands run from the Terminal app):
sudo apt-get updatesudo apt-get -y install xinput-calibrator- Edit
/boot/config.txtagain, this time adding the following lines below the rest of the config you changed earlier:
# Enable touchscreen on Elecrow HDMI interface.
dtparam=spi=on
dtparam=i2c_arm=on
dtoverlay=ads7846,cs=1,penirq=25,penirq_pull=2,speed=50000,keep_vref_on=0,swapxy=0,pmax=255,xohms=150,xmin=200,xmax=3900,ymin=200,ymax=3900
dtoverlay=w1-gpio-pullup,gpiopin=4,extpullup=1
These commands first install the touchscreen calibration utility, then configure the Pi to use the correct GPIO settings so touches can be interpreted as mouse moves/clicks by the Pi.
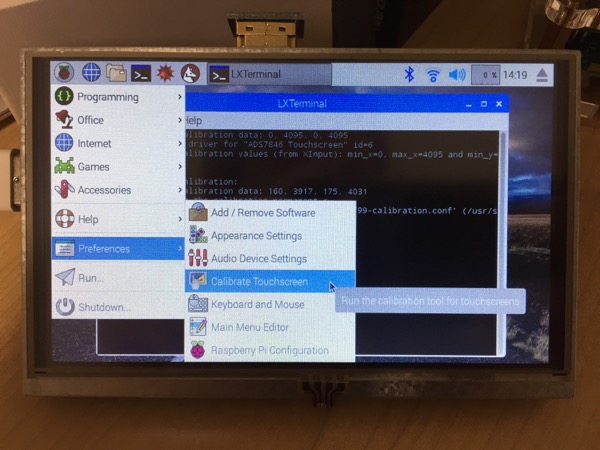
After you make those changes, reboot the Pi via the UI or in the Terminal with sudo reboot. Once it reboots, you need to calibrate the touchscreen. To do that, go to Menu > Preferences > Calibrate Touchscreen (see image below):
Once calibrated, the accuracy is pretty good, using either the included stylus or your fingernail. Note that the default Raspberry Pi UI is totally unoptimized for small (or even large) touchscreen use. You should probably get to work building your own touchscreen UI now :)
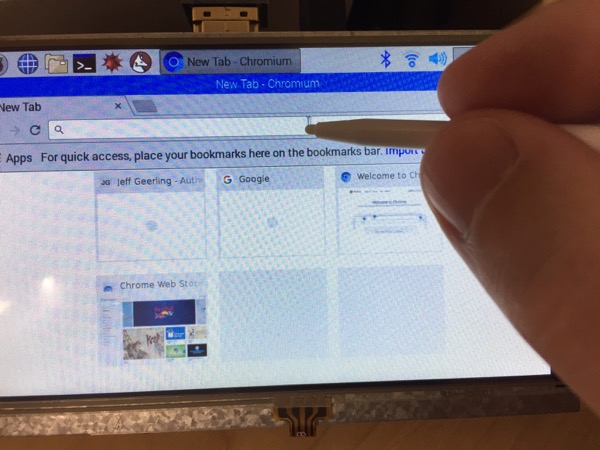
Special thanks to the Amazon.com reviewer IslePilot for the above notes!
Screen quality and touch responsiveness
For ~$30 ($40 without discount), I wasn't expecting a mind-blowing retina display with excellent glare-reducing coatings and contrast. But I do expect no dead pixels, and at least a crisp, vibrant picture when looking straight on. This screen is 'good enough' in that regard, though viewing angles aren't too great; side to side is okay, but looking down from above or up from below results in a bit of a washed out picture. Also, there is no antireflective coating on the screen, so wherever you use it, you need to be aware of nearby light sources.
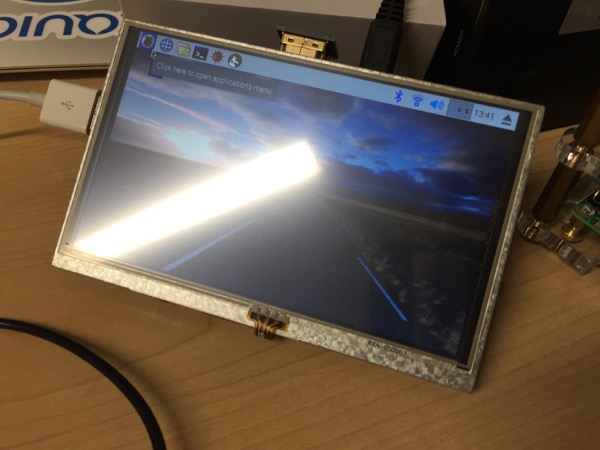
So, to summarize the review: this is everything I expected out of a sub-$50 display. It's nothing like a high-end smartphone display with capacitive touch, so if that's what you're expecting, you'll have to look elsewhere. But if you just want a small display that mounts to the Pi easily and is more affordable than the Raspberry Pi Foundation's own 7" touchscreen, this is a great buy!
You can buy the HDMI 5" 800x480 TFT Display with XPT2046 Touch Controller from Amazon for about $40.
Comments
Nice review, have just ordered mine so will be using your code no doubt tomorrow when the screen arrives!
Very helpful! Thank you for saving me much frustration.
This helped a lot, i didn't know i had to do all these settings before plugging it.
The screen displayed many abstract lines until i get it to work with your help!
Thanks a bunch!
Thanks; the display came with just a CD, and the website didn't mention how to connect it, so these instructions were really helpful.
Thank you for the guide. There is about 1 inch border around the edge that I'm unable to select by touch. I don't know how to fix.
Who does it works with OS Android Things?
You also need to rename 10-evdev.conf to 45-evdev.conf in order to get it to load after 40-libinput.conf:
$ sudo mv /usr/share/X11/xorg.conf.d/10-evdev.conf /usr/share/X11/xorg.conf.d/45-evdev.conf
This will let you calibrate the display with xinput-calibrator and will also solve the 1cm border problem another poster is having.
I can't get the calibration correct, everything else worked, but touchscreen calibration is an issue, when I run calibration and press on x, the cursor is always around 2mm of. after calibration I can't press anywhere near the border of the screen.
Hello,
I have followed your tutorial and everything works but when i try to calibrate i receive this message:
Error: No calibratable devices found.
Pls help
The problem is that i tried to get the screen to work but failed and i had even copied the text for touching the screen
I have been trying to find the HDMI 180 degree Daughter cards but cant seem to tackle the name they advertise under. Any assistance you can offer is appreciated.
Thank you.
Everything worked but the top menu bar is unreachable.
Thank you a lot for this post. I'm was working about 5 days and many many reading and waching without resoults. Then i found your post and finaly works.
Awsome job. thank you a lot
Thank you for this. I've had my touch screen for a few years and never used it as all the examples I found the touch portion would not work. After following your configuration example, I finally got the screen tow work with my Pi 3B.
Can you have red shirt Jeff see if he can remove the touchscreen without any issues? I have one I don't need the touch function and it may sharpen the pic a bit. Just wasn't sure if it was possible, and if ANYONE would try..it would be red shirt Jeff!!
Thanks for the tip of adding "hdmi_mode 78". That got my rpi4 with spectre 20 lcd to get past 640x480. Now, when I go to raspberry/preferences/screen configuration/configure/screens/HDMI-1/Resolution, I see 320x240 up to 1368x768! Now... about that sound over hdmi....bcm2835. .. thats next.