I am frequently away from home (whether on family vacation, a business trip, or out around town), but I have a number of important resources on my home network—as any homelabber does.
There are services I like to access remotely like my NAS with my giant media library, my edit server with all my active projects, and especially Home Assistant, which lets me monitor all aspects of my home.
Some people rely on individual cloud services from IoT vendors and have a bunch of apps to connect to each type of device independently. As someone who has dealt with numerous security breaches for numerous services, I know not to trust 50 different cloud-connected devices in my home.
That's why I'm a 'self-hosted' homelabber, and why I try to find devices that don't leave my local network.
But that creates a conundrum: it is nice to be able to connect to everything from afar. Enter PiVPN: in the olden days, when Raspberry Pis could be found at your corner drugstore for $35, it was probably the cheapest way to get yourself a fully-self-hosted VPN, assuming you have a public IP address.
PiVPN, luckily, runs on any other Pi-like device, though, as long as it's running a Debian or Pi-OS-like distro. Something like a Libre Computer Le Potato should work in a pinch, without breaking the bank—though if you want faster networking, you'll have to pony up a little more cash, at least until the Pi shortage abates.
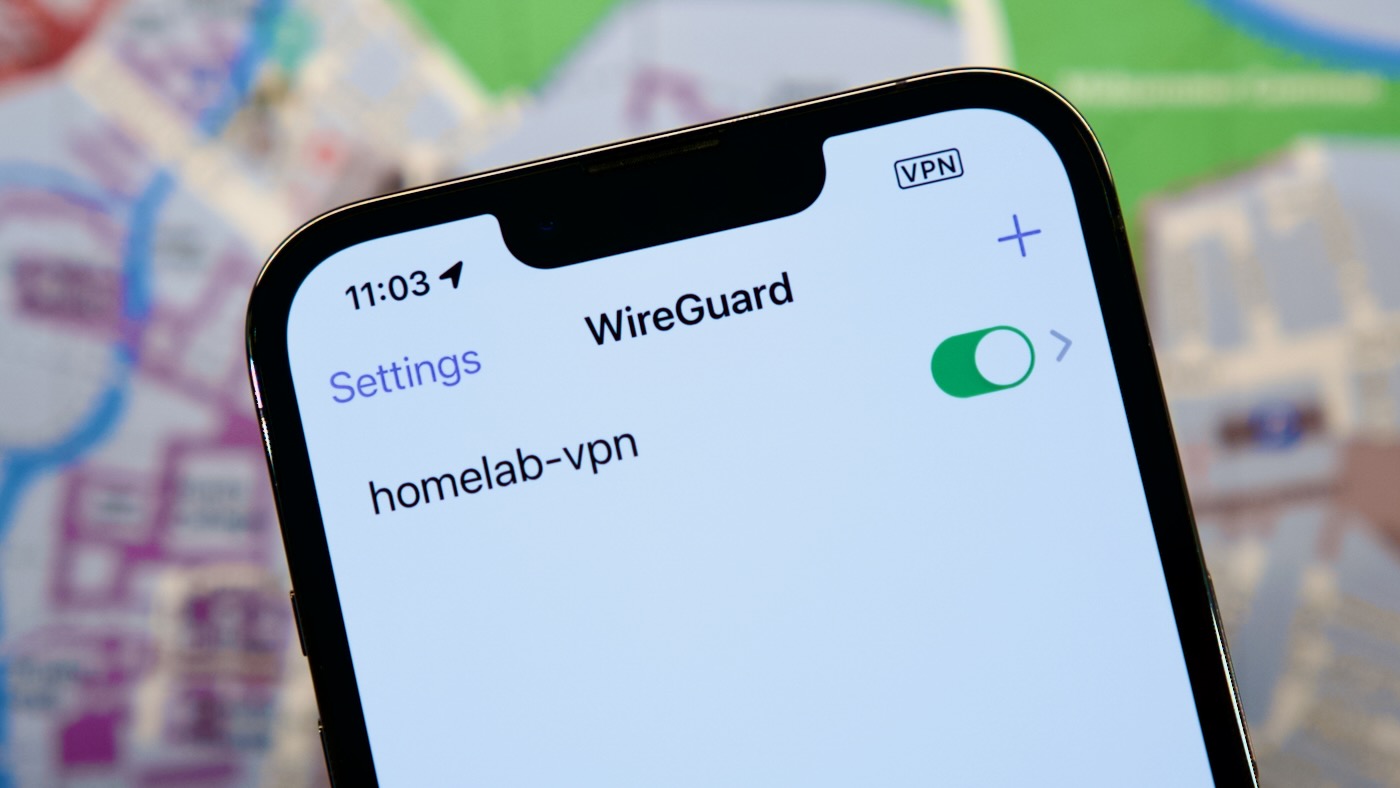
And PiVPN lets you pick one of two tried-and-true VPN stacks: OpenVPN or WireGuard. In my case, I already have a Pi that I bought way back in the fairy-tale times of 2019, and I wanted to try out WireGuard—mostly because I have managed OpenVPN before and found it... not fun.
Video
I have a full video which runs through the entire setup process, and shows a demo of me using it both in my Dad's radio studios and over in the UK. If you prefer to read instead of watch, just keep scrolling ;)
DNS and IP setup
Because WireGuard likes to have stability when it comes to DNS and IP addresses, I needed to give my Pi a stable DNS name and IP address on my home network.
So the first thing I did was use my router's software to statically assign an IP address to the Pi based on it's MAC address. Then, purely for convenience on my local network, I set up the DNS assignment pivpn.geerli.net on the Pi-hole that runs DNS on my home network (geerli.net is a domain I purchased and use only for devices on my home network).
Then, I used sudo raspi-config to set the hostname for my Pi to pivpn.geerli.net.
Now that the Pi had a persistent IP address and an easy-to-remember local DNS name, I moved ahead with the PiVPN install.
Note: You don't have to do this step—you could try setting a static IP in the install wizard later. But I like managing all my static IP assignments on my router, centrally, in its DHCP settings.
Silencing the PoE HAT Fans
Since I'm running this Pi in my rack, I'm using a PoE HAT with it's annoying little fan. I decided to take control of the overly-aggressive fan and only have it run when the Pi was getting a bit hot, instead of having it run nearly all day.
PiVPN Installation
Most of the time, I'll write an Ansible playbook to automate my entire server build, but this time, I'm trusting the PiVPN installer—for now at least—which can be run with the command:
curl -L https://install.pivpn.io | bash
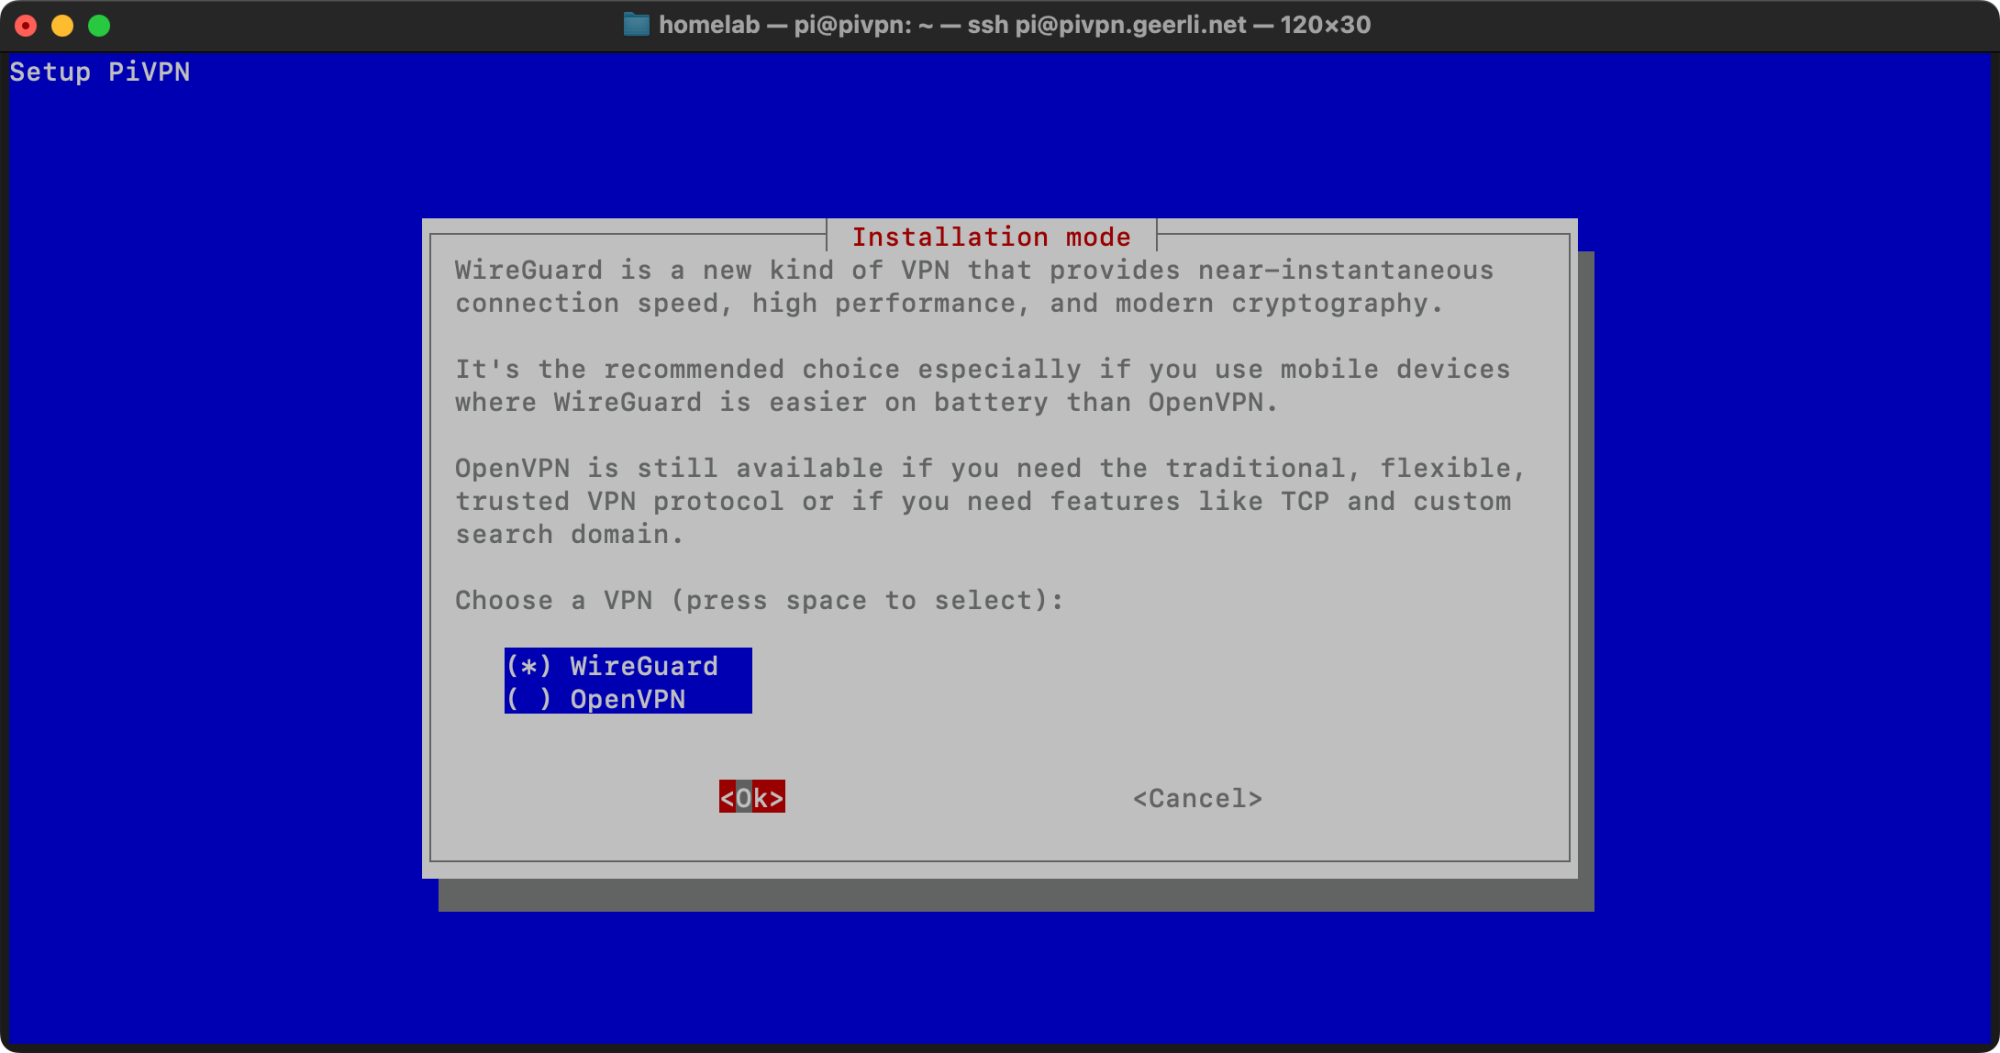
I followed the install wizard, and chose WireGuard when prompted. I kept the default port (51820), and since I run Pi-hole on my network and use it as my local DNS server, I chose the 'Custom' option for DNS Provider, and input the IP address of the server running Pi-hole.
For the 'DNS or IP' option, I chose to assign a public DNS name to my VPN server, since I point a few public DNS records (e.g. servicename-subdomain.example.com) to cover my home network. To make that work, I added a DNS A record for my home's IP address to my domain settings, pointing pivpn-subdomain.example.com at my home's public IP address (which I found by running curl icanhazip.com).
Then on my router, I configured port forwarding for external UDP port 51820 to the assigned internal IP address of PiVPN. Now, external traffic from the public Internet can route through the Pi to PiVPN.
Note: Security is a major concern here—don't set up a VPN if you don't know what you're doing. If someone gets access through the VPN to your home network, they can (and will) hack into your house!
Since I already enable automated updates using my geerlingguy.security role for Ansible in my homelab playbook, I skipped that part of the Pi VPN setup wizard, then completed the installation process with a reboot.
Setting up a VPN Profile
The next step is to connect to the VPN from another device—in my case, my Mac laptop.
After the Pi rebooted, I logged back in, and ran:
pivpn add
I set a name for the client profile (I generally use a format like username-devicetype-id, and once it generated the .conf file, I copied that over to my laptop.
Connecting from my Mac
When I used to use OpenVPN, I used Viscosity since I liked the simple UI. But as I'm switching to WireGuard, I installed the official Wireguard app from the App Store.
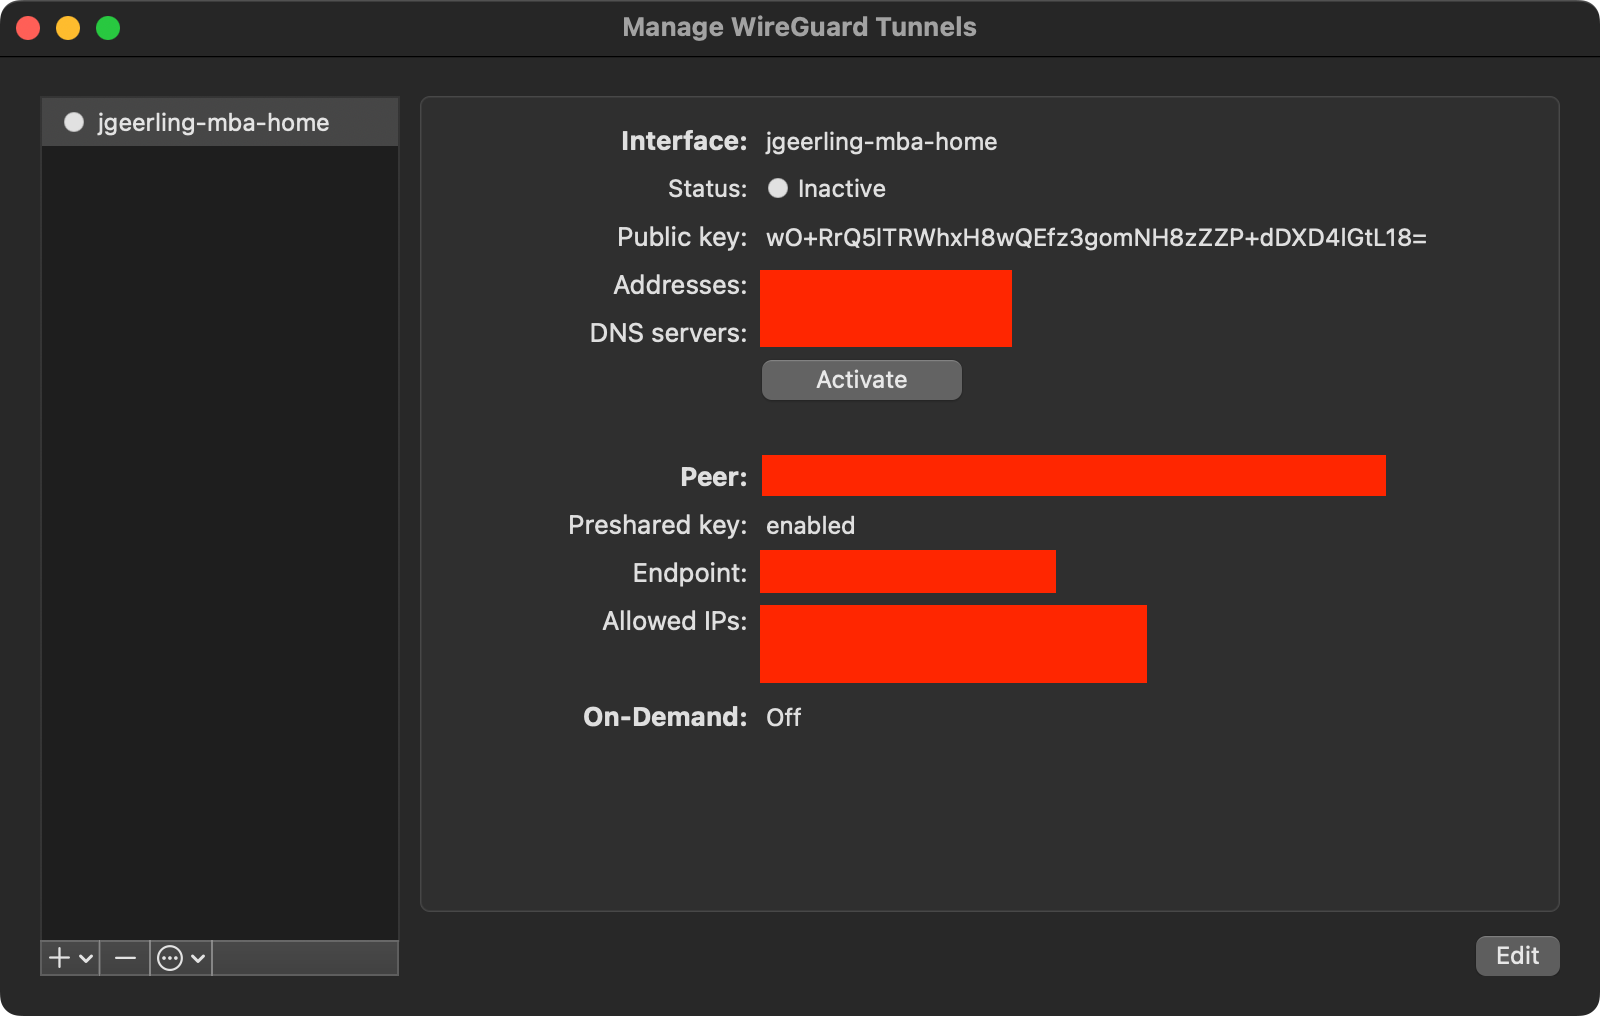
In Wireguard, I clicked "Import Tunnel(s) from File..." and chose the .conf file I copied from PiVPN.
From that point, it was a matter of testing it on an external network. I switched my MacBook Air to connect via my iPhone's hotspot, and then connected with Wireguard by clicking the 'Activate' button (you can also enable the connection from the Wireguard menu bar item).
If you are able to ping other devices on your home network, congratulations! You have successfully built your own private VPN!
Sadly, due to overhead, you'll get a little less bandwidth than if you were on the network directly. But bandwidth is adequate for my purposes, assuming I'm on a stable Internet connection.
You can test the overhead from the VPN connecting while you're on your home LAN. Try this, and run a speed test on https://speed.cloudflare.com, once without the VPN connected, and once connected. Compare the two speeds and that's the overhead of the VPN connection.
On my LAN, the download speed goes from around 600 Mbps to 237 Mbps, but upload remains close to the measly 35 Mbps Spectrum gives me.
And connected through my iPhone on AT&T over a pretty poor signal (2/4 bars), I can get 32 Mbps down and 4 up through the VPN—not too bad! That's a little under line speed on the iPhone through AT&T directly, but it's workable, and has saved me a few times when I needed to grab something from the LAN remotely!
Connecting from my iPhone
It's also convenient to be able to browse my NAS or access my servers from my iPhone directly, and Wireguard has apps for both Android and iOS to make the connection easy.
To set up a new mobile VPN connection:
- Make sure the Wireguard app is installed on your phone
- Create a new client for your phone (like
username-iphone-id) withpivpn add - Run
pivpn -qrto display a QR code in the terminal:
$ pivpn -qr
::  Client list  ::
1) jgeerling-mba-home
2) jgeerling-iphone-home
Please enter the Index/Name of the Client to show: 2
::: Showing client jgeerling-iphone-home below
=====================================================================
[QR CODE WILL DISPLAY HERE]
In the phone app, add a new VPN connection and scan the QR code. Name it the same as you named the client in PiVPN, and it should work! You can test by disabling WiFi on your phone and connecting to the VPN.
If it's working, visiting a site like icanhazip.com should show you your home IP address, not the IP address of your mobile phone carrier.
Troubleshooting PiVPN
If you have any issues, the first thing to do is run pivpn -d, which outputs a bunch of debug information, and runs some self-tests. If everything checks out, it could be you have DNS issues—it's almost always DNS.
Another handy command is pivpn -c, which shows a list of all clients and their last connection times, with data transfer stats.
Backing up your VPN configuration
It's a good idea to back up your VPN configuration, in case PiVPN ever nukes itself. Run pivpn backup, and that will generate a backup tarball inside ~/pivpnbackup. Copy that off to a safe place, and a full restore will be as simple as restoring all the files to the proper location on a fresh install of PiVPN.
Dealing with Dynamic DNS
My ISP doesn't provide a static IP address for my home, so I have to deal with the fact that the public IP changes sometimes. And it's weird, sometimes it changes a couple times a day, other times once a month. As luck would have it, my IP changed literally minutes after I first set up PiVPN, which threw me for a loop as I thought it was irrevocably broken!
The problem is, whenever my home's public IP address changes, I have to make sure the DNS A record for pivpn-subdomain.example.com is updated in my domain registrar account. And that's not as simple as you'd hope.
The common way of dealing with this 'Dynamic DNS' or DDNS problem is to use a DDNS service like DynDNS or No-IP. These require a service running on your router or a device on the network that periodically updates their server with your home IP.
In my case, since I'm a little guarded and don't like pushing my IP address anywhere out of my control, I publish my IP address to one of my webservers running on DigitalOcean, to a file where I can retrieve it should the IP change and my VPN connection fails.
I have a custom shell script set up for that, running on one of my Pis, but I haven't had time to clean it up and put it in one of my public Git repos. I'll do that... someday.
But doing that could be as simple as creating a file named update-ip.sh:
#!/bin/bash
wget -O /tmp/ip.txt icanhazip.com
# Command to push this file up to one of your servers goes here.
And adding a cron job like:
*/10 * * * * /usr/local/share/update-ip.sh
This would update your IP address every 10 minutes. Have update-ip.sh push it up to a server you can access anywhere, and bingo! You just created yourself a self-hosted DDNS service!
For bonus points, have the script only detect a change in IP addresses, and have it shoot you an email or ping you via [Slack|Discord|SMS|Signal|Telegram|Email|IRC|Skype|whatever the cool chat app of the day is], only when it changes!
Dealing with CGNAT
If your ISP uses CGNAT (Carrier-Grade NAT), then you will not have a publicly-reachable IP address on your home network.
Unfortunately, that limits the ability to run a private VPN, since you effectively don't have a direct gateway to the public Internet.
In this case, you can either see what it takes to get a publicly routable IP address from your ISP (sometimes business plans offer this feature), or consider using a service like Tailscale, Cloudflare Tunnel, or Twingate.
Comments
Or you can use ZeroTier if you need to deal with CGNAT. It's free for up to 25 devices and i was link all mine servers into one VPN. One of them is behind double-NAT, but can be accessible from outside.
Or Tailscale as an alternative to ZeroTier. Setup is a breeze and I still have to encounter a network topology that does not allow connectivity to a device that is behind it.
I'm using WireGuard and Pi-hole both in separate docker containers on my cloudserver. Due to this setup and both using different docker networks I can't see even in full detailed Pi-hole log-mode which devices queried which domain/host - which is very privacy-friendly and nice for my users (mainly family and friends). But I wanted to ask you if your setup also deals with this or if you can see all details in Pi-hole?
And for those that want WireGuard but much easier, there’s wg-easy: https://github.com/WeeJeWel/wg-easy
That's the best approach. Mix that with secure tunnels and you have a full fledge vpn
Good to know about pivpn.
As an on-demand VPN this works great.
Only peeve with wireguard on iPhone (incl cloudflare warp) is they are battery hogs when long-running.
Even on Android it appears the in-kernel wireguard module was added in Android 12.
Unclear if this has made it to the VPN protocol options on Android settings.
Really? I used to use Tailscale and it was a massive battery hog and I mean MASSIVE. I switched to Wireguard, with the on demand access feature turned on and it sips battery.
Jeff, this is great, thank you. I want to set up something similar so I can support my parents, who live far away. I basically want to give them a Pi to plug into their network, which creates a persistent site-to-site VPN with a Pi on my network. Any advice?
interesting article. my broadband is over mobile, so no static ip. I used to have a vpn which provided a static ip and allowed port forwarding so I could host some web sites and email locally, but the vpn stopped working, and I can't find another vpn provider that offers static ip and ability for port forwarding. I do have a vps with a couple of static ip's so thought I could set up my own vpn host on it to provide my lan router (which has vpn client capablilty) a public static ip. Any chance of a video on how to do that for all us people stuck with mobile broadband, a "home lab" and a public vps? Thanks for all the videos, they are informative and interesting, and opensourcing the projects is nice.
If your ISP uses CGNAT (Carrier-Grade NAT), then you can use IPv6 to have a publicly-reachable IP address on your home network.
Sadly, not all ISPs assign IPv6 addresses either, yet :(
My mobile provider here in Australia doesn’t yet provide IPv6 yet either.
I have been using pivpn for over a year now and it's great. I can get my ad blocking while on my phone 5g. Also I can encrypt my connection on public WiFi. My router has a built in dynDNS feature that gives my IP a url with an SSL cert, so it's not an issue for me.
Hello.
Would you know why https://icanhazip.com displays my IP v6 in one browser (Opera), but the IP v4 address in other (Firefox) ?
Cheers.
Hello Jeff,
I just wanted to add a little quick fix/workaround if anyone uses PiVPN in a Raspberry Pi together with Docker and Traefik (and maybe any other reverse proxy). When both installed on the same Pi there is a conflict with the networking resulting in Traefik not working.
My workaround was to edit the PiVPN .service file (/lib/systemd/system/[email protected]) to start after the Docker service has started (docker.socket docker.service) like this:
After=network-online.target nss-lookup.target docker.socket docker.service
With this workaround everytime the Pi is rebooted both services will work as expected.
Hope it is useful for anyone.