In the world of radio and professional podcasting, there are fewer than a dozen 'go-to' microphones. Each of the classics (e.g. the Shure SM7B, the Neumann U87, or the EV RE20) has it's own advantages and a few marquee users, but one mic seems to rule the roost when it comes to versatility and ability to color almost any voice with the 'talk show' sound, and that's the EV RE20.
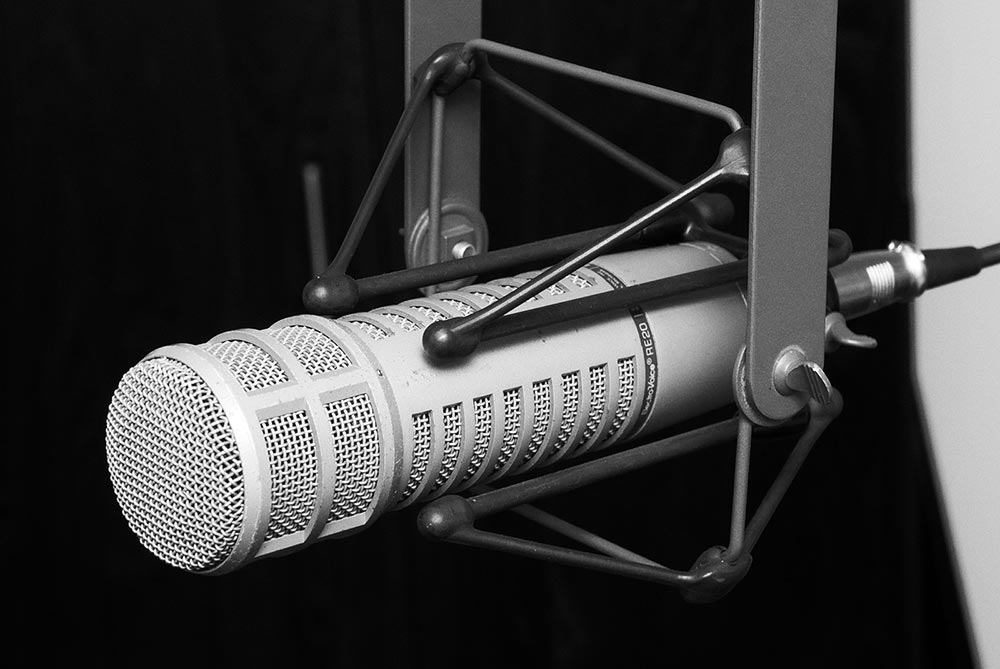
The RE20 mounted in the 309A shockmount.
The RE20 is a dynamic mic, so you can shout at it without clipping, it's a hefty metal mic, so you can bang it up a bit without too much ill effect, and it has a neat 'Variable D' feature that allows you to talk straight on or at an angle without affecting the quality of your voice too much (other mics need a lot more practice in controlling distance and direction).
I've often wanted one of my own, but couldn't justify the half-a-grand price tag. Luckily, however, I know a few people in radio (RE20s are about as common in radio studios as Toyota Camrys are on the road!), and it seems most radio engineers have a box full of crusty old RE20s that have been dropped, popped, or shaken one too many times. I did some research, and found the most common issue with older mics was that the foam deteriorated to the point where the mic capsule would be freely rattling around inside the body of the mic, and as long as the circuits were good and the voice coil intact, you could restore it to like-new condition with about $30 worth of foam!
So I took a few of the worst-of-the-worst—the ones with 30+ years of abuse from a variety of AM and FM radio announcers—and set about trying to clean, refurbish, and re-foam them. Since there aren't any other comprehensive guides on the Internet on the procedure, I thought I'd document it here, once and for all.
Note that Electro-Voice used to offer a rebuild-and-refoam service for about $75, shipping included. I called EV before starting this project to see what they offer, and apparently the price is now $230 (plus tax), and an additional $75 to replace the outer casing.
This project isn't for the faint of heart, but if you have an old 'baby rattle' (as some engineers call these messy old RE20s), it might be worth the DIY effort.
Servicing the RE20
For starters, I found the RE20 Service Manual (helpfully available for download on the EV website!). I looked through all the details to make sure I knew what parts went where, and how to eventually reassemble everything (the wires need to be routed through a few different parts of the mic correctly, otherwise screwing together the parts will break the connections):
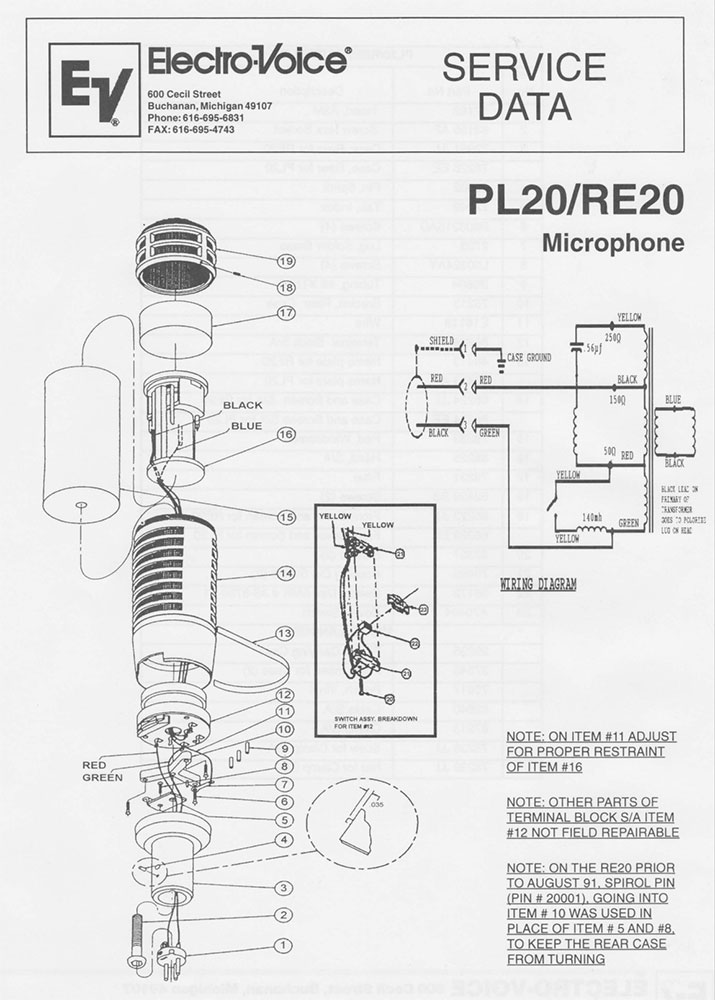
Click image above to download.
Since it was obvious that the foam was the primary issue with the mics I had been entrusted, I looked around online and found that I could purchase the individual foam parts direct from Full Compass, an online audio distributor (there may be other sources, but Full Compass had a decent price and was quick to ship):
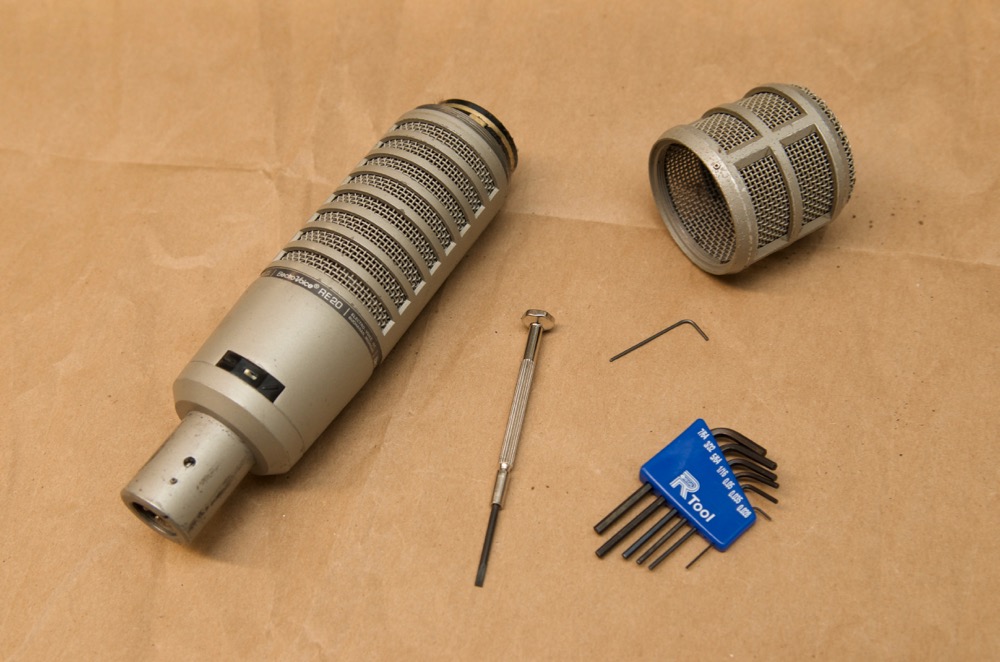
I ordered the foam and waited a few days for the shipment. While I was waiting, I realized the head of the mic was retained by a very tiny hex screw... which I didn't have. So I made sure I also acquired all the tools that would be needed for the rebuild—most I had on hand, but check to make sure you have everything in the list below before attempting a re-foam!
Tools Required
- 0.035" hex key (note—this is way smaller than most standard size hex kits include)
- 9/64" hex key (note—I actually used a T20 Torx bit instead, as I didn't have a 9/64" hex bit)
- 1/8" flat head (slotted) screwdriver + #1 phillips screwdriver
- Needle-nose pliers
- 6" Cotton swabs (for cleaning the grill mesh and details)
- 91% Isopropyl alcohol (for cleaning)
- Soldering iron (or a nice fancy temperature-controlled soldering station
- (Optional) Solder wick
Other than these supplies, you should probably prepare a work surface and make sure you have something laid on top of it to collect all the icky foam bits that will drop out of the microphone (some dried out, some gooey) during the course of the teardown.
Step-by-Step Pictoral Guide
There's a tiny 0.035" hex screw in the head of the microphone. You need to back this out at least a few turns (but don't need to pull out the screw all the way!).
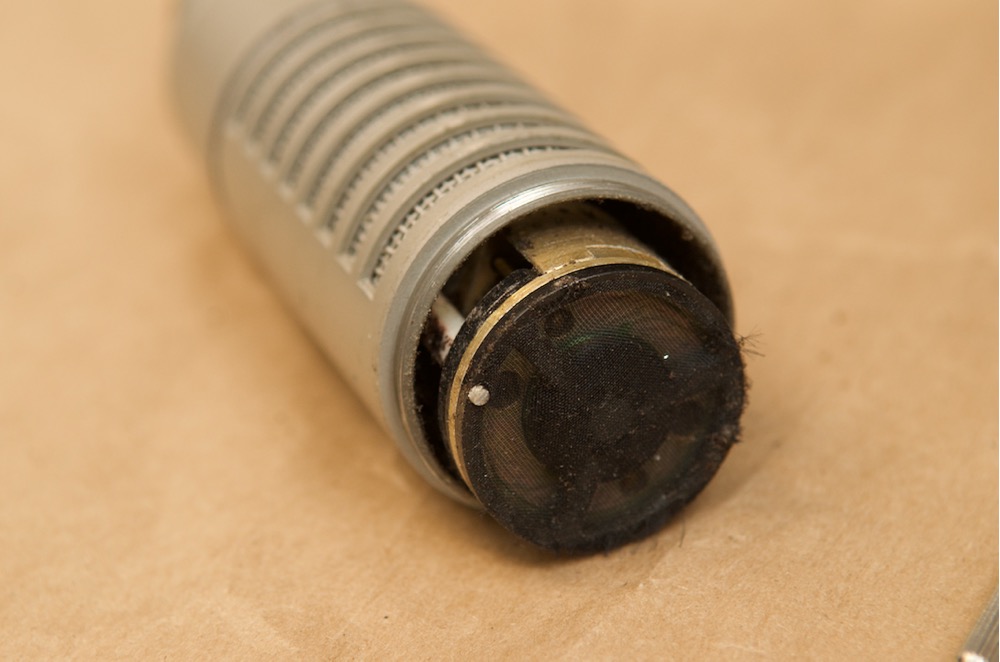
Unscrew the head of the microphone by hand; you'll find the foam pop filter inside (unless it's completely disintegrated!, and once the head is off, you should also see the front of the mic capsule. Don't be alarmed if there's a bit of foam that falls out as well!
Note: Be careful not to touch the front of the mic capsule; even when cleaning, be gentle in that area—the voice coil is exposed under a fine mesh filter, and you can even see (if you look closely) the finely-wound copper wire that picks up your voice. If it gets damaged, the mic capsule is toast, and you'll have a pretty dull-sounding paperweight. Only touch the mic capsule on the sides, never the top.
Now we need to get to work on the bottom of the mic. First, you need to unscrew the reverse-threaded screw holding the female XLR connector in place. Loosen it ('lefty loosey'), but realize that loosening it will actually sink the screw deeper into the mic body. I used a 1/8" flat precision screwdriver, along with needle-nose pliers around the barrel of the screwdriver to give a little extra torque.
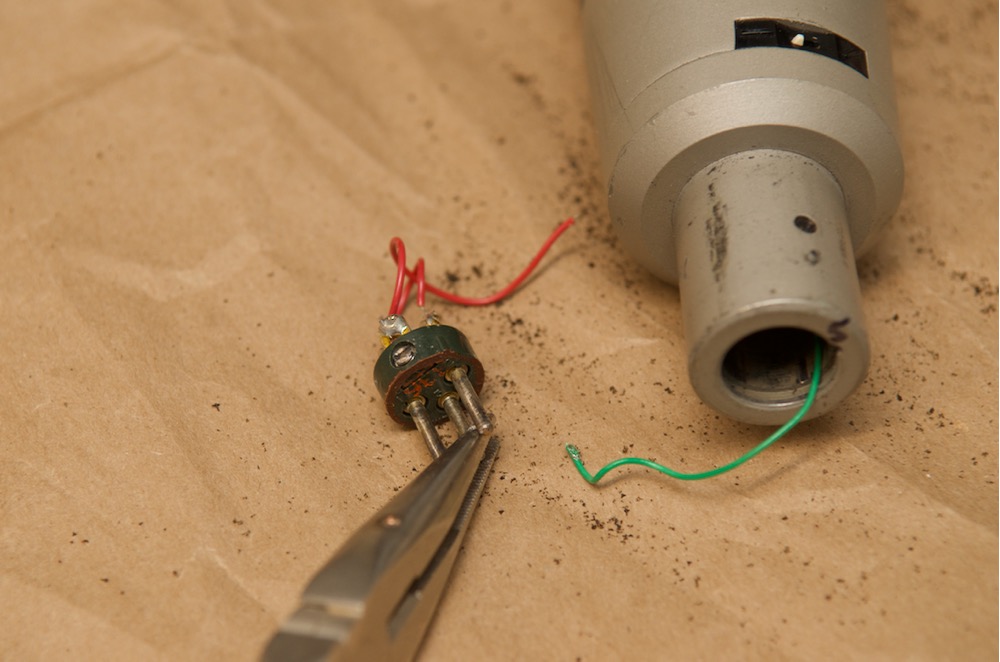
After making sure the retaining screw is sunk in all the way, you need to slide out the female XLR connector. This is probably the most nerve-wracking portion of the mic rebuild, because on most RE20s, the connector is fixed in place with a little paste (colored red on my mic), which could be brittle, sealing the connector in the end. I had to use needle nose pliers, and work the connector back and forth a bit to get it to break loose. There's a good chance, if you're using a lot of force, that you'll end up breaking one of the leads on the inside. Don't worry—you'll have to do some soldering later anyways!
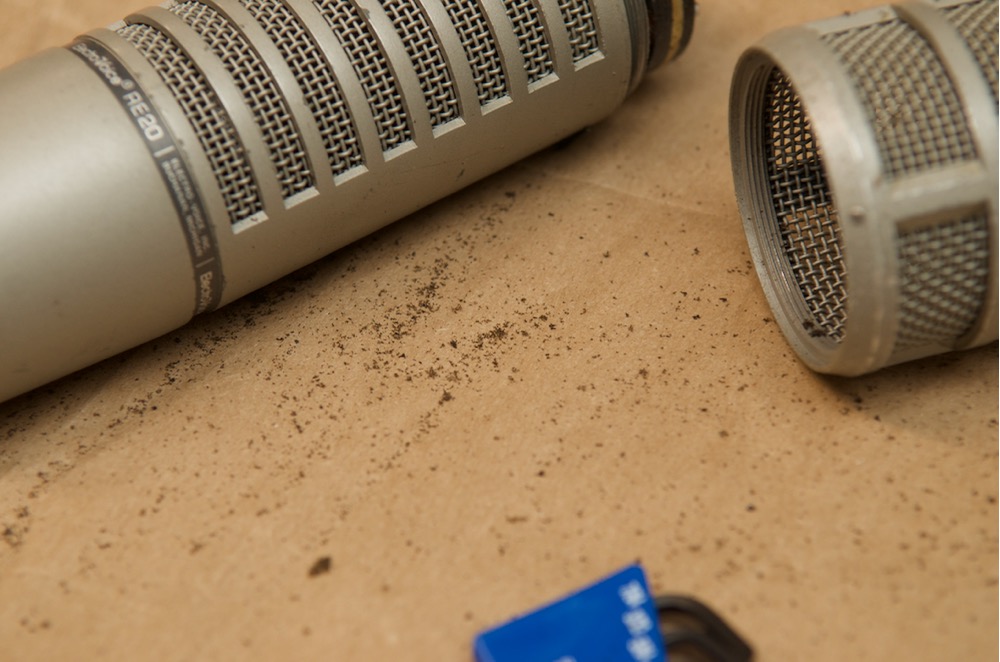
You'll probably start accumulating a good deal of disgusting disintegrated foam dust at this point—I kept tossing out sheets of packing paper that I was using to cover my work surface throughout the rebuild. This stuff is even nastier than regular old foam because you know it contains the spittle and DNA of all the talent who used it over the years!
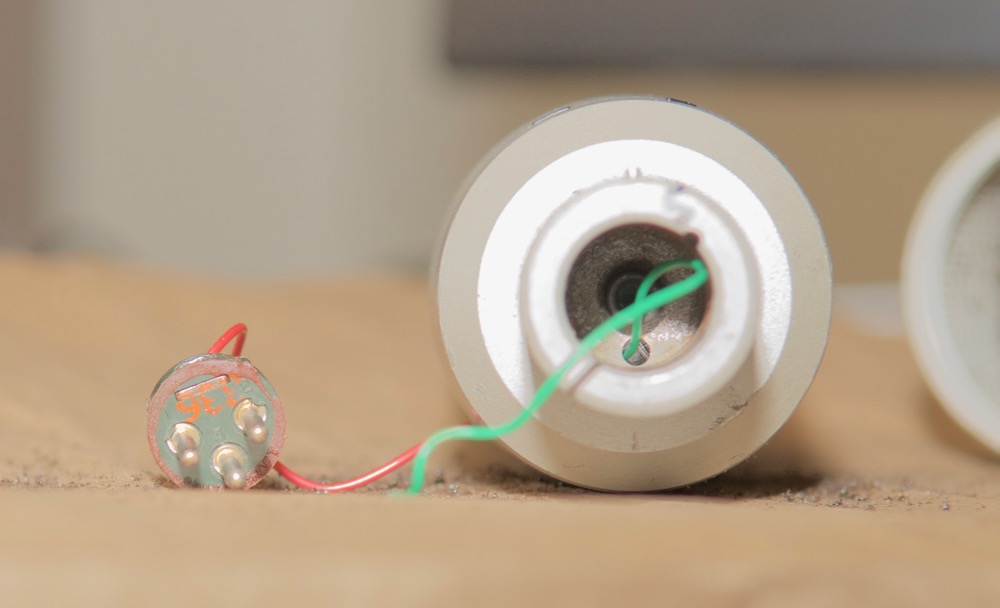
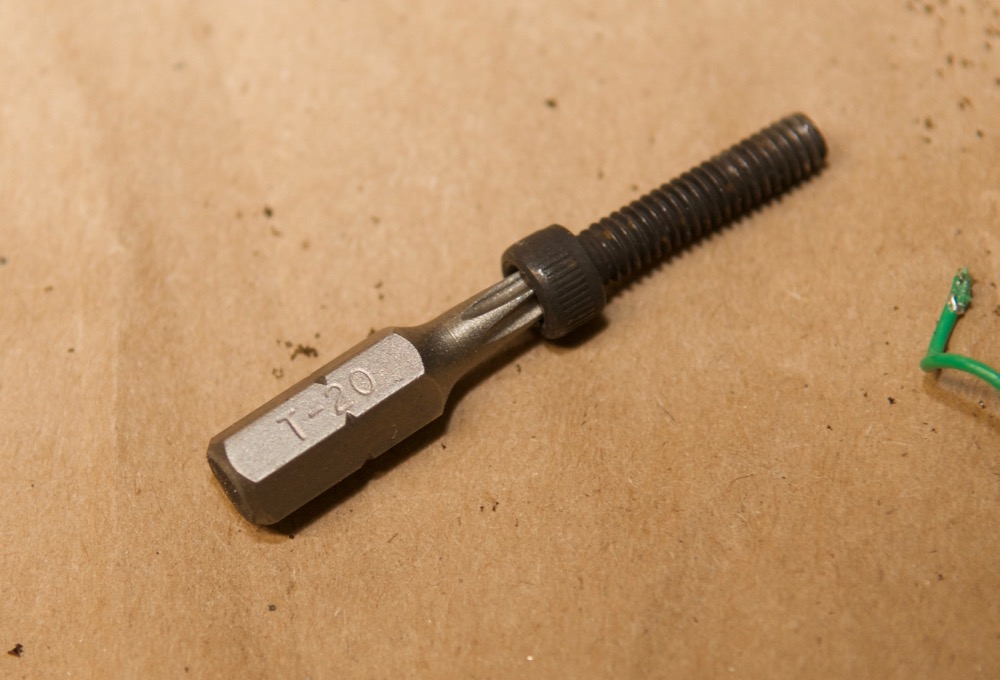
Use an 9/64" hex key (I ended up using a T20 torx bit because I'm missing my 9/64" hex key!) to unscrew the screw retaining the bottom end of the mic. Use a flashlight to find it—it's pretty dark inside the end of the mic!
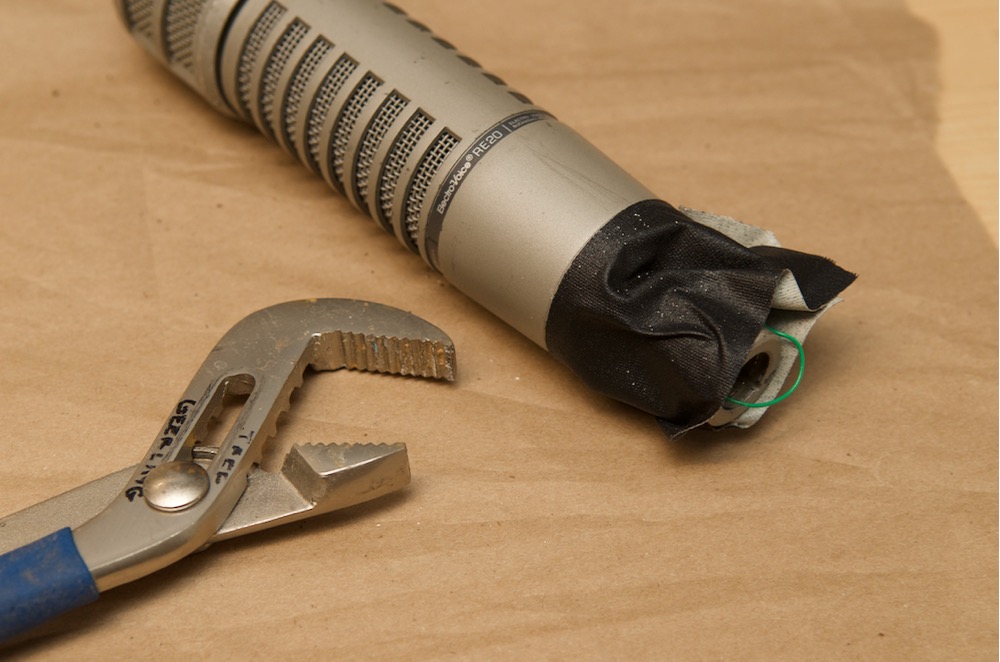
Carefully pull off the bottom part of the mic. Since mine was on tight, I tried breaking it loose with my plumbing pliers...
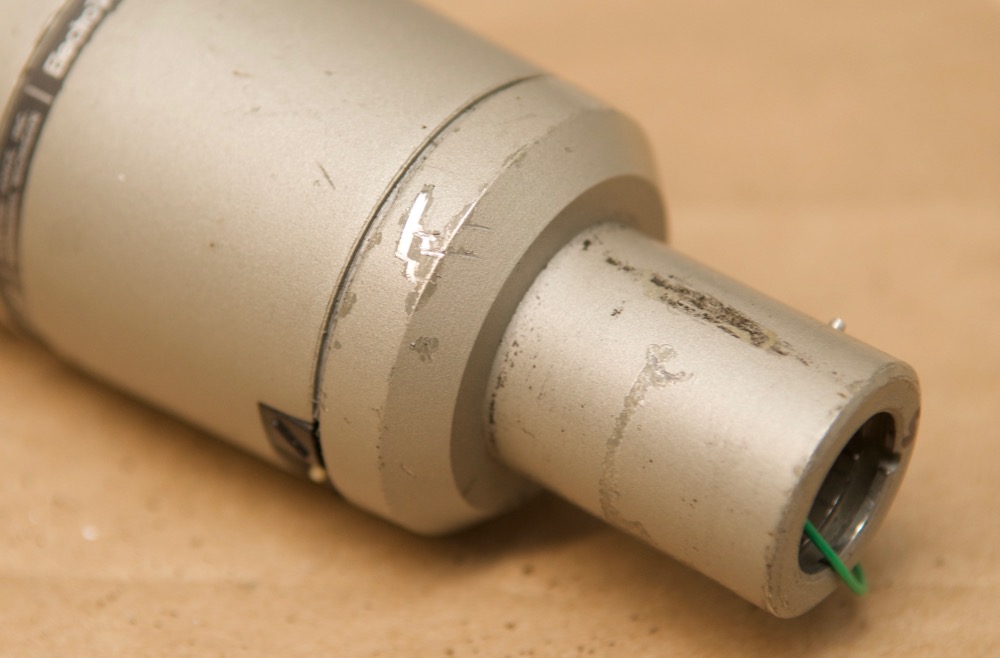
...and ended up stripping a little of the finish off in the process! Ah well, adds to the patina.
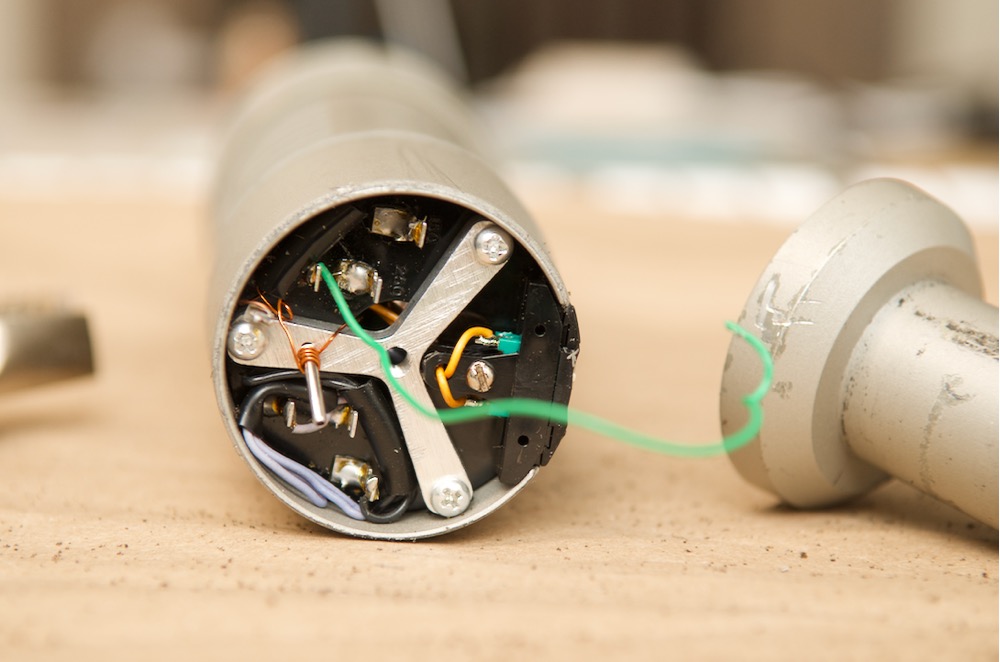
Next up, there are three phillips screws retaining the plastic mic circuit assembly. Unscrew the screws with a #1 Phillips-head screwdriver, then unwind the copper ground wire from the post that's integrated into this tri-wing metal piece. This metal adapter is basically a bridge that allows the bottom retaining hex bolt to hold firmly against the rest of the mic.
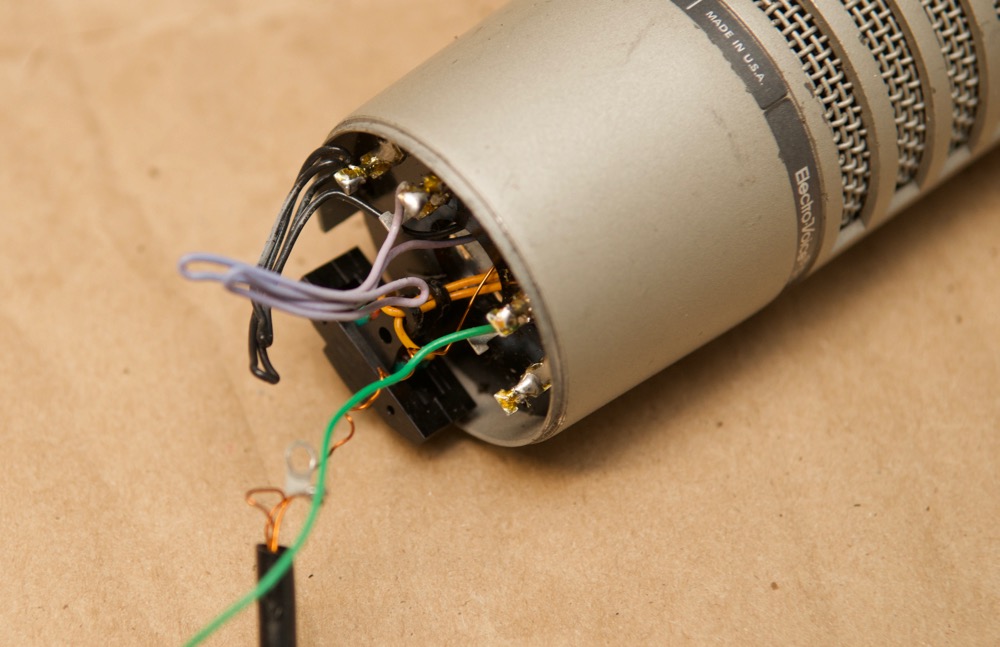
After the metal retaining clip is out of the way, you need to slide off the (hopefully) loose heat shrink wrapping the purple and black wires, and make sure the copper ground wire is also free. These wires need to be able to extend into the body of the mic as they're connected to the capsule—which will need to slide out the other end of the mic body soon!
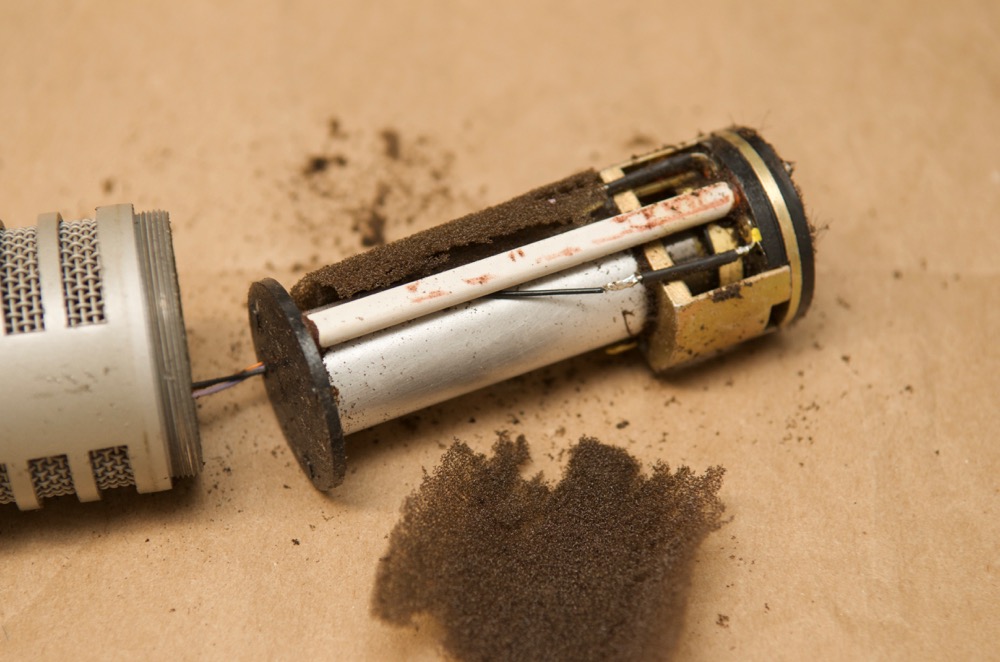
Now that the wires are free, carefully (and slowly) slide the large mic capsule out the other end of the body of the mic. You'll need to pull a little, then feed the three wires (copper, purple, black) through the little hole in the plastic circuit housing, then pull more, then feed, etc. until the mic capsule is free from the body casing.
This is the step where it's apparent just how badly the foam has decayed. Compare the few bits of foam here to the new foam sleeve later in this post—the old stuff is nasty, and almost completely deteriorated! In the future, it is probably a good idea to re-foam the mic every 5 or 10 years at the most. Or just use it 'till it rattles again then throw it away!
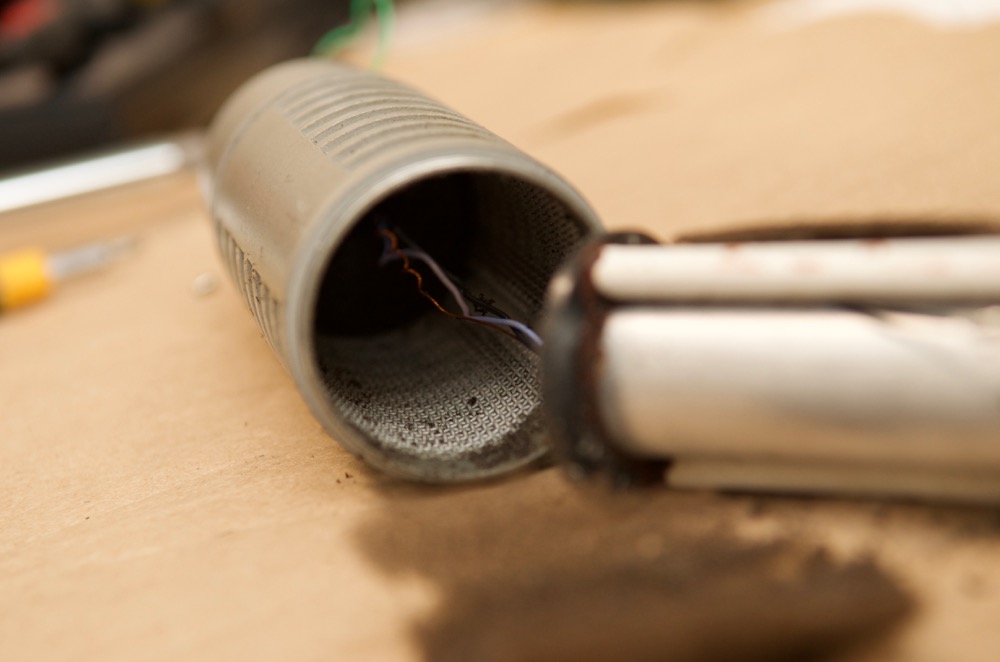
If you look down the now-empty mic barrel, you'll see the three little wires exit through a nasty foam-encrusted hole in the plastic circuit housing.
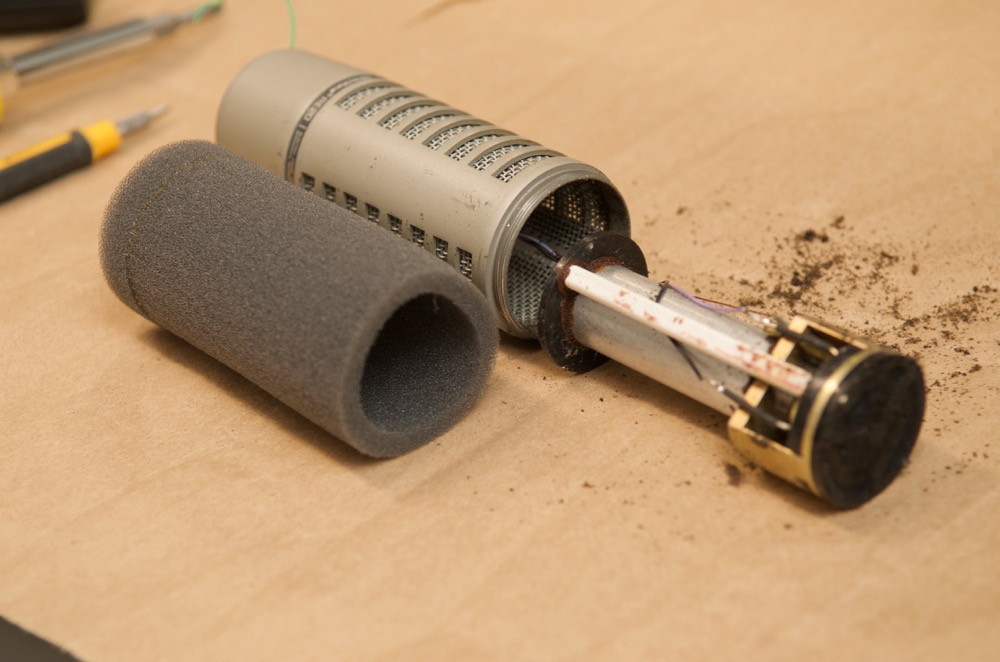
Here's a picture of the new foam we'll be installing later. Notice how it's not in tiny flecks of nasty gooey mess? That's how the old foam looked when the mic was new!
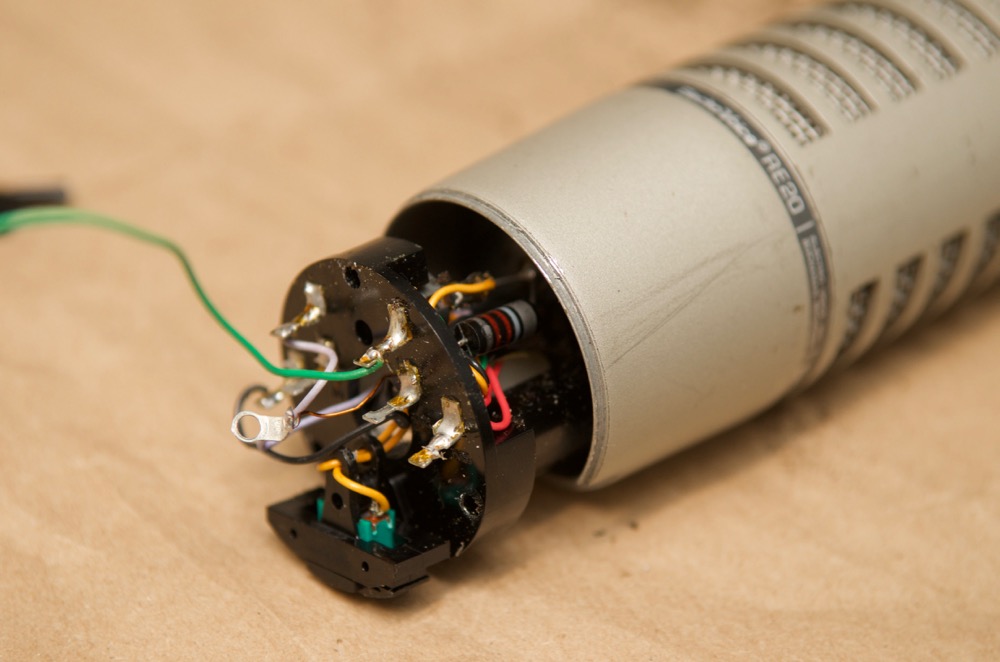
At this point, you need to unsolder the purple and black wires from the plastic circuit housing, so the mic capsule can be completely removed from the body of the mic. (If you have trouble unseating the plastic circuit housing, use patience and a tiny flat-head screwdriver to pry opposite sides until it budges—it's just a friction fit).
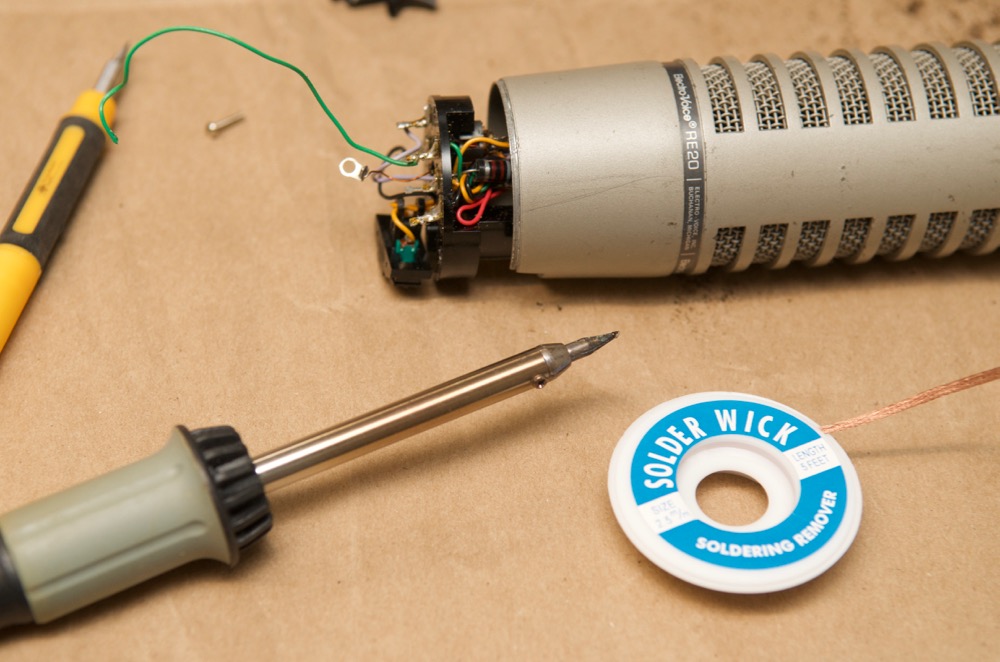
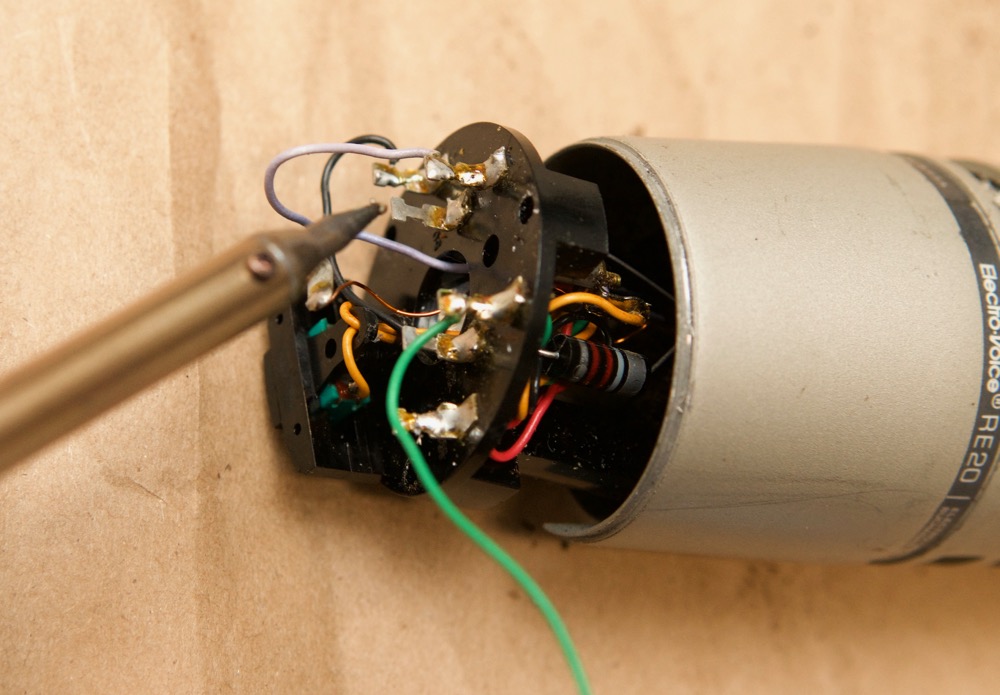
Yikes, my old Radio-Shack soldering iron makes an appearance! I usually use my nicer Weller soldering station, but I needed a quick iron to remove these bits, and was far away from my workshop when I was rebuilding this mic. Any old soldering iron will do, as long as you have a small tip. Solder wick isn't strictly required, but it's easier to wick away the old solder and then use new clean solder on the posts later.
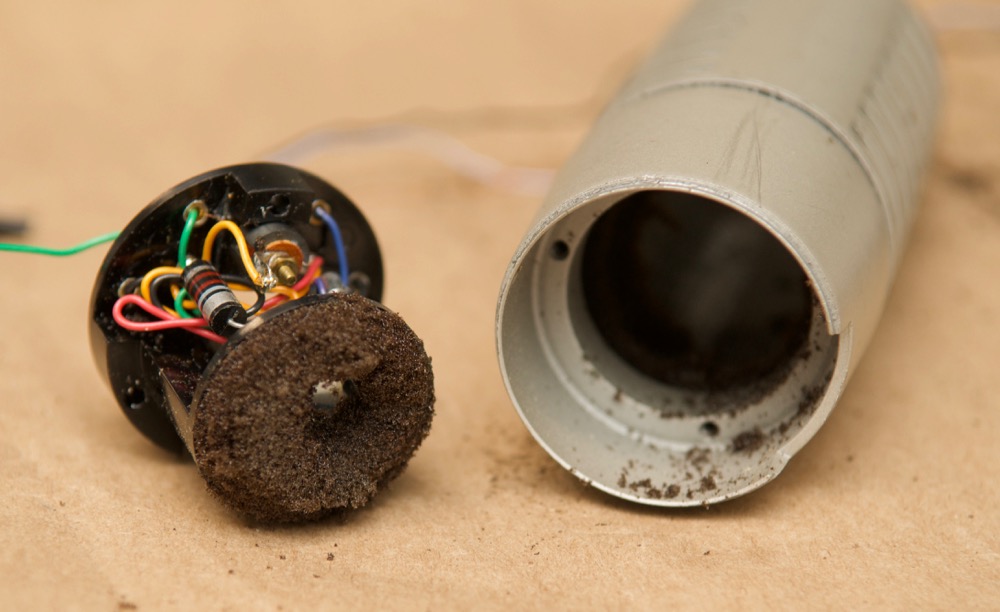
After you wiggle the wires out through the tiny hole in the circuit housing, you can pull it out, and see the full extent of the decayed foam. Some will remain permanently 'gooed' onto the plastic, even after repeated cleanings. Luckily, we'll put in some brand new foam to make sure the last remnants of goop don't fall out when you shake the mic in the future!
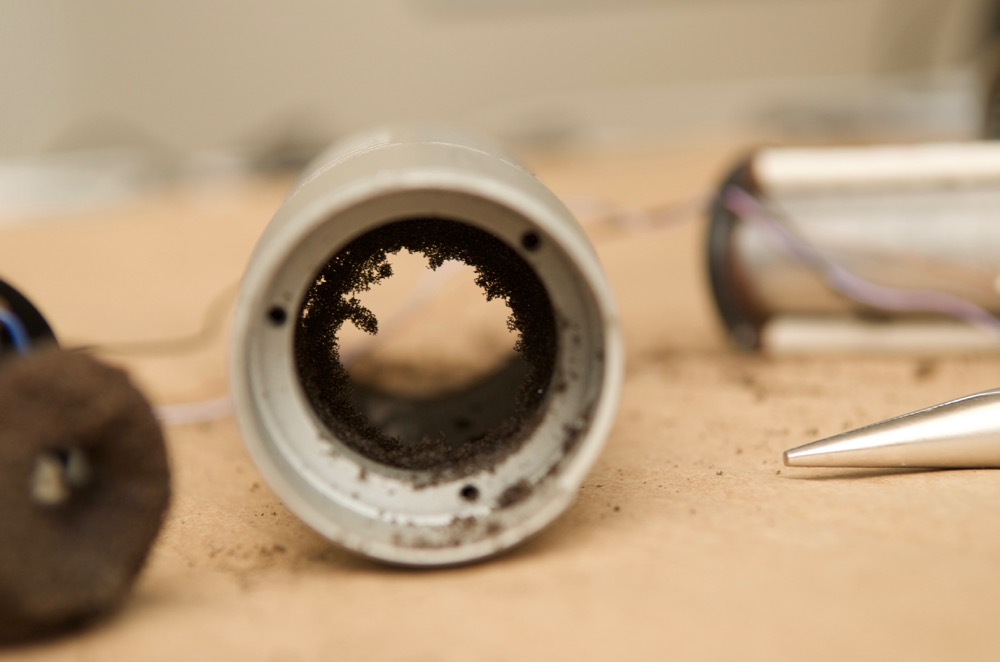
And with the mic capsule and plastic circuit housing removed, you can finally look down the empty barrel of the mic and see even more foam stuck to everything! Luckily, with everything removed, cleaning it out once and for all is finally possible.
And... IT'S CLEANUP TIME! Finally, after all this teardown, you can start rebuilding and reassembling everything.
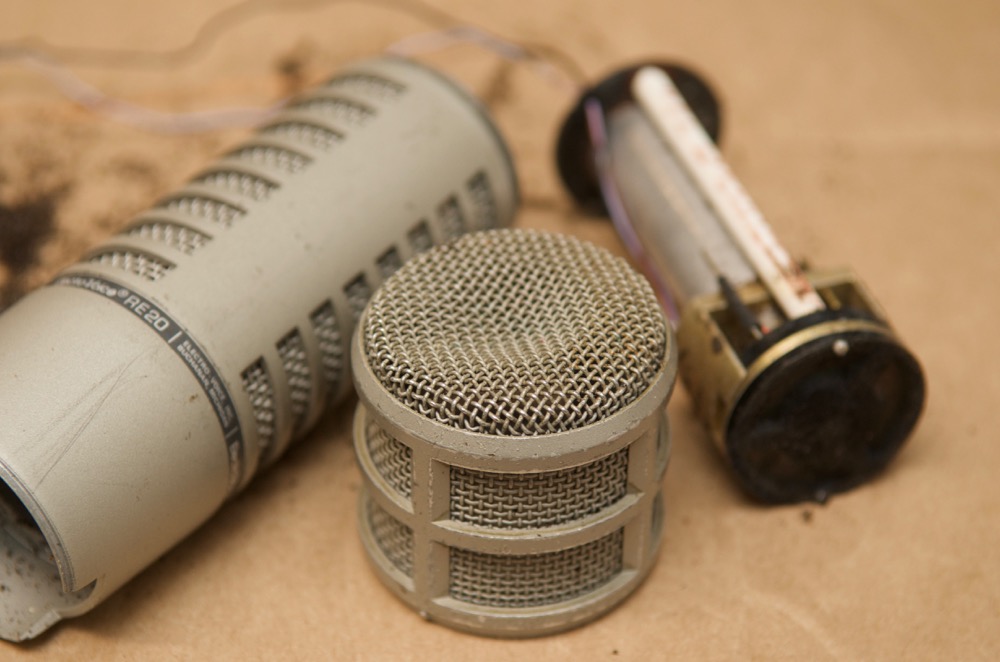
First things first, let's take care of the dent in the front mesh screen of the mic. I held it in my hand, and bashed the inside with the blunt rubber end of my screwdriver until the mesh looked pretty close to the original shape.
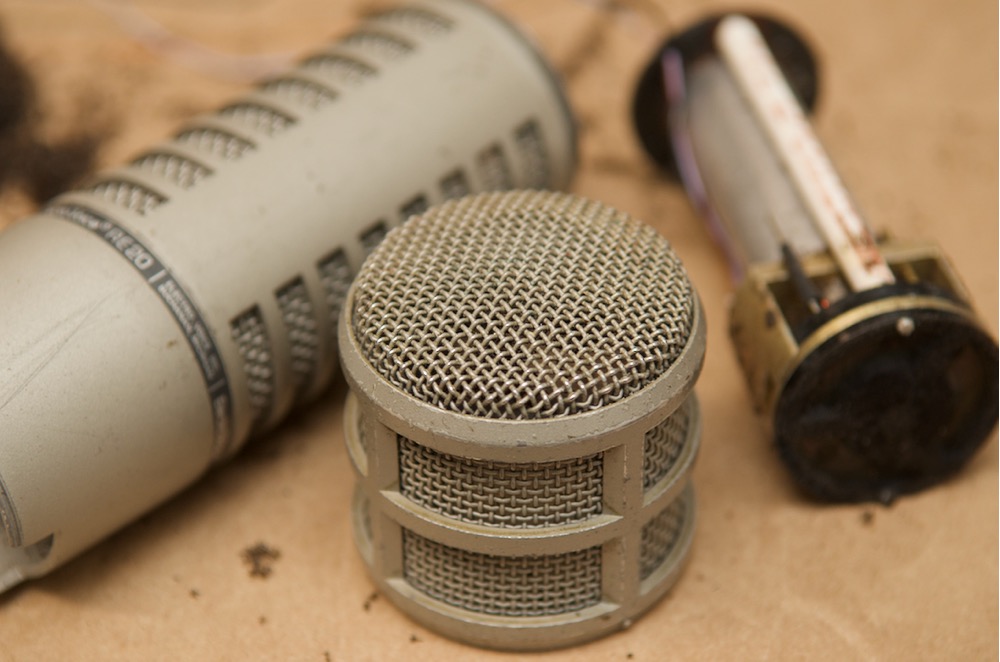
Ahh... much better!
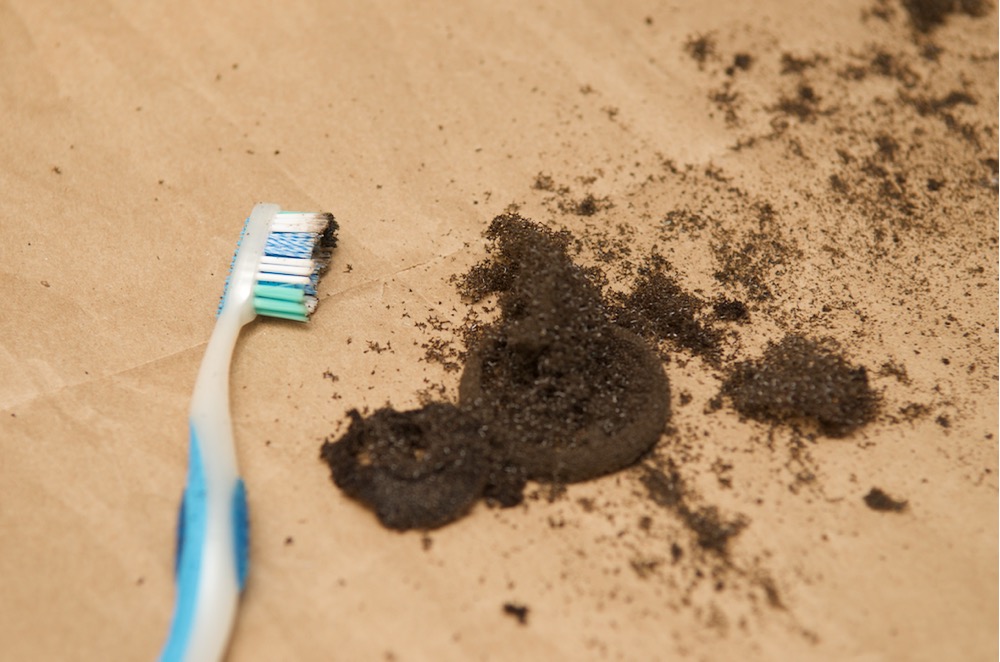
You might be forgiven for throwing up a little after cleaning the grill—this picture was taken after cleaning all the parts with just a dry toothbrush. Be very careful to not touch the head of the mic capsule, and use caution around any connections on the capsule itself!
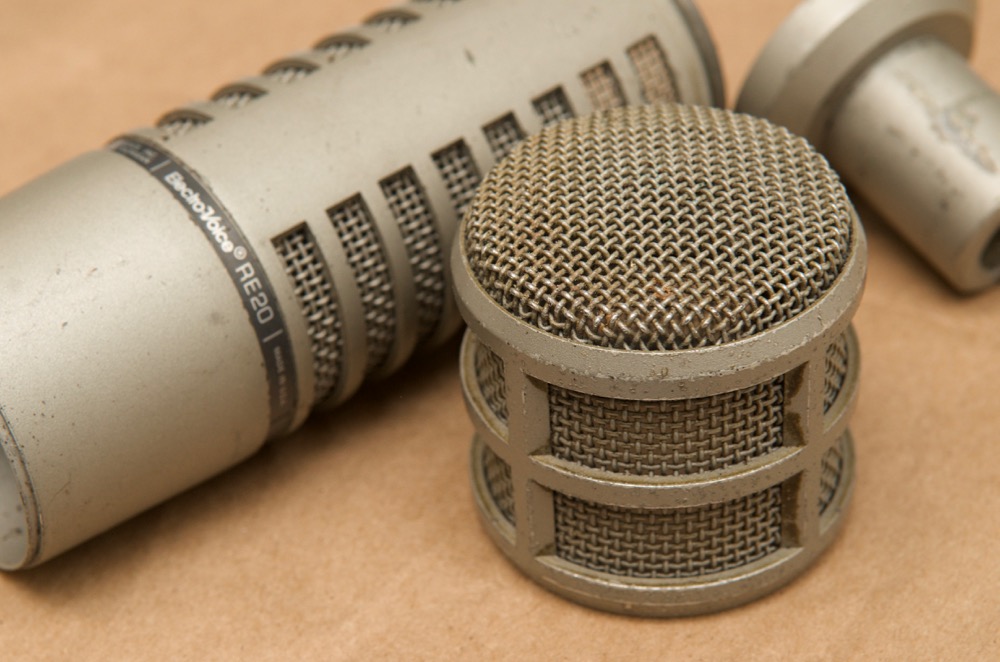
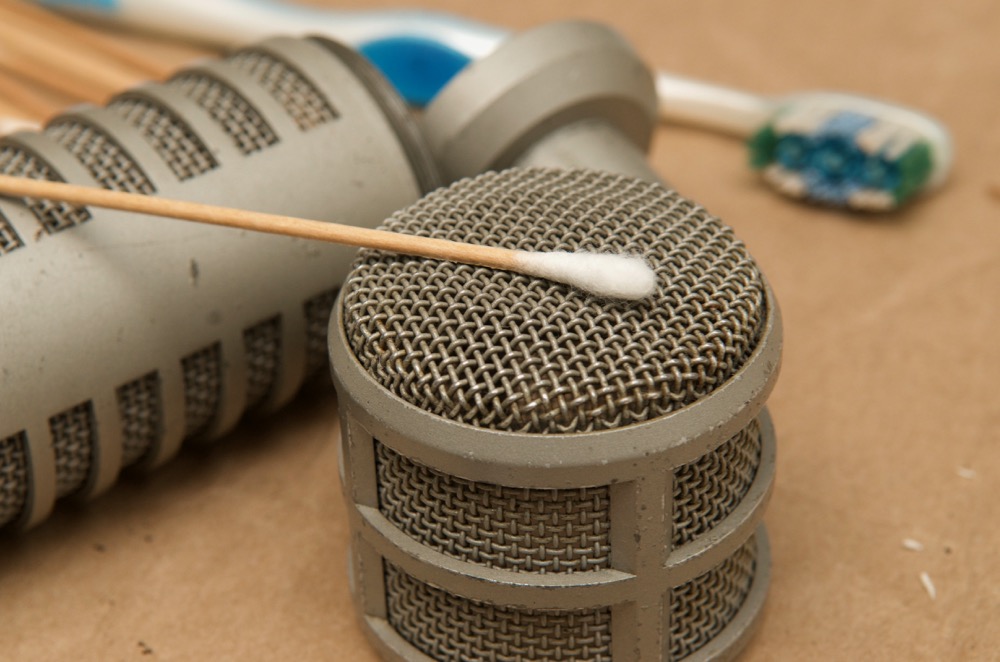
You can see what a massive difference you can make just scrubbing the mic mesh grill with a few dozen cotton swabs and rubbing alcohol does. There's at least three decades worth of grit and grime in there, and using a toothbrush doused in alcohol, as well as a ton of long cotton swabs, I was able to get it restored to something resembling metal. Patience is key here—if you want to ever touch the thing without fear of getting sick, you gotta get into every little nook and cranny.
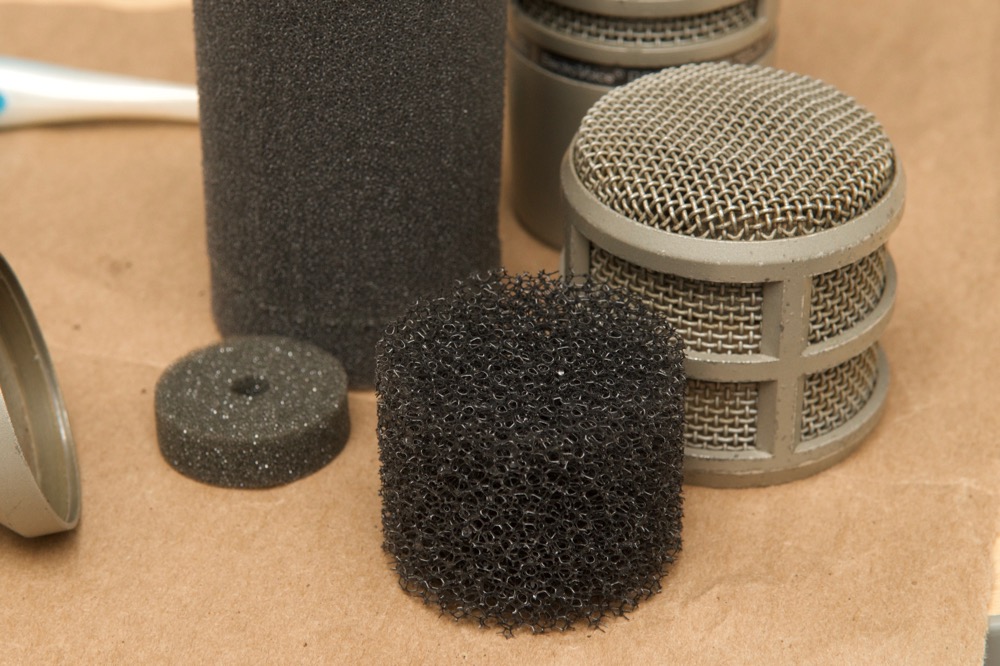
The new foam is ready to go! The internal pop filter slides into the head of the mic quite easily, but you'll need to spend a bit more time getting the rest of the foam in place.
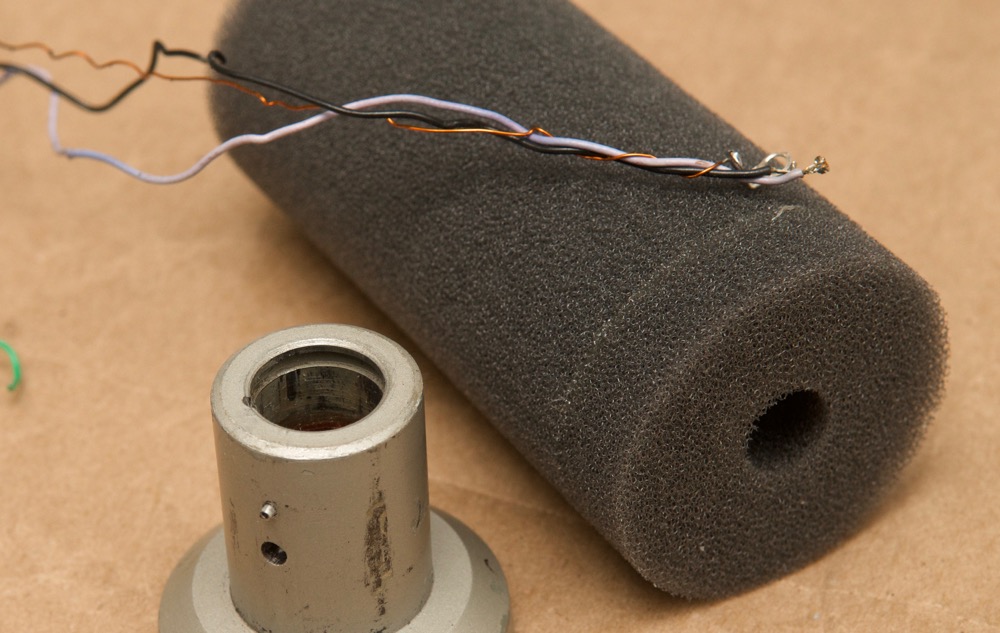
Wrap the copper ground wire around the other two wires coming from the mic capsule, and carefully work them through the little opening in the large foam sleeve, while you slide the mic capsule into the sleeve. Yet again—be careful to only touch the sides, and not the top, of the mic capsule!
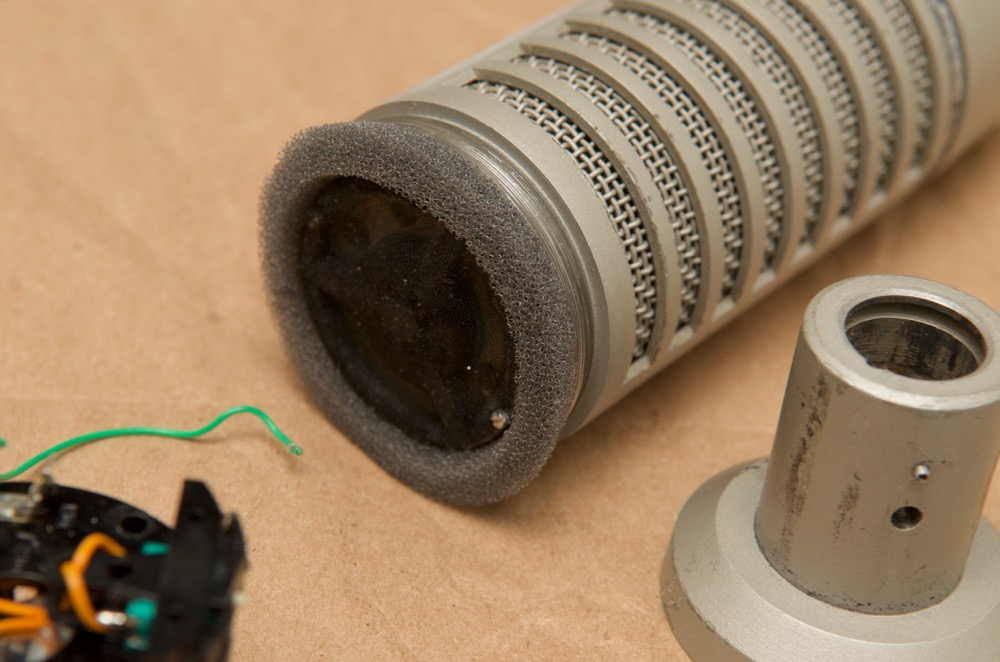
In terms of delicate operations... this one isn't. You have to slowly but slightly-forcefully squish the foam-jacketed mic capsule into the body of the mic until it's all the way in. In the end, the foam should be squishing just a tiny bit out the sides, and the capsule should stand about .5 cm above the end of the mic body.
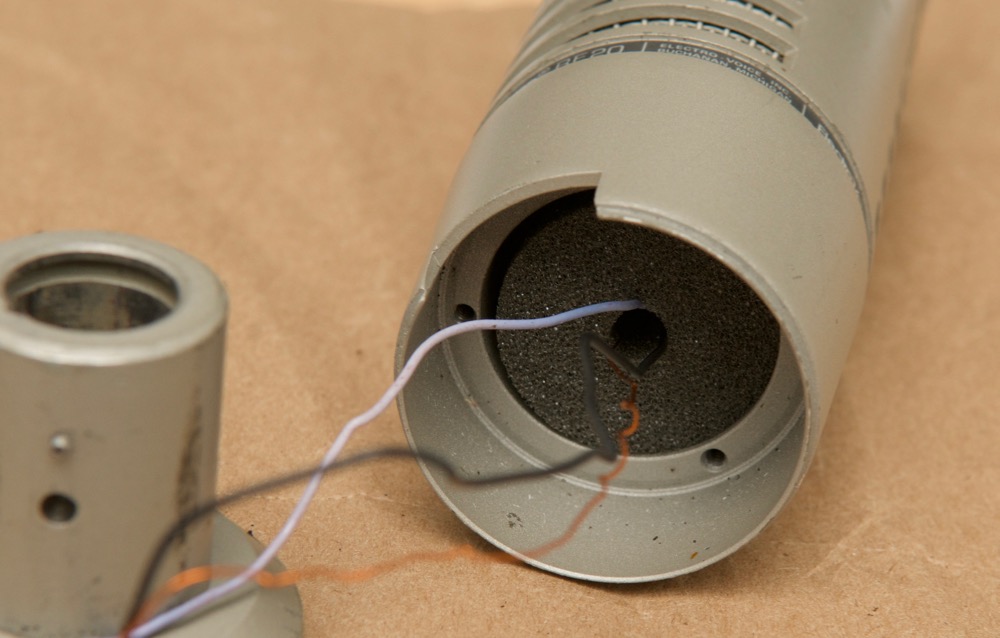
After the capsule-and-foam-sleeve assembly is seated in the body, thread the 'rear internal foam pad' over the wires into the circular opening in the body.
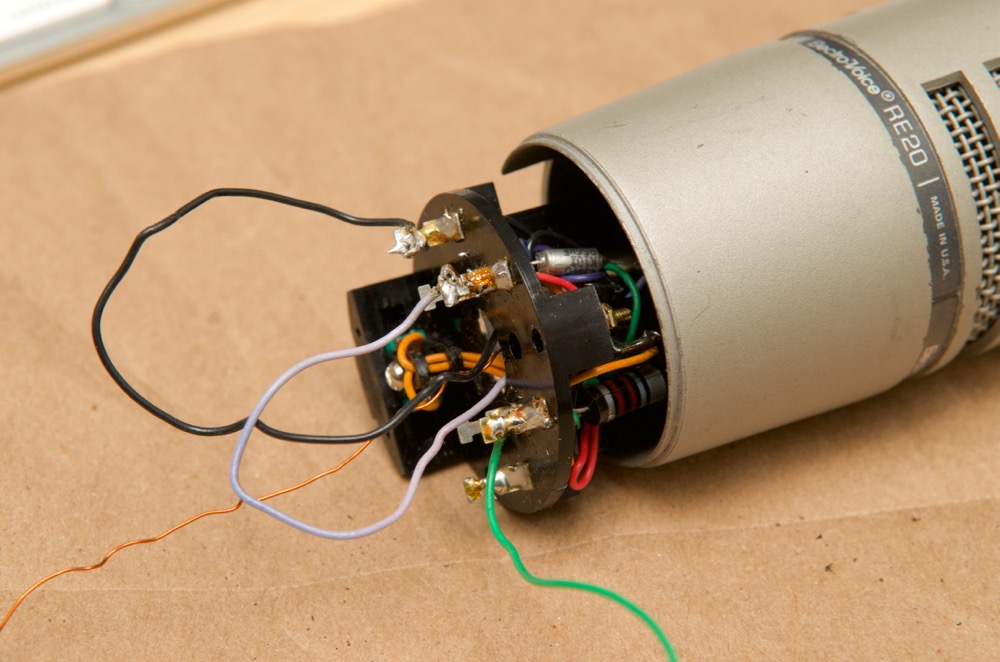
Thread the purple, black, and copper wires through the opening in the plastic circuit body. This can be tricky, so take your time and use a tiny needle-nose pliers or a tiny screwdriver to thread it through. Then, re-solder the black and purple wires to the posts where they were originally soldered. Be careful to not get the posts too hot with the soldering iron—it seems they're only held to the rest of the plastic circuit holder via solder as well, and they can pop right off!
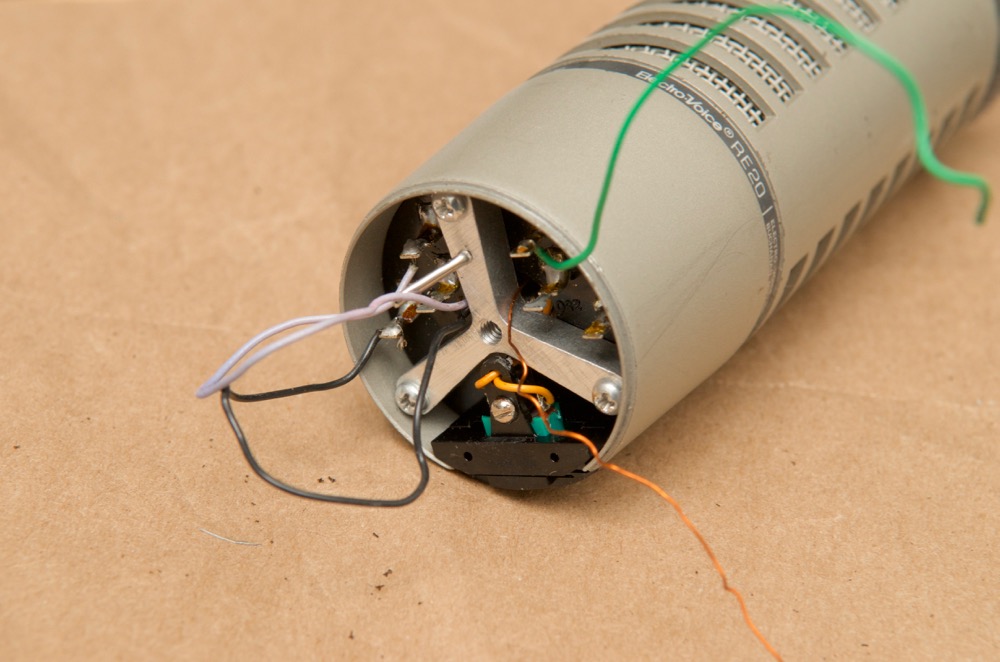
Mind the cables while you reposition the tri-wing aluminum screw plate over the plastic housing. Also, be careful when re-inserting the plastic housing in the mic body to make sure the EQ switch seats correctly in its slot. Unlike in the picture above, you should also screw one of the three machine screws through the grounding wire lead, so it's grounded with the metal adapter (like it was prior to disassembly).
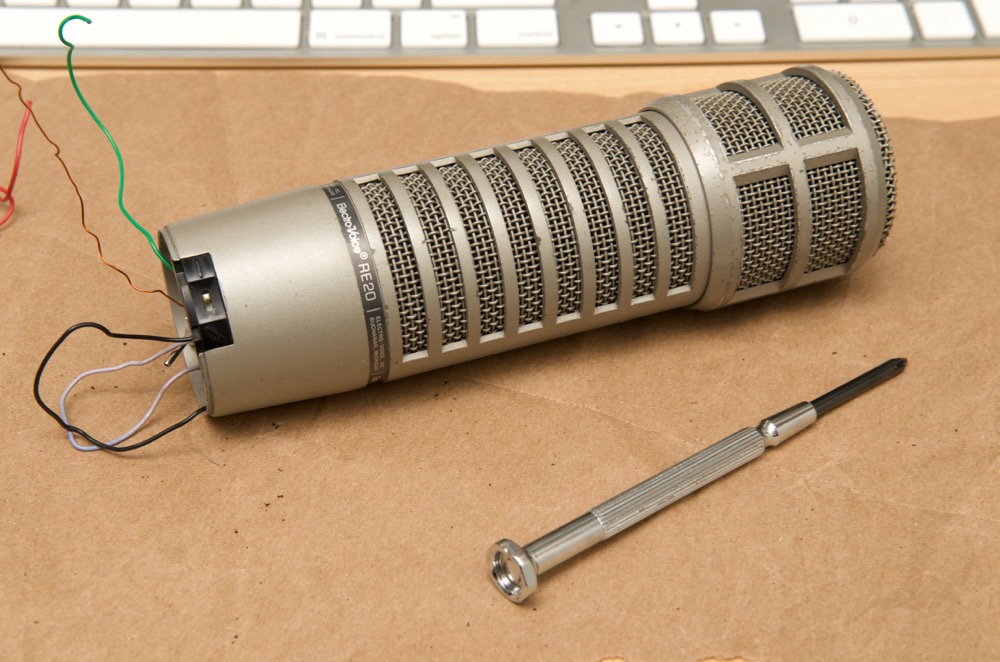
At this point, I also screwed on the head of the mic, just to provide a little extra protection to the front of the mic capsule. Even without the tail end and XLR connector, this thing is looking ten times better than before!
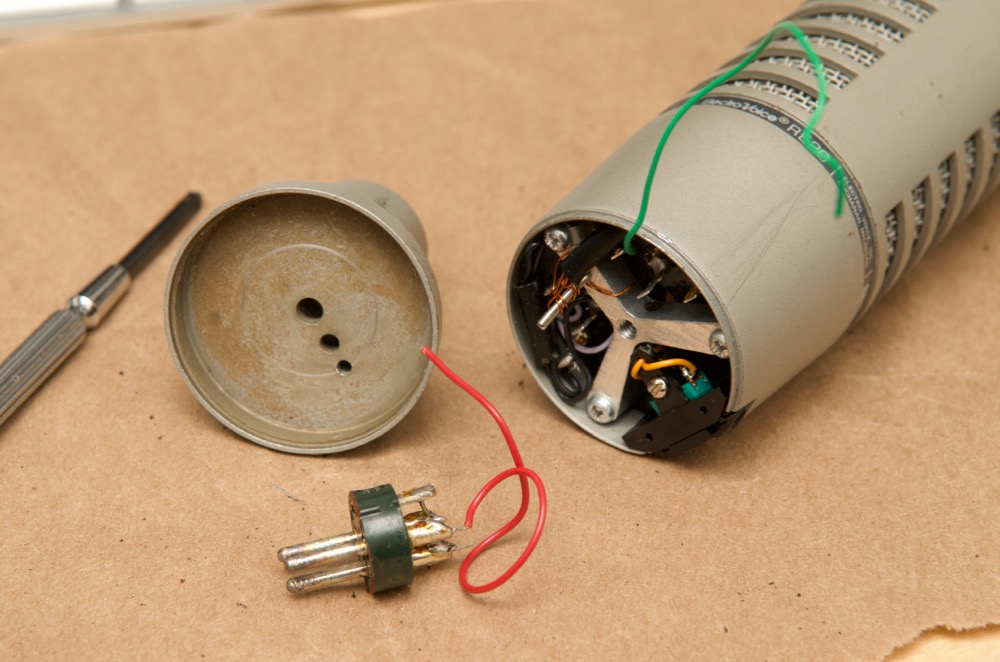
The last step is also a bit tricky, especially if you snapped a couple of connections accidentally like I did. The stranded signal wires (red and green) are something like 24 or 26 gauge, and if they're old and brittle, they'll be very hard (if not impossible) to re-strip and reuse. Therefore, in my case, I pulled out some solid wire I normally use for Raspberry Pi and Arduino projects (I didn't have any stranded available—it would be a better fit here), and cut the same lengths as the existing wire, and stripped back about 0.5 cm of insulation. I soldered the ends to the plastic circuit assembly, then carefully threaded both wires through the hole just off the center of the bottom casing (this is a bit tricky with my 22 gauge wire!), and prepared to make the final solder joint, to the female XLR connector.
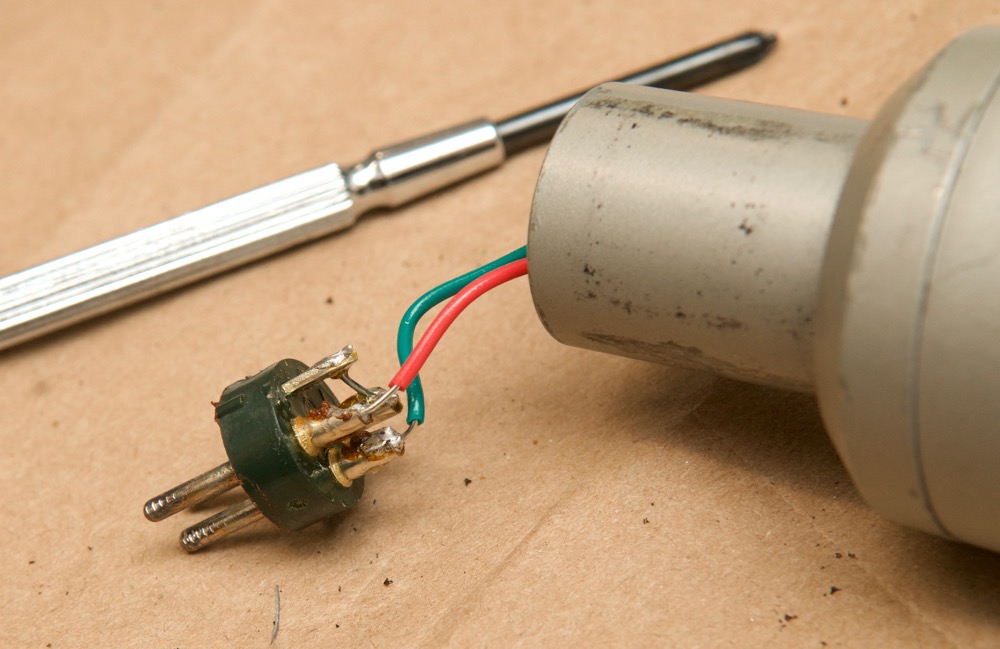
I soldered the green and red wires to the proper pins on the female XLR connector, then carefully re-inserted it in the proper orientation into the barrel of the end of the mic (it only fits one way, orienting the key on the connector towards the index inside the barrel).
Push in the connector until you can see the flat-head screw through the hole in the side, then 'tighten' the screw (this will back out the reverse-threaded screw so the connector is fixed in place). Finally...
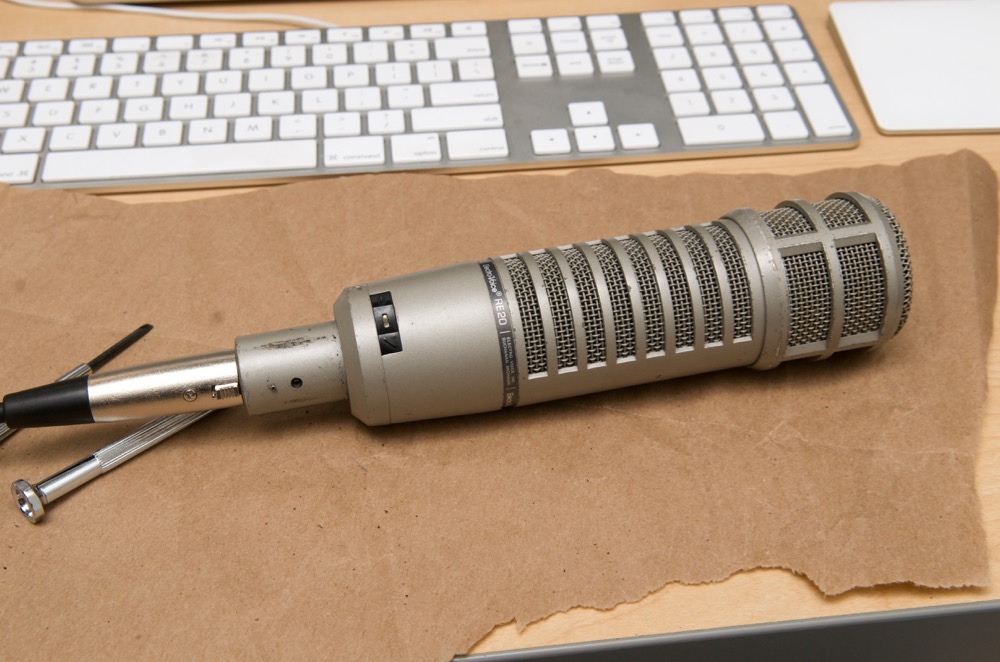
SUCCESS! In this picture, the RE20 is plugged into my computer via a Behringer U-Phoria UMC202HD USB audio interface, and I tested it by recording samples into Sound Studio on my Mac:
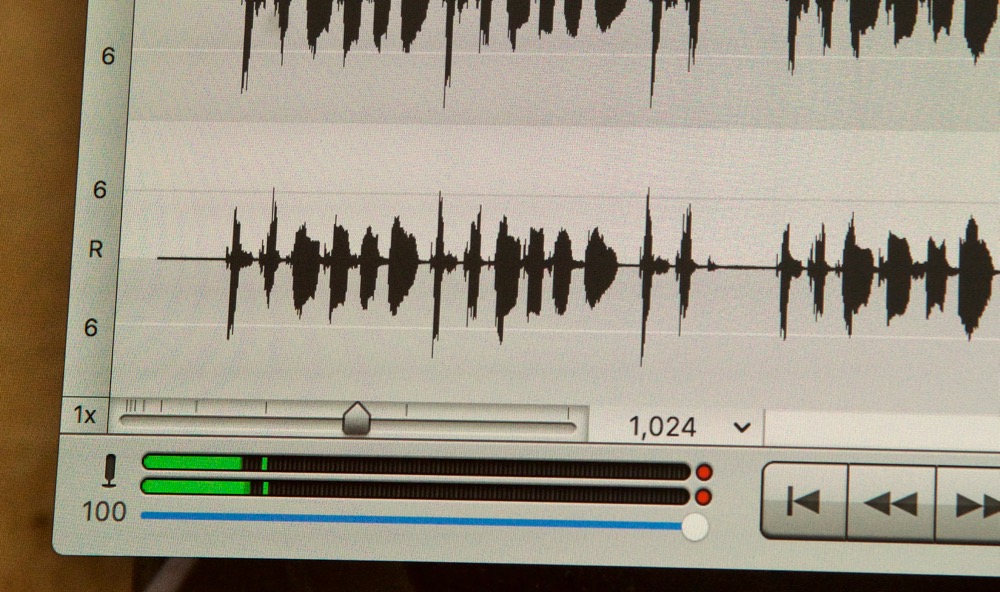
I tweaked the levels for this mic (plugged into the right channel of the U-Phoria) and another known-good RE20 (plugged into the left channel of the U-Phoria), and then did some test recordings in Sound Studio, and found that the levels and fullness of the sound were just as before, if slightly improved by having a continuous ring of foam holding the capsule in place!
More Resources and Inspiration
I'm indebted to a ton of different forum topics and random tidbits I've read from audio engineers and DIY enthusiasts, in addition to helpful advice from my dad. Here are some of the posts where I found bits of information helpful in my journey towards repairing some old RE20s instead of buying new and dumping the old ones:
- GroupDIY post on RE20 replacement foam sources
- Tape Op Message Board topic on replacing the RE20 foam (includes a great walkthrough and detailed pictures!)
- Gearslutz topic on RE20 foam replacement (more pictures, though a bit blurry/low-res)
- RE20 Service Manual
Of course, if you read through this entire post and decided this kind of project isn't for you (especially considering a used RE20 might never sound as good as new even after full foam replacement!), you can always buy a new copy of the Electro-Voice RE20 microphone for a bit over $400 on Amazon! And if that's a bit too rich for your taste, the RE320 has almost the same signature sound for about $120 less.
Comments
Hi!
We have a few of these at our community radio station and your writeup will be very helpful when it's time to fix them. They have the "baby rattle". Nice work and thanks!
You're quite welcome, glad to help! I still hope to record a video while I do another one; I have two more baby rattles in a box in my office right now, just waiting for a re-foam.
Thanks so much for this informative and clear explanation, it's wonderful to have you on the web.
Jeff-
Just wanted to THANK YOU for this marvelous page and detailed instructions.
I also loved that you had links to the proper foam replacement items which I ordered
and installed, AS WELL AS specifying the exact hex wrenches. Ordered those as well.
May I say to any viewers here, if you can solder a couple wires to pins and follow Jeff's
suggestions and steps to the letter, you can bring new life back to your RE or PL 20.
If yours clunks or rattles, the foam is toast!
(I refurbished a PL 20 so the wire colors were different...or, perhaps they vary anyway, but
you'll get the idea fast.)
THANKS JEFF!
Good on ya!
Mission Accomplished!
Jeff,
Let me add my thanks for detailing the refurbishing of the EV RE20 Mic. It is crazy to pay EV what they want to do this these days.
You have done us all a great service!
Aloha from Maui
You're welcome, and yeah, I really wish EV would charge a more reasonable rate. Paying more than half the price of the mic to get it re-foamed seems a poor deal. One of the strengths of these venerable mics is how they're (mostly) built to last... and if EV makes it harder to make them last as long, people may more readily consider other options.
Thanks for taking the time to walk through this process and provide the links. I've never attempted something like this before, but with your instructions, I was able to fully recondition a nasty, old cast-off mic from a radio station. It sounds great, no longer rattles, and looks much nicer now! Thank you!!
Jeff-
Thanks so much for this guide. I'm refoaming one right now based solely on this post. My R20 was so bad that the foam literally crumbled out once I opened the mic!
I have one question if you don't mind. The top of the voice capsule has a small piece of cloth material covering it. The cloth on mine is glued/secured in only one spot. The cloth can be lifted.. Is this by design, or has the cloth come unglued? I'm not sure whether I should glue it down around the edges..
Thanks again. Your guide is excellent!
That thin cloth was glued lightly around the edges on mine. I would maybe use a few dabs of superglue or some other adhesive to get it to stick around the edges again, but be super careful to not get anything on the mic pickup diaphragm itself!
Jeff-
Thank you for your reply.. Okay, thanks for addressing that concern. I will carefully glue it down.. I agree that the hardest part of this project is removing the glued xlr connector. I had to dig out the glue to get the connector to move. And, I broke off the red & green wire pair right at the connector. But, nothing a little soldering won't fix!
Tbanks again for answering my question and for assembling this excellent how-to guide!
Thanks for your excellent guide and your reply to my question. I successfully refoamed my RE20 based on your guide here.. It's back to excellent working order.
Thanks again!
-Al
Hi Jeff,
I just checked out your excellent tutorial on re-foaming an Electrovoice RE-20 mic.
I have two of these for use in my home studio. One sounds excellent with a very rich sound.
The other sounds like the “baby rattle” you described. When I purchased that mic, the foam was obviously shot, so I purchased a new foam kit from Full Compass and, since I’m not very good at soldering or putting things back together after I tear them apart, had a friend (who is a radio engineer) rebuild my mic. He did a great job, but it still has the baby rattle sound, which he attributed to the mic head (if I remember correctly, it’s been a few years).
The mic works, but the sound is flat and tinny, not rich like my other RE-20 mic. The settings on the bottom of the mics are set the same. Can you suggest anything else I can do to fix this mic without spending big $$$?
Thank you. Bob
Bob, that rattling is likely the "button" on the voice capsule that has come loose. I don't know how to fix that without damaging the capsule itself. I have the same problem, but it doesn't seem to create any issues. I use mine for speech only. I also use the foam pop filter made by EV for this mic and a dbx 286s processor. Good luck.
To add to this; sometimes if the baby rattle problem is not fixed but the mic is still used for a long period of time (so the capsule can bounce around inside the metal body a lot), this can lead to physical damage of the capsule which may or may not be repairable. If it's something superficial on the diaphragm, carefully removing the mesh screen on top, and delicately cleaning the diaphragm (not even sure how to do that best... probably with extremely light air dusting, and maybe delicate touch with a soft baby q-tip) might help.
But typically if the capsule is damaged, you either live with it or have to buy a new mic.
Excellent tutorial, thank you for putting this together!
Thank you.
I am about 75% done with the job and I couldnt have achieved ANY of it without this tutorial.
Thank you for this guide! I made it through without a hitch, and my classic RE20 sounds better than ever.
I really appreciate the positive things, like this webpage, people in the audio field take on themselves to give to the rest of us. Replacing the foam on an RE20 is probably knowledge in the heads of only a few dozen folks in real life. I was impressed with just how many steps have to be done to do the repair. With this page, I would guess that many many RE20's have been brought back to life. Which is badass because the RE20 is one of the best mics out there. You're literally making the audio world a better place.
Again, THANK YOU! I could not have done it without this guide.
Glad I could help! I still have a box with three more of the things to repair... maybe I'll do a video for my next one so more visual-based learners can get that level of detail. Just like to share the knowledge, especially when I find it hard to find any guides on my own.
Hi Jeff - I have an Re20 - can you take care of it if I send to you - hourly rate?
Sorry, I can't do the repairs for other people's mics at this time :(
Yep, got the baby rattle ….. so I'm thinking while I have it out, strip the paint and if I could find a gold plate kit...….. LOL !!
Don W4DNR
Haha, the only one of those I've ever seen was Rush Limbaugh's gold RE20, which I believe was cast in gold ?. For plating, you'd probably need to strip off the grey finish coat on the mic's exterior... but it might be possible!
Do you find the umc202 has enough gain to power the re20 without a cloud lifter
Ha, that is an excellent question! Something I've been considering tonight, in fact. Are you watching my Amazon browsing history by chance?
The UMC202 provides just enough gain with my RE320 if it's a hair under max, without clipping when I'm close to the mic.
For the RE20, even at max gain, you can only get the mic to clip if you're shouting at it close up.
So, if your voice does not carry very well, or you need to be more than 3-5" away from the front of the mic, you might be better off with either a better interface, or using the Cloudlifter inline. The UMC202 has a low enough noise floor that it isn't a problem to increase gain a little in software to compensate, though.
Does any of you know why Electro-Voice use this particular kind of foam that degrades? There's plenty acoustical foam that doesn't ??
I am so happy that this instructional piece is online! I have an EV RE20 that is every bit of 30 years old and when I went to do some VO with it again, the foam was dust. I contacted EV and they told me the part numbers for the three sections of foam, which I ordered from Full Compass, and it came in today. This instructional piece was just what I needed to take the mic apart and fix everything. Now it works like new! Thanks so much! Happy New Year!
That's exactly why I posted it! These old mics are too good to go to waste, and I'm so glad you were able to get yours back in ship-shape. Happy New Year to you too!
Adding to the many comments in appreciation for this post/tutorial. Thank You!!
I just successfully finished a re-foam of my PL20, purchased circa 1991.
Like you, I snapped off the leads to the XLR when removing the connector from the microphone body.
This offered an opportunity to replace the leads with new wire. I was surprised to learn I didn't need to cut the leads really short. because there was enough room inside the mic barrel for a little excess wire. Thanks EV...!
While disassembling the tri-wing, I discovered the copper ground wire had snapped as well.
I soldered some new wire to the capsule (a stripped piece of 24 gauge stranded), making sure to leave plenty of length.
Upon reassembly, I wrapped this new ground lead around the screw that holds the grounding post, figuring all it had to do was make contact. I had not unwound the copper wire from the post, but still had enough room within the housing to leave it there along with the new ground lead. The three screws went back into the body of the mic nice and snug.
Really happy to have been able to do this with your help! Again, thanks!
Ah, the PL20—those things are pretty rare these days! Glad I could help you with the project, and may your mic give you another few decades of great sound!
Yea, think I will pass on this tail chase microphone. I have a microphone with a foam over it and even a pop stopper in the foam. Doubt I will have this microphone ever rot out, it won't see my spit. These things last forever or 20 plus years in a radio station. I am 65 years old and cut out the spit factor. Looks like PITA's in the process. Just spend another 200 bucks for a good one when I hit 85...lol
Thanks, Jeff. Your instructions, with only minor differences, worked out terrific! Sounds like new!
Regards,
Bern
Thank you for this great tutorial.
Just took everything apart and started cleaning when I noticed that there is a rattle when moving the capsule. Like something is loose inside.
I don't think this is normal. Does anybody know what that is and how to fix it?
Hi, Great site. My Dad just retired from 50 years behind the broadcasting mic and I am looking for a used , not working but physically intact appearing EV20 to make into a trophy of sorts. Do you have a good source?
Thanks,
BC
I actually had a spare that was broken (capsule wouldn't work) until last year. Unfortunately it's gone now. I'd see if you can call up any of your local radio stations or find the engineer's email and ask that way (politely), and see if one of them has one in a box.
I have one from 37 years ago…it was recently refoamed and cleaned etc, and hasn't worked since. So it would be “trophy worthy”, for your pappa. Make an offer.
Julia
I'll give you $50 for it...thanks and let me know
[email protected]
Hi, where can I send the beer to? Your detailed tutorial is great and helped a lot. I struggled at first. The foam is also not cheap over here in Yurp but my beloved RE20 is like mint now.
Any way thank you so much!
If you'd really like to send some token—check out my donation page. Otherwise, just pay it forward and help someone else today :D
Best tutorial on net. Hint fish tank open cell bio filter for top pop screen
Ev no longer repairs or sells foam. Full compass has sets for 30 but the bio filter stuff is identical
Thanks.
Just cleaned up and re-foamed two old mics. EV does still have stock of the foam bits. Thanks for the write-up. Very helpful.
Good to know, thanks for the comment!
Jeff, I have an RE 20 that has plenty of high end but no low end. Is this a voice coil problem?
Thanks.
Hello to all!! I have a RE20 and the rubber holders for the shokmount are gone broken, i feel the shockmount is a little too bulky so i am looking for the regular stand mount, the one that comes standard with the microphone. If anyone has a spare one i will buyit from you! please respond to [email protected] Thanks
Hi Jeff,
Just felt I had to also thank you for this super rebuild info. Your photos were a great help also. I had to break the xlr connector to get it out, but that was the worst of it other than the crumbs of foam all over me! Thanks again.
Haha congratulations! At least the XLR connector is probably the easiest thing to repair on this mic.
Thanks too for the detailed write up. In fixing mine did not have the left handed thread set screw that holds down the XLR connector. Does someone know the specs on this screw or wouldn't mind measuring it for me.
Sorry I got a bit confused here seems the person I got it from had wound the set screw into the XLR plate and I thought there was another one but after winding it out. (Righty loosely) It's all just fine.
So far I've taken mine apart and it all looks healthy just waiting on my foam in the post to get my $70 + $60 foam RE20 back up and Happy days!
Has anyone got a spare stand clamp they want to sell. Everyone in Australia is out of stock. And US retailers won't send due to distribution rights.
Wonderful post... many thanks. Can I mention something about Variable-D? It has nothing to do with off-axis response... it's a way of eliminating (or close to it) proximity effect when cardiod mics are worked close. That's one of the claim to fames for the RE series. Interesting that EV chose to also include a rolloff... many studio guys appreciate that for recording purposes.