script

Controlling PWM fans with the Raspberry Pi CM4 IO Board's EMC2301

Noctua 120mm PWM fan connected to Raspberry Pi CM4 IO Board

When I initially reviewed the Compute Module 4 IO Board, I briefly mentioned there's a 4-pin fan connector. It's connected to the Pi's I2C bus using a little PWM chip, the EMC2301.

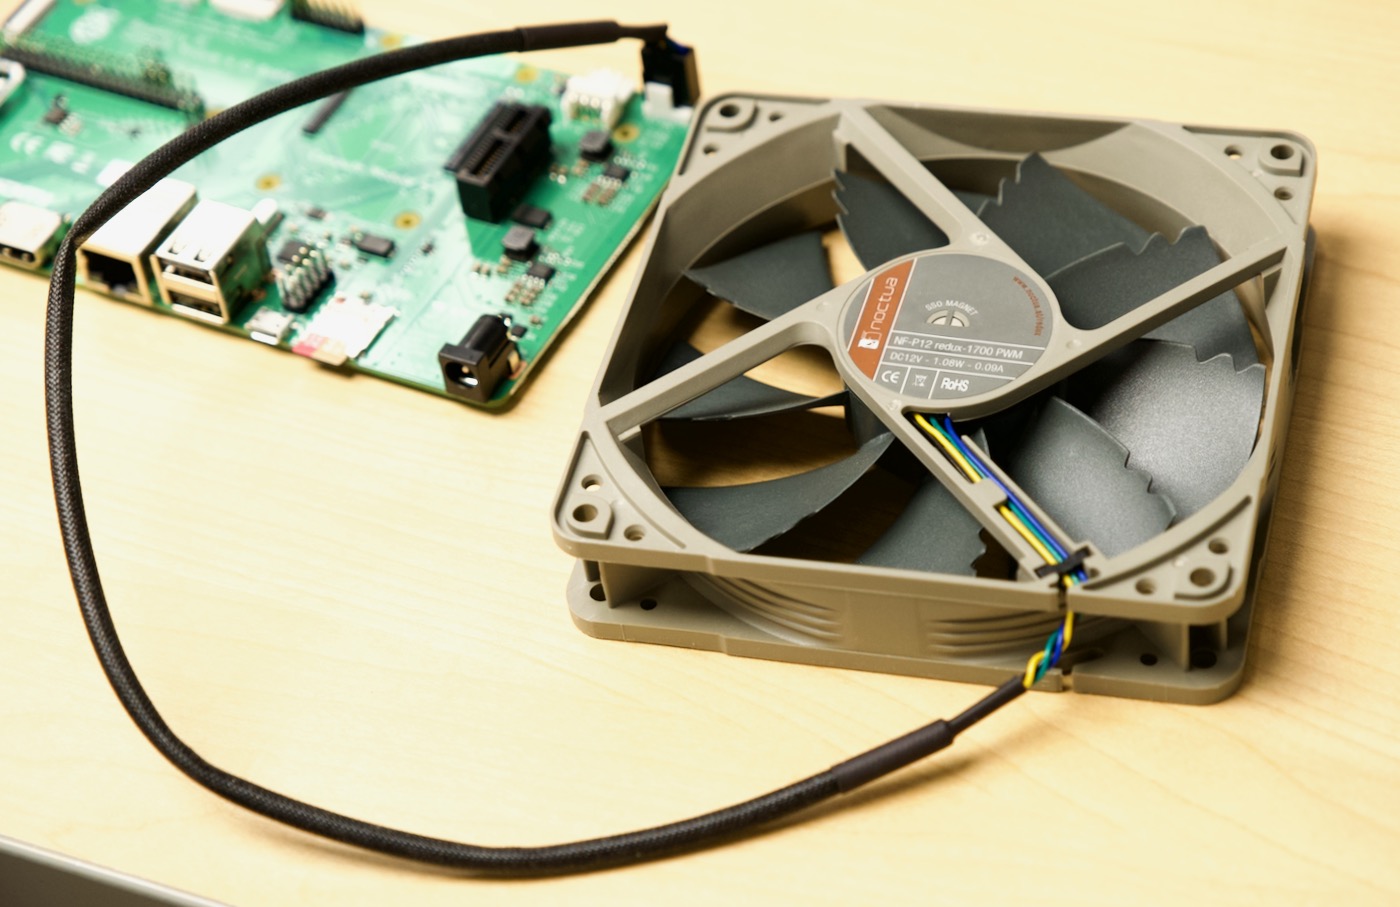
But wait... what's I2C, what's PWM, and what's so special about a 4-pin fan connector? I'm glad you asked—this post will answer that and show you how you can control a fan connected to the IO Board, like the quiet Noctua NF-P12 pictured above with my IO Board.

If you plug a fan like that into the CM4 IO Board, it will start running full blast, 24x7. If you need that much cooling, that's great, but a lot of times, I don't mind my Pi's CPU getting warmer if it means I can run the fan silent most of the time.

Making a Terminal window the right aspect ratio for streaming or recording

Recently I've been spending a bit of time producing video content of both browser windows and Terminal windows for screen recordings and livestreams on my YouTube channel.

One common issue I have to deal with is trying to optimize the aspect ratio of the window for the video dimensions. In 99% of all cases, I need the window to be 16:9. And ideally, I want the window to be recorded at 1280x720 at 2x 'retina' resolution, so when I capture the window, it will be nice and sharp at 1080p, which is my typical output resolution.

In the past, I'd open up a 1280x720 image at 2x resolution, then drag the Terminal window over it. However, getting that to be pixel perfect is sometimes frustrating, and it's always annoying since it takes me an extra 10-20 seconds per recording.

In my searching, I found this handy article from way back in 2013: How to Resize Windows on your Mac to Specific Sizes.

Updating a Kubernetes Deployment and waiting for it to roll out in a shell script

For some Kubernetes cluster operations (e.g. deploying an update to a small microservice or app), I need a quick and dirty way to:

  1. Build and push a Docker image to a private registry.
  2. Update a Kubernetes Deployment to use this new image version.
  3. Wait for the Deployment rollout to complete.
  4. Run some post-rollout operations (e.g. clear caches, run an update, etc.).

There are a thousand and one ways to do all this, and many are a bit more formal than this, but sometimes you just need a shell script you can run from your CI server to do it all. And it's not too hard, nor complex, to do it this way:

Parsing YAML files on the command line using Ruby

I have been working on an infrastructure project that uses YAML files for all inventory and configuration management, and for the most part, if you're using tools like Ansible, CloudFormation, etc., then you don't ever have to worry about the actual parsing of a YAML file, and keys and values in the file are readily accessible since these tools parse them and get them into a readable structure for you.

But there's often little bits of glue code, or infrastructure build/cleanup jobs, where you need to grab one specific value out of a YAML file, and all you have readily available is bash. Luckily for me, I also have Ruby available in the particular environment where I needed to parse the YAML file, so doing this was as easy as:

  1. Defining a little bit of Ruby code which would load the YAML file, then grab a value out of it.
  2. Running that Ruby code using ruby -e (-e for 'evaluate this code), operating on the contents of a YAML file.

And here's how that looked, in my case:

Current Time - @currenttime on Twitter

A few weeks ago, I was thinking to myself: "It's hard to tell what time certain tweets in my (already busy) timeline were posted... It'd be great if, instead of '18 minutes ago,' I could see that the post fell between 10 p.m. and 10:10 p.m. – it's much easier for me to remember tweets by time than by 'time ago.'

So, instead of trying to find some Twitter app that would let me insert my own timestamps or change the date format (I'm sure there are a few), I wrote a PHP script that would post a new tweet with the time in four time zones to the @currenttime Twitter account. Then, I followed @currenttime, and history was made ;-)

Here's the script I used (with help from Morethanseven's article, "Posting to Twitter using PHP"):