I recently rented a Nikon 105mm VR Macro lens for a weekend, and wanted to experiment with different types of macro photography.
One of the things I was most interested in was focus stacking. See, there's a problem with macro photography in that you're dealing with a depth of field measured in millimeters when reproducing images at a 1:1 ratio, even stopped down to f/8 or f/11. And, wanting to avoid diffraction at higher apertures, there's no way to take a straight-out-of-camera picture of a 3D object that's sharp from front to back.
(There's also a video version of this post, embedded below)
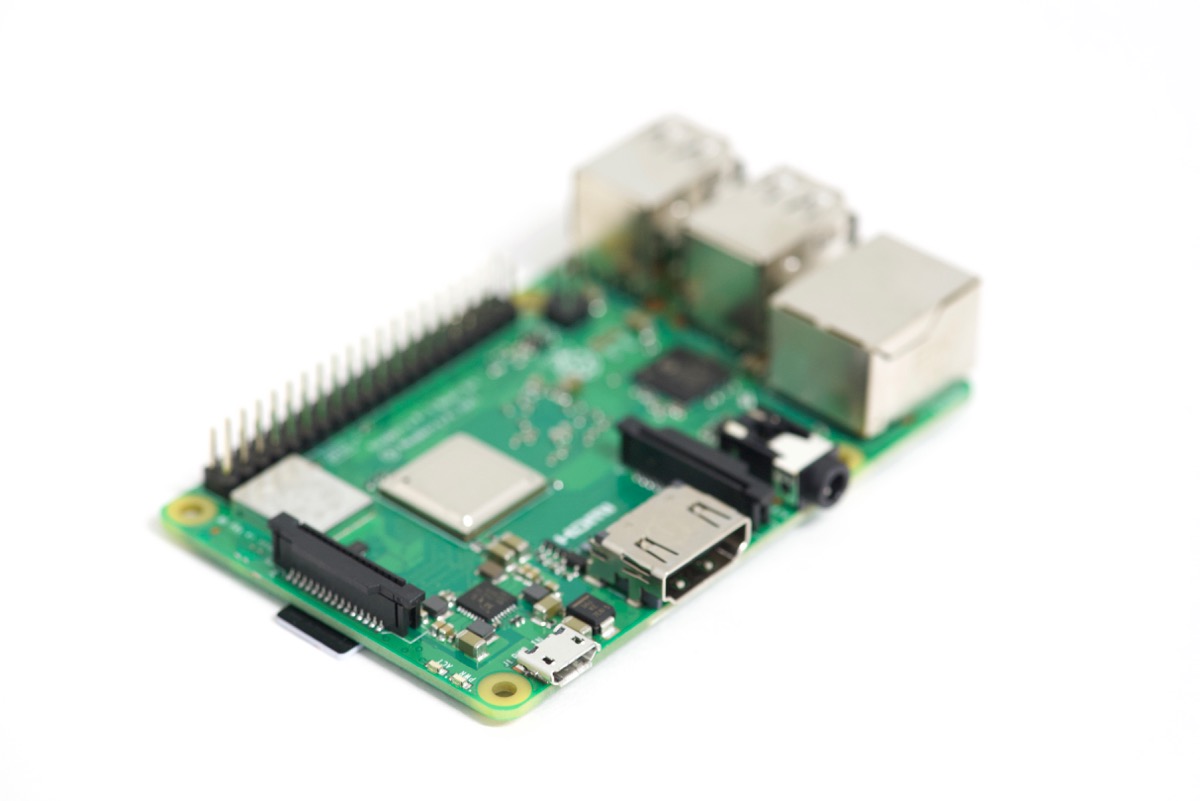
One frequent subject of my close-up photography is the Raspberry Pi single board computer. You can see the problem when taking just one photo:

The blurred out foreground and background can be a nice effect, if that's what you're going for... but if you wanted to have a clear representation of the entire product—say, for a catalog or for scientific purposes—this is not it. This image was taken at f/5.6 and 1/25 second exposure at ISO 800 (using available light).
Taking pictures for a focus stack image
So, to combat this problem, we'll create a 'stack' of images, with the area in focus overlapping from frame to frame. At f/5.6, that area in focus is about 0.8 cm deep, so I set my camera in manual focus and exposure mode, locked it down on a tripod, and focused just on the front edge:
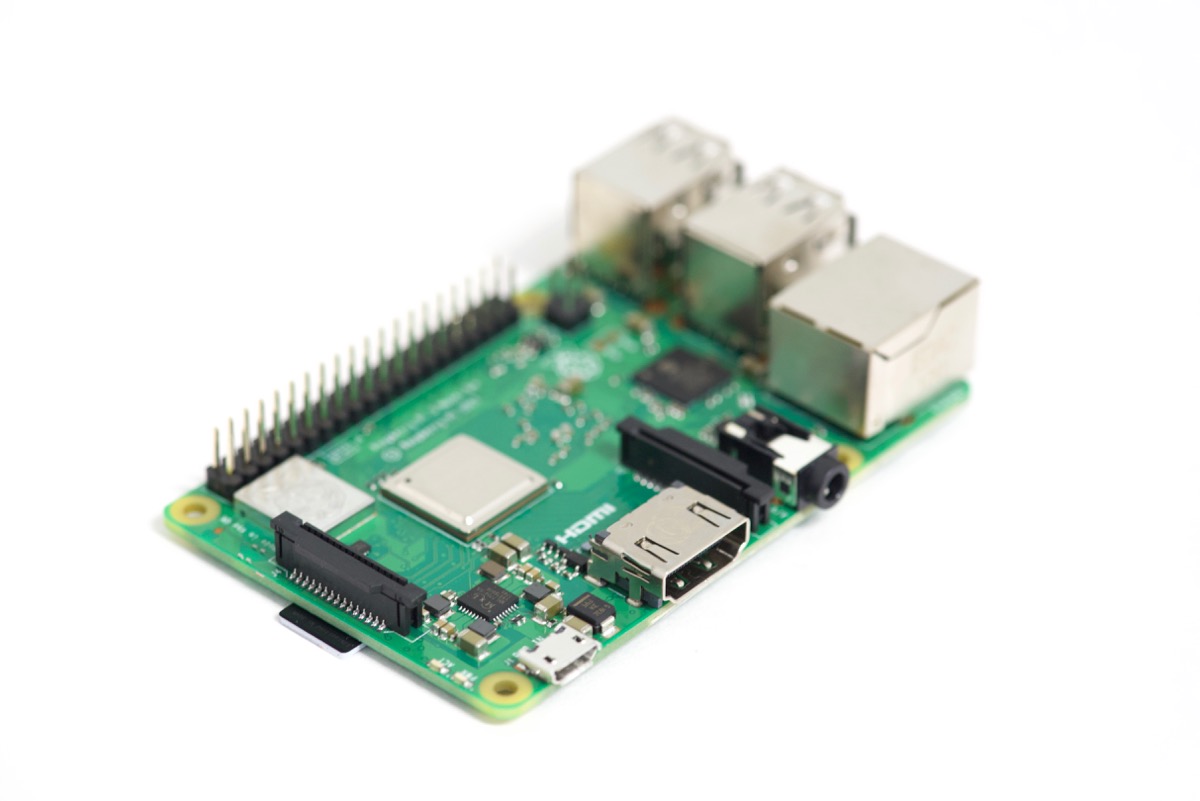
Next, I manually adjusted focus just beyond, on the HDMI port and second group of circuits:
And so on and so forth, until I focused just on the back edge of the board (the metal USB ports):
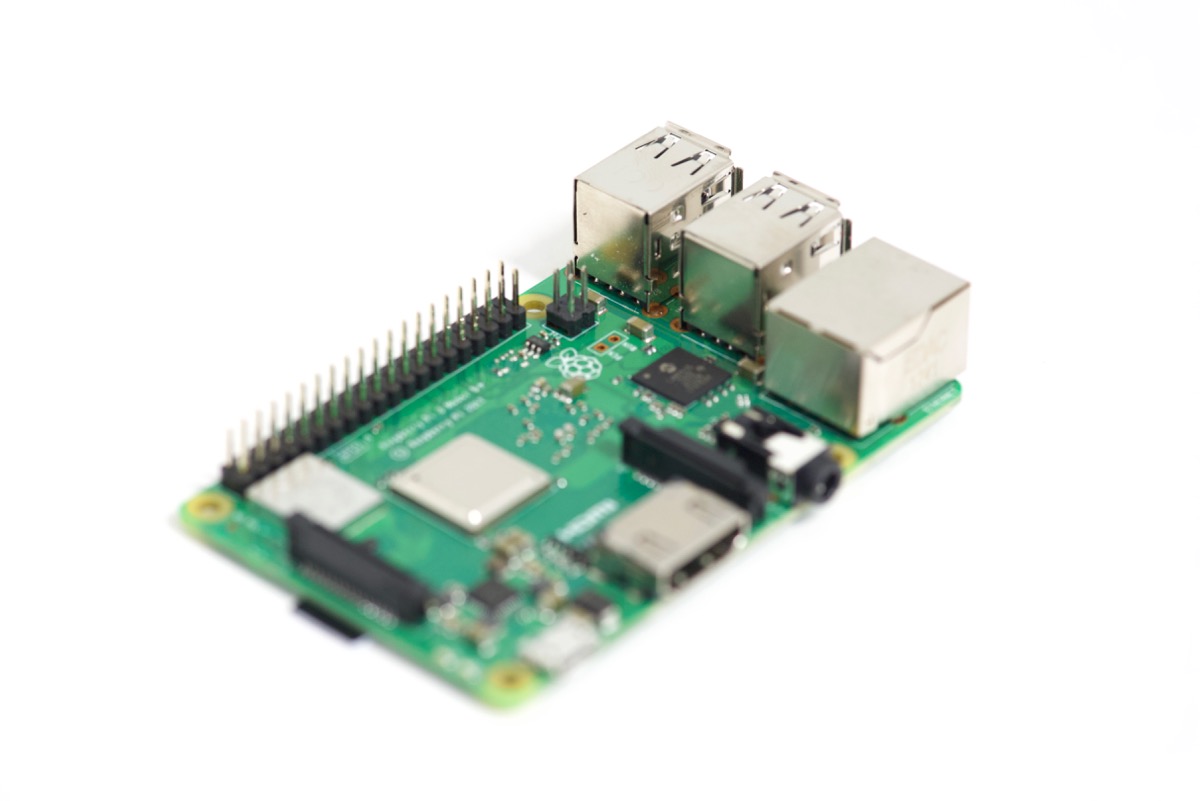
Now that I have a set of 7 photos with overlapping areas in focus, I can import them and complete the post-processing in Photoshop. (Note that I usually tweak exposure and white balance in Lightroom or Photos before I export a set of JPEGs for Photoshop work).
Simple focus stacking in Photoshop
- In Photoshop, go to File > Scripts > Load files into Stack...
- Select the photos you just imported, then before creating the stack, check the 'Attempt to automatically align source images' checkbox.
- After Photoshop creates the image with all the layers, use Shift to select all the layers in the Layers palette.
- Go to Edit > Auto-Blend Layers...
- Make sure the 'Stack' option is selected, and click OK.
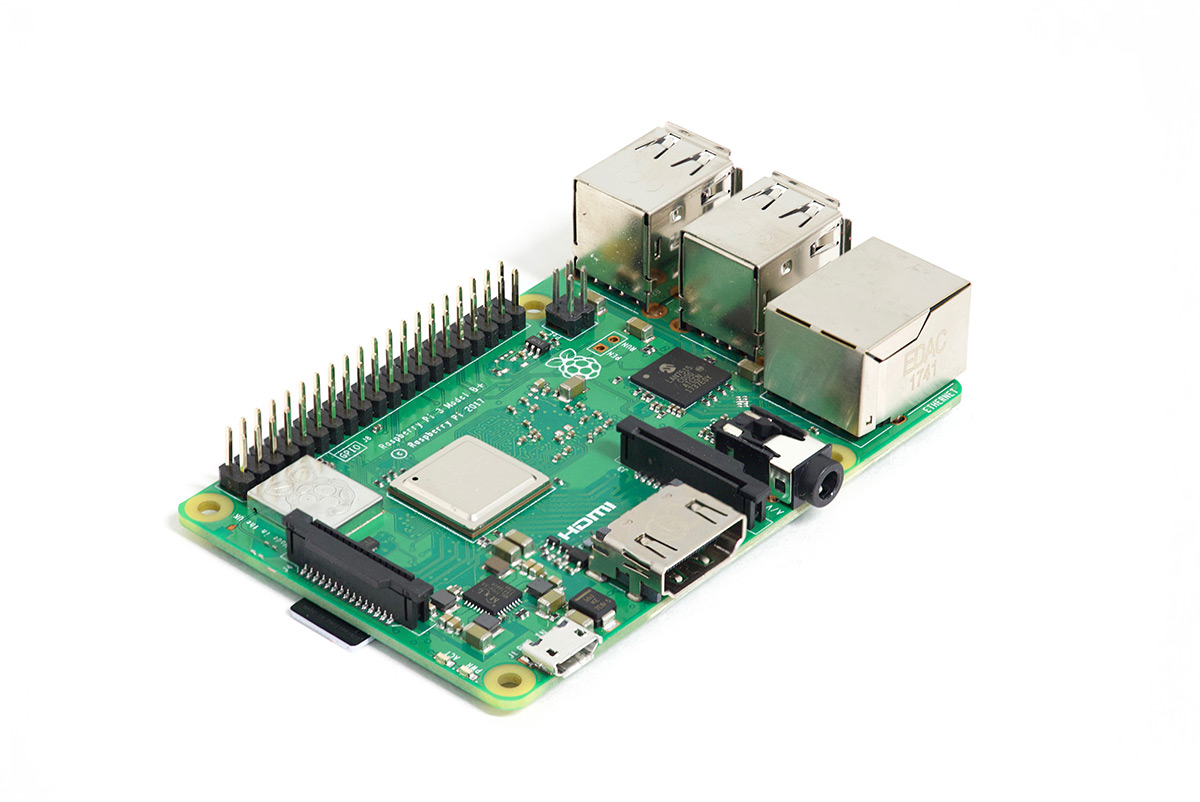
After a minute or so (depending on the resolution and number of images you have in the stack), Photoshop will show you the end result, which in my case looks like the following:
Note: There are many situations where this kind of focus stacking will not produce perfect results. In some cases, especially with more complicated plant life, you may need to spend a bit of time adjusting the masks on each of the layers before you can get an image that's acceptably sharp and without strange blur artifacts due to overlapping objects (e.g. a leaf that goes in front of and behind a vine).
Comments
Just wanted to comment on my own post—this works so nicely for shots of tiny objects like my electronics or small computers with my 60mm 2.8 macro lens (after trying out the 105mm and 60mm I went with the 60mm just based on price, especially since I have a 135mm 1.8 I use for portraits already).