video

CutiePi - a Raspberry Pi CM4 Linux Tablet

A few weeks ago, I got my hands on an early prototype of the CutiePi.

CutiePi Tablet with Raspberry Pi mug

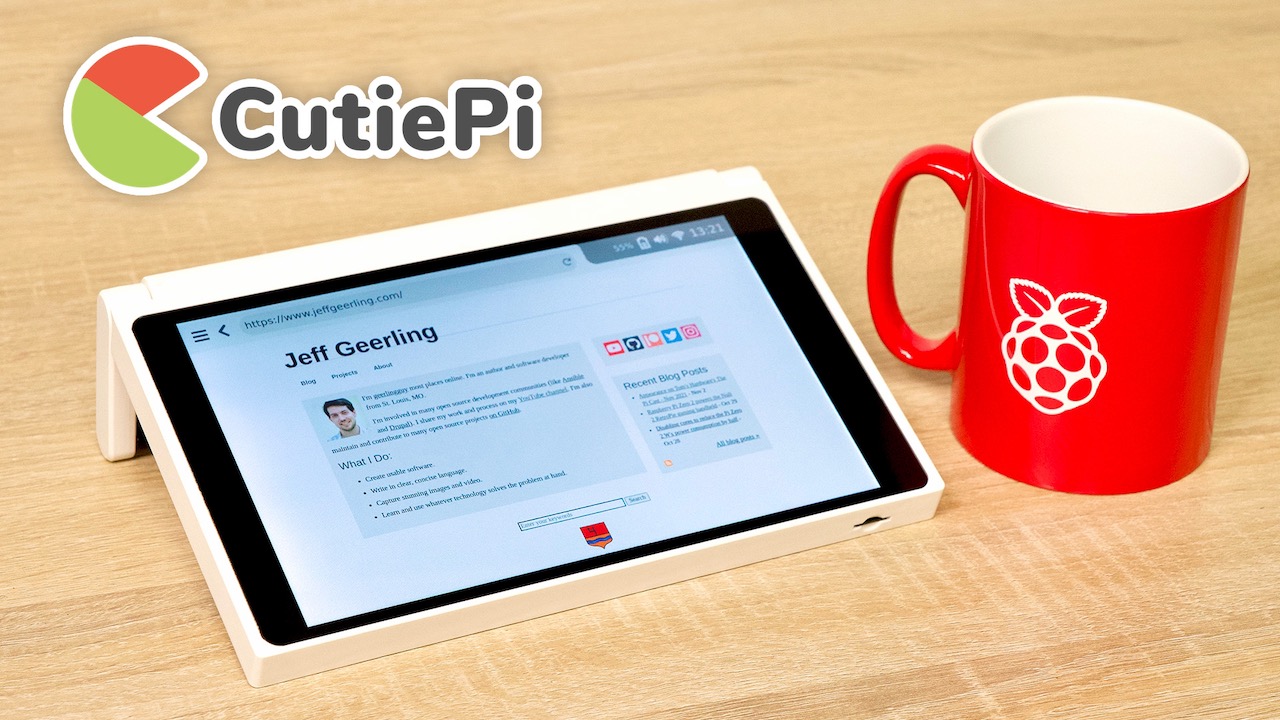
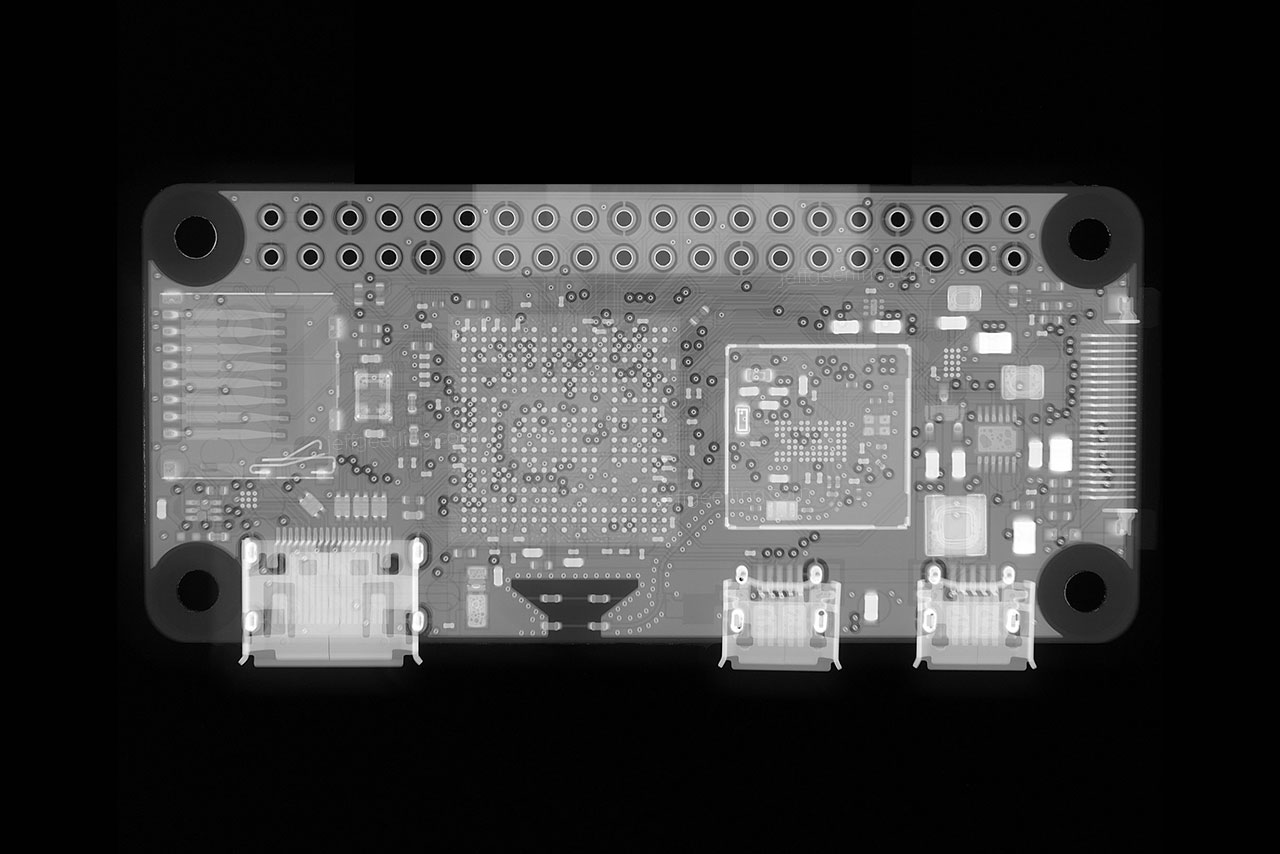
Unlike many other Pi 'tablet' projects, this one is actually more of a, well, tablet, since it is based on the diminutive Compute Module 4. And because of that, and a custom main board, the CutiePi is less than half as thick as the other decent modern Raspberry Pi tablet on the market, the RasPad—plus it has a cute handle:

CutiePi Back

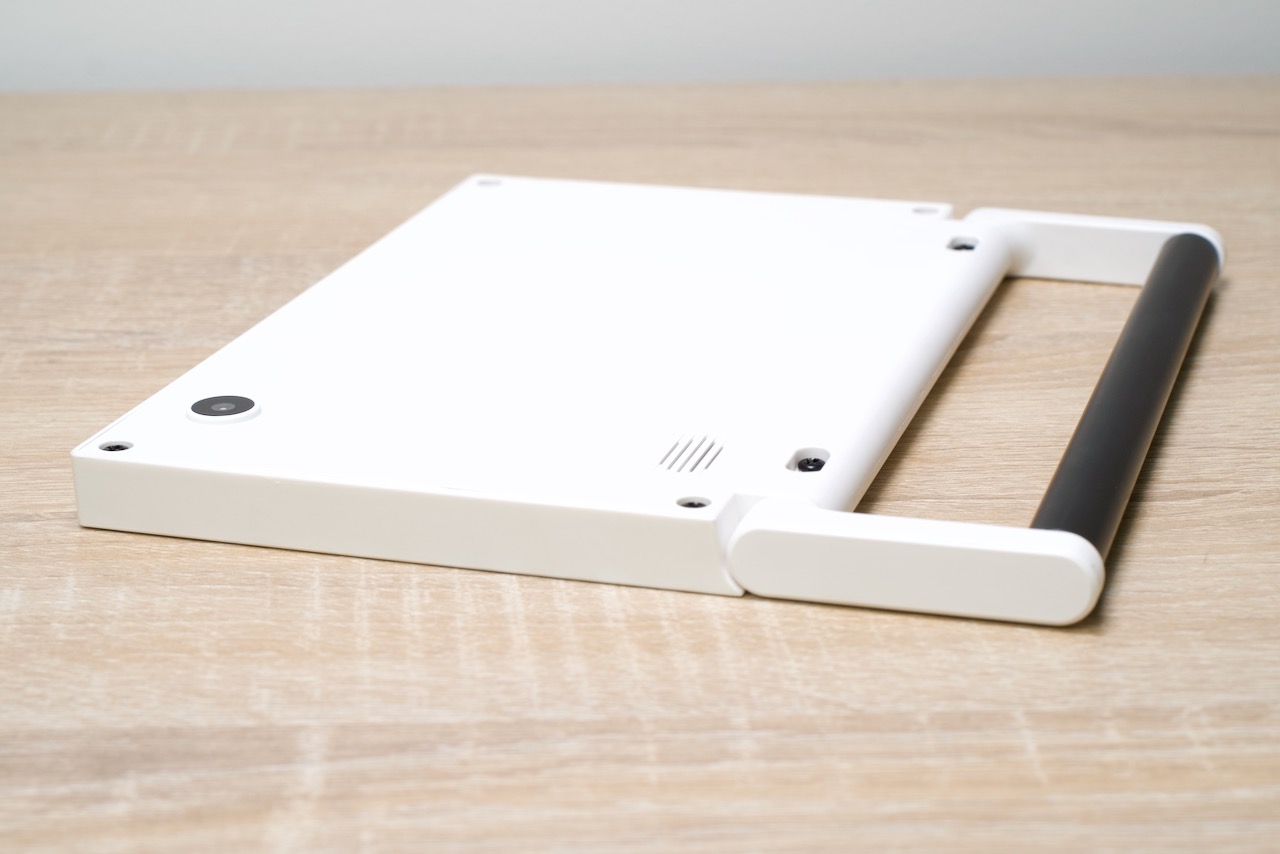
It has an 8" 1280x800 multi-touch display, a 5000 mAh battery, USB 2.0, USB-C power (you can use the tablet while charging), micro HDMI for an external monitor or TV, and a microphone, speaker, and 5MP 1080p rear-facing camera.

Look inside the Raspberry Pi Zero 2 W and the RP3A0-AU

Today, Raspberry Pi released their new Zero 2 W, and it includes a new Raspberry Pi-branded chip, labeled RP3A0-AU.

I was able to get early access to the Zero 2, and I have a full review of the device on my YouTube channel, but I wanted to share more of the X-ray images I took of the device to reveal its inner workings, and because I just think they look cool. Also, I paid a bit of money to get these pictures, so might as well share!

First, here's what the Zero 2 W looks like in person:

Raspberry Pi Zero 2 W

And here's what it looks like via X-ray:

Raspberry Pi Zero 2 W - X-ray vision

Getting a Raspberry Pi to boot after cutting it in half

This blog post starts with the question: If I cut the ports off a Raspberry Pi 4 model B, will it still work?

Cut Raspberry Pi 4 model B

My early conclusion? Sorta.

With most Raspberry Pi generations, there is a full-featured model B, and a smaller, trimmed-down model A. The Pi 4 never had a model A, so I thought it would be interesting to see if I could make one. I looked at the Pi 4 with this really cool X-ray tool, as well as using this album of X-ray images from reddit user u/xCP23x:

Xray image of Raspberry Pi 4 model B

The cut was calculated to try to avoid anything important, though as we'll find later it may not have been measured carefully enough.

Automating the Uncommon - AnsibleFest 2021 presentation

At AnsibleFest 2021, I presented a session titled Automating the Uncommon - Ansible automates everything!.

Since watching on-demand versions of the AnsibleFest sessions requires a signup, I thought I'd also post the session to my YouTube channel, so everyone can learn from it without registering. The session seemed well-received, and I hope it shows that, as I state in my 'Rule of Golden Hammers':

Jeff's rule of Golden Hammers - If you know a tool well enough, and the tool is good enough, it's okay to do weird things with it.

I demonstrate how I use Ansible to:

Face detection for my leaf blower

In the class of 'out there' projects, I recently added a little AI to my leaf blower:

Leaf blower with Raspberry Pi on top for AI ML Machine Vision blasting

The short of it: I have a face detection algorithm running which, when a certain individual enters the field of the Pi's vision, triggers a servo that powers on the blower, releasing a powerful air blast.

Red Shirt Jeff gets blasted by air cannon

I've been wanting to play around with face detection on the Pi for some time, but the Pi Zero I use in most of my camera projects is seriously underpowered for this kind of work.

CM4Ext Nano

So when Harlab (Hardware Laboratory) told me they'd like to send me a CM4Ext Nano board for testing, I thought it'd be the perfect opportunity to play with machine vision on the Pi.

Raspberry Pi KVMs compared: TinyPilot and Pi-KVM v3

In a strange coincidence, the authors of TinyPilot and Pi-KVM both emailed me within a week of each other and asked if I'd be interested in one of their KVM devices.

TinyPilot vs Pi-KVM v3 Price comparison

Michael Lynch, founder of Tiny Pilot, said he'd used some of my Ansible work in building the TinyPilot update system, and Maxim Devaev, of Pi-KVM, liked my Pi open source content, and wanted to see what I thought of the new v3 kit that's currently on Kickstarter.

I took them both up on the offer, and dug into both devices.

Both have HDMI and USB inputs, so you can plug them into any Mac or PC and get full control, up to and including BIOS/UEFI settings, remote desktop management (with no software on the managed computer), and mounting of USB ISO images for re-installing an OS or maintaining a system.

Monitoring my home's air quality (CO2, PM2.5, Temp/Humidity) with AirGradient's DIY sensor

A few months ago, I found this Hacker News post about the AirGradient DIY Air Quality Monitor. I had already been considering buying an AirThings Wave Plus sensor to monitor my home's CO2 levels, but the high price and limited 'ownership' of the data coming from it turned me off.

AirGradient DIY Air Quality Sensor - Focus Stacked by Jeff Geerling

So I built two AirGradient DIY air quality monitor boards (see above), and integrated them into my Prometheus + Grafana home monitoring setup I've been using to monitor other things in my house:

AirGradient DIY Grafana Dashboard for CO2 PM2.5 Temperature Humidity monitoring

Modeling my Grandpa with 3D Photogrammetry

Today I released a video about how—and why—I 3D Printed my Grandpa and put him on my bottle of ketchup. Watch it here.

I sculpted a bust of my Grandpa in high school, gave it to my grandparents, got it back after he died and my Grandma moved out of her house (I wrote a tribute to my 'Grandpa Charlie'), and I kept on moving it around my office because I didn't have room for it:

Grandpa bust - terracotta by Jeff Geerling in 2001 - original statue
Grandpa by Jeff Geerling, terracotta, 2001.

I decided it had to go, but asked my extended family if anyone wanted the statue (thinking it would be sad to destroy it). One enterprising cousin suggested he could 'copy' the statue in smaller form using photogrammetry:

Why build a Raspberry Pi Cluster?

Raspberry Pi Cluster next to a banana for scale

After I posted my Raspberry Pi Blade server video last week, lots of commenters asked what you'd do with a Pi cluster. Many asked out of curiosity, while others seemed to shudder at the very idea of a Pi cluster, because obviously a cheap PC would perform better... right?

Before we go any further, I'd say probably 90 percent of my readers shouldn't build a Pi cluster.

But some of you should. Why?

Well, the first thing I have to clear up is what a Pi cluster isn't.

Note: This blog post corresponds to my YouTube video of the same name: Why would you build a Raspberry Pi Cluster?. Go watch the video on YouTube if you'd rather watch the video instead of reading this post!

Uptime Lab's CM4 Blade adds NVMe, TPM 2.0 to Raspberry Pi

A few weeks ago, I received two early copies of Uptime.Lab's CM4 Blade.

Uptime Lab's Raspberry Pi CM4 Blade Computer with NVMe SSD

The Blade is built for the Raspberry Pi Compute Module 4, which has the same processor as the Pi 4 and Pi 400, but without any of the built-in IO ports. You plug the CM4 into the Blade, then the Blade breaks out the connections to add some interesting features.

A 1U rackmount enclosure is in the works, and 161 of these boards would deliver:

  • 64 ARM CPU cores
  • up to 128 GB of RAM
  • 16 TB+ of NVMe SSD storage

That's assuming you can find 8 GB Compute Modules—they've been out of stock since launch almost a year ago, and even smaller models are hard to come by. More realistically, with 4 GB models, you could cram in 64 GB of total RAM.