tutorial

HTGWA: Partition, format, and mount a large disk in Linux with parted

This is a simple guide, part of a series I'll call 'How-To Guide Without Ads'. In it, I'm going to document how I partition, format, and mount a large disk (2TB+) in Linux with parted.

Note that newer fdisk versions may work better with giant drives... but since I'm now used to parted I'm sticking with it for the foreseeable future.

List all available drives

$ sudo parted -l
...
Error: /dev/sda: unrecognised disk label
Model: ATA Samsung SSD 870 (scsi)                                         
Disk /dev/sda: 8002GB
Sector size (logical/physical): 512B/512B
Partition Table: unknown
Disk Flags:

Good, I had plugged in that SSD just now, and it's brand new, so it doesn't have a partition table, label, or anything. It's the one I want to operate on. It's located at /dev/sda. I could also find that info with lsblk.
Raspberry Pi Zero 2 powers the Null 2 RetroPie gaming handheld

As a kid, I never had a Game Boy, Game Gear, or any other handheld console. Heck, as luck would have it I've never owned a Nintendo Switch, either.

I've played console and PC games, I've only used handhelds twice: once in middle school, when a friend let me borrow his Game Gear for a day, and last year year when my dad brought over his Nintendo Switch—which my kids quickly commandeered.

I guess out of a sense of jealousy, I decided the first thing I should do with Raspberry Pi's latest hardware, the Pi Zero 2 (see my review here), is build myself a handheld retro gaming console.

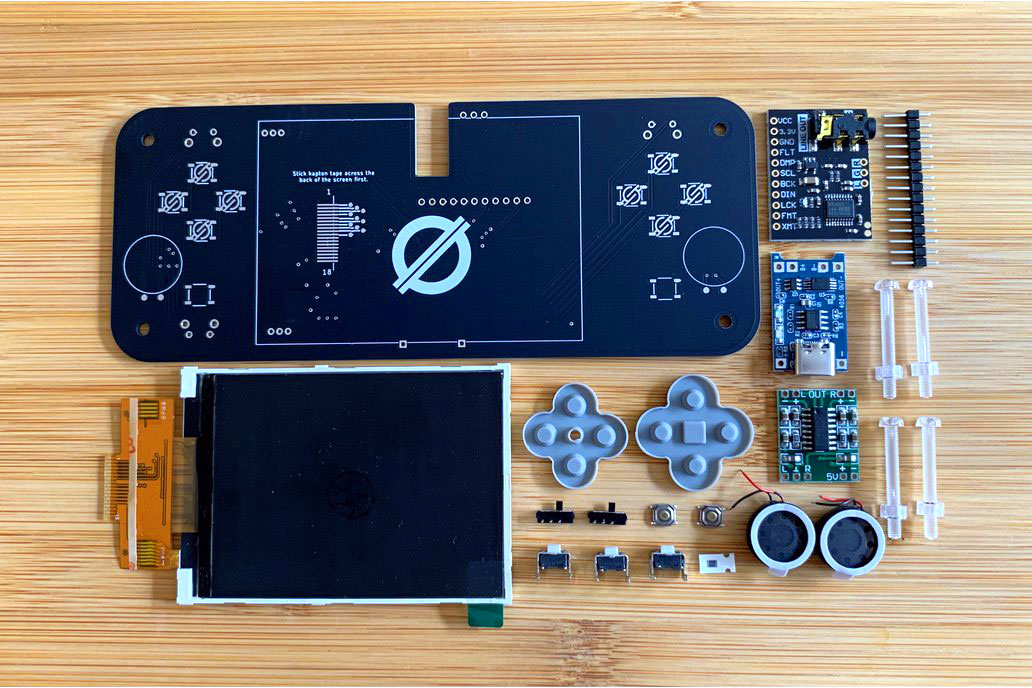
Null 2 kit on Tindie

And what better way than with the Null 2 kit (pictured above, from it's Tindie page), a kit integrating off-the-shelf components on a custom PCB, wrapped up nicely in a custom acrylic case.

The Raspberry Pi IoT Notification Bell

Harbinger of the Internet of Dings

Last year, I built the first version of what I call the "Raspberry Pi Bell Slapper." It was named that because it used a servo and a metal arm to slap the top of the bell in response to a stimuli—in this case, an email from a donation notification system for a local non-profit radio station.

This year, that same radio station had another one of their fund-raisers (a radiothon), and to celebrate, I thought I'd do the thing justice, with a better circuit (using a solenoid instead of a servo) and a 3D printed enclosure. And this is the result:

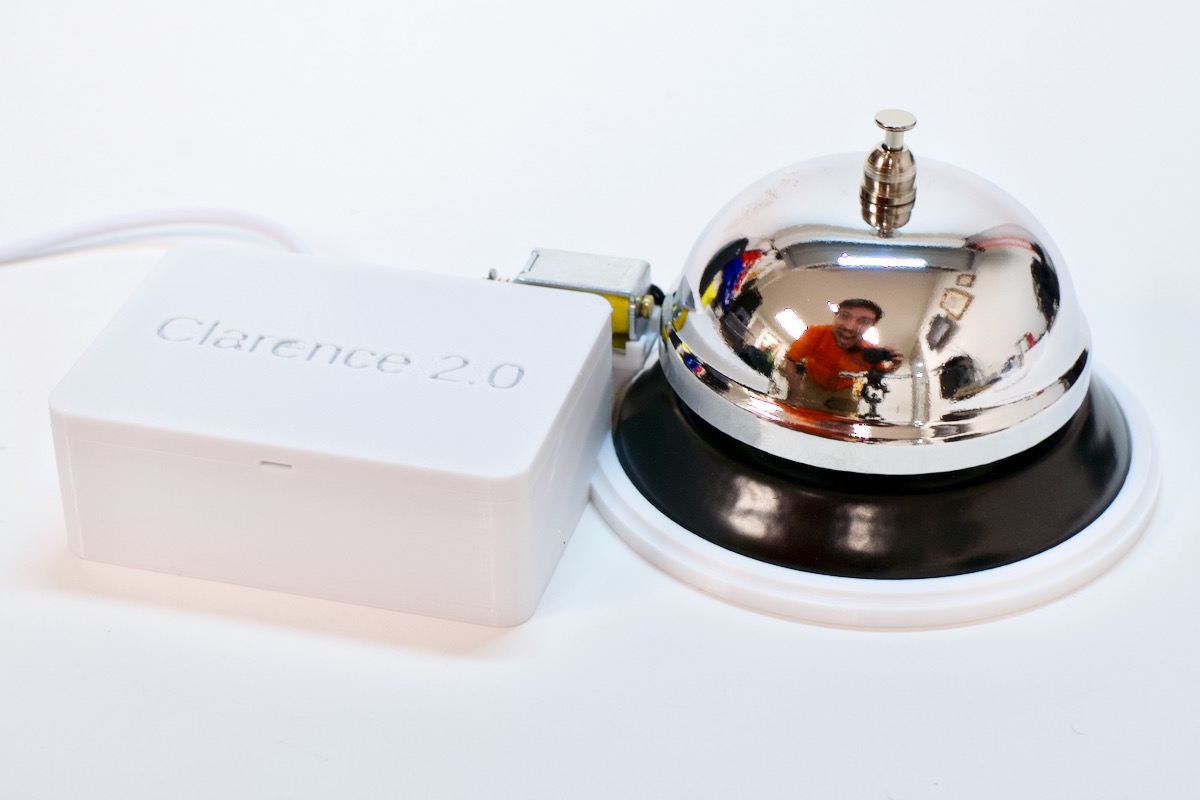
Clarence 2.0 - The Raspberry Pi Notification Bell

There is a Raspberry Pi Zero W with a custom solenoid control HAT on top inside the case to the left, and the solenoid right up against the bell, which is mounted on the right.

I also posted a video on YouTube exploring the project in detail: The Raspberry Pi IoT Notification Bell.

Setting up a Raspberry Pi with 2 Network Interfaces as a very simple router

I needed a very basic 'Internet sharing' router setup with one of my Raspberry Pis, and I thought I'd document the setup process here in case I need to do it again.

I should note that for more complex use cases, or where you really need to worry about security and performance, you should use something like OpenWRT, pfSense, or VyOS—or just buy a decent out-of-the-box router!

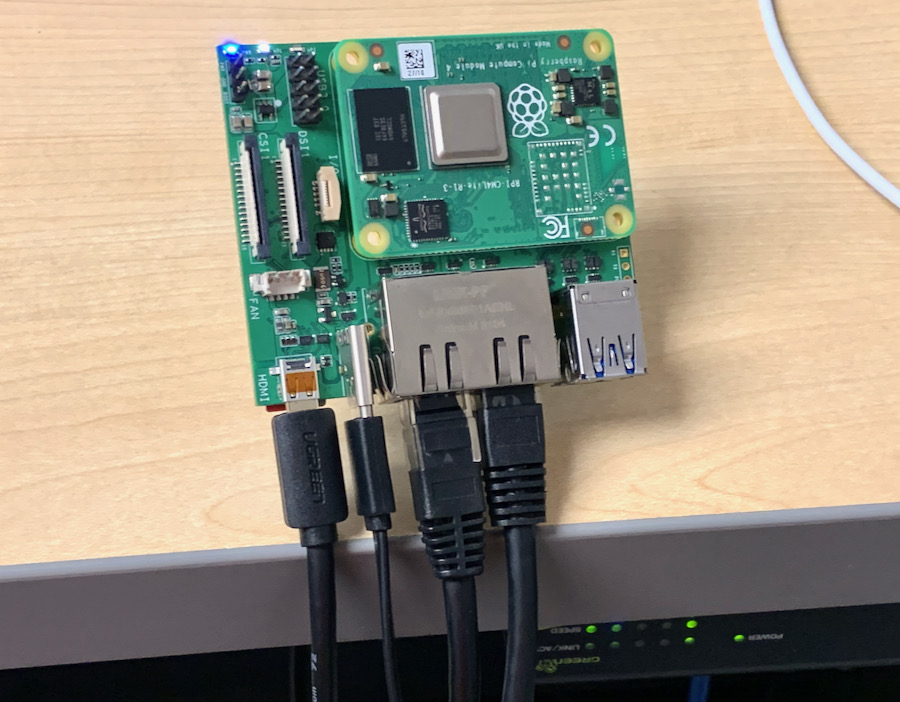
Seeed Studios Raspberry Pi Compute Module 4 Router Board

But I needed a super-simple router setup for some testing (seriously... look at the picture—the thing's about to fall off my desk!), and I had two network interfaces on a Raspberry Pi running the 64-bit build of Raspberry Pi OS. These instructions work on that OS, as well as Debian, Ubuntu, and derivative distros.

Building a 2.5 Gbps 5-drive Pi NAS - Hardware Setup

A few months ago, an ASUSTOR representative emailed me with an offer I couldn't refuse. He saw my blog post and video about building the fastest Raspberry Pi NAS, and asked if I wanted to put up my best Pi-based NAS against an Asustor NAS.

We settled on the Asustor Lockerstor 4, with dual-2.5 Gbps networking, 4 GB of RAM, and a quad-core Intel CPU. To make things even, he convinced Seagate to send four 8TB IronWolf NAS drives. I don't fancy he thought it would be a good show if I kept on using my four used WD GreenPower drives from 2010!

I posted a video of the hardware build process for both NASes on my YouTube channel:

Kubernetes 101 livestream series starts Nov 18th!

On November 18th, at 11 a.m., the first episode of my upcoming Kubernetes 101 livestream series will start on my YouTube channel.

Kubernetes 101 Series Artwork

The first episode will be available here on YouTube: Kubernetes 101 - Episode 1 - Hello, Kubernetes!.

You can find more details about the series on my Kubernetes 101 site, and there is also an open-source Kubernetes 101 GitHub repository which will contain all the code examples for the series.

In the spring, I presented a similar livestream series, Ansible 101, covering all the basics of Ansible and setting people up for success in infrastructure automation.

Flashing a Raspberry Pi Compute Module on macOS with usbboot

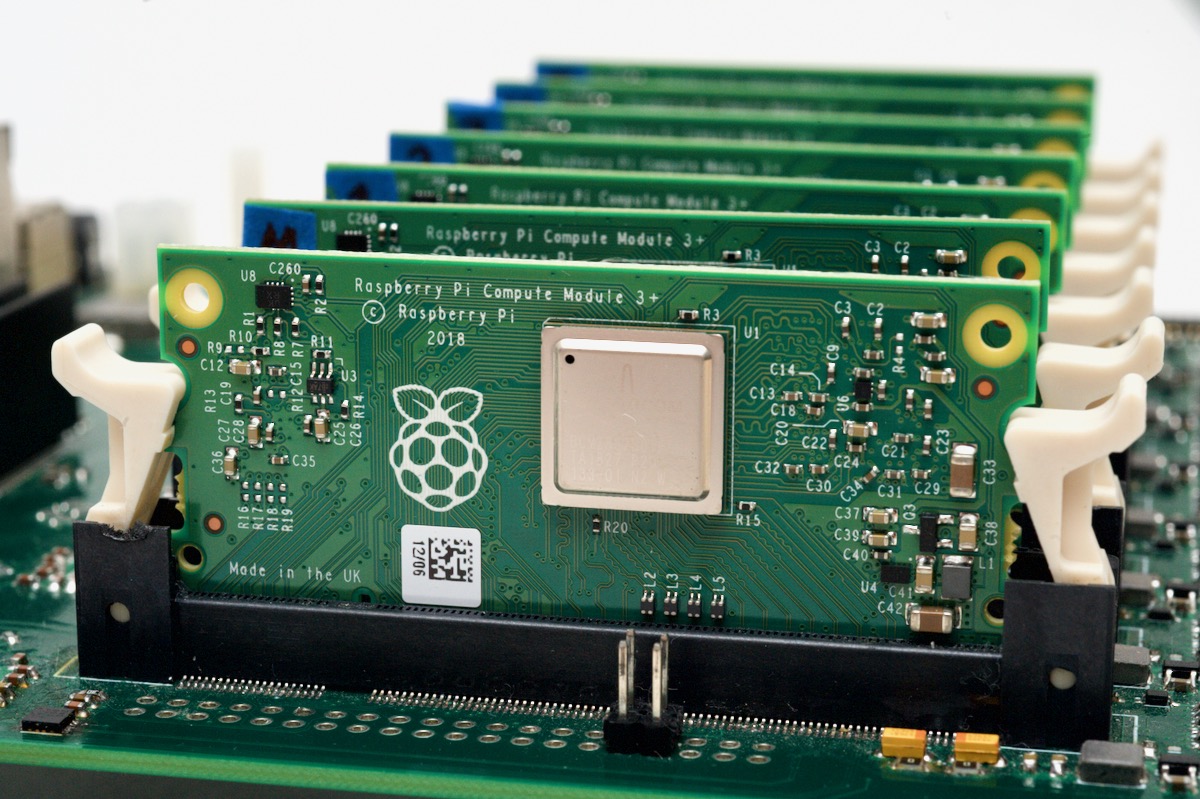
I recently got to play around with a Turing Pi, which uses Raspberry Pi Compute Modules to build a cluster of up to 7 Raspberry Pi nodes.

Turing Pi Raspberry Pi 7 nodes of Compute Modules

Interested in learning more about building a Turing Pi cluster? Subscribe to my YouTube channel—I'm going to be posting a series on the Turing Pi and Rasbperry Pi clustering in the next few weeks!

You can buy Compute Modules with or without onboard eMMC memory. If you don't have memory, you can attach a microSD card and boot from it, just like you would on any Raspberry Pi model B or model A. But if you have the eMMC memory, it's nice to be able to 'flash' that memory with an OS, so the compute module uses the onboard storage and doesn't require a separate boot device (either microSD card or USB disk).

How I livestream with OBS, a Sony a6000, and a Cam Link

.embed-container { position: relative; padding-bottom: 56.25%; height: 0; overflow: hidden; max-width: 100%; } .embed-container iframe, .embed-container object, .embed-container embed { position: absolute; top: 0; left: 0; width: 100%; height: 100%; }

A few weeks before this year's pandemic started affecting the US, I started live-streaming on my YouTube channel.

In the past, I've helped run live streams for various events, from liturgies in a cathedral to youth events in a stadium. (I even wrote a blog post on the topic a few weeks ago.)

For larger events, there was usually a team of camera operators. We also had remote control 'PTZ' cameras, and dedicated streaming hardware like a Tricaster.

For my own livestreams, I had a very limited budget, and only one person (me) to operate the camera, produce the live stream, and be the content on the live stream!

Ansible 101 by Jeff Geerling - YouTube streaming series

Ansible 101 Header Image

After the incredible response I got from making my Ansible books free for the rest of March to help people learn new automation skills, I tried to think of some other things I could do to help developers who may be experiencing hardship during the coronavirus pandemic and market upheaval.

So I asked on Twitter:

How to livestream Masses or other liturgies on YouTube

Note: I also posted a video with more information and a demonstration of how I live stream.

I've been working on video streaming on a tight budget for years, and have scrambled to get live-streaming going for some liturgies on short notice, so I figured I'd put together a video showing a few options from 'cheap using what you already have' to 'a little more expensive but within a reasonable budget'. Note that if you plan on having regular video streams for the long term, it's better to invest in a proper streaming system with remote-controlled PTZ cameras and hard-wired connections.

All of the options in this post will require at least a smartphone or computer (laptop preferred) with a good WiFi connection. Ideally, you can also plug your phone or laptop into power so the battery doesn't run out in the middle of the stream