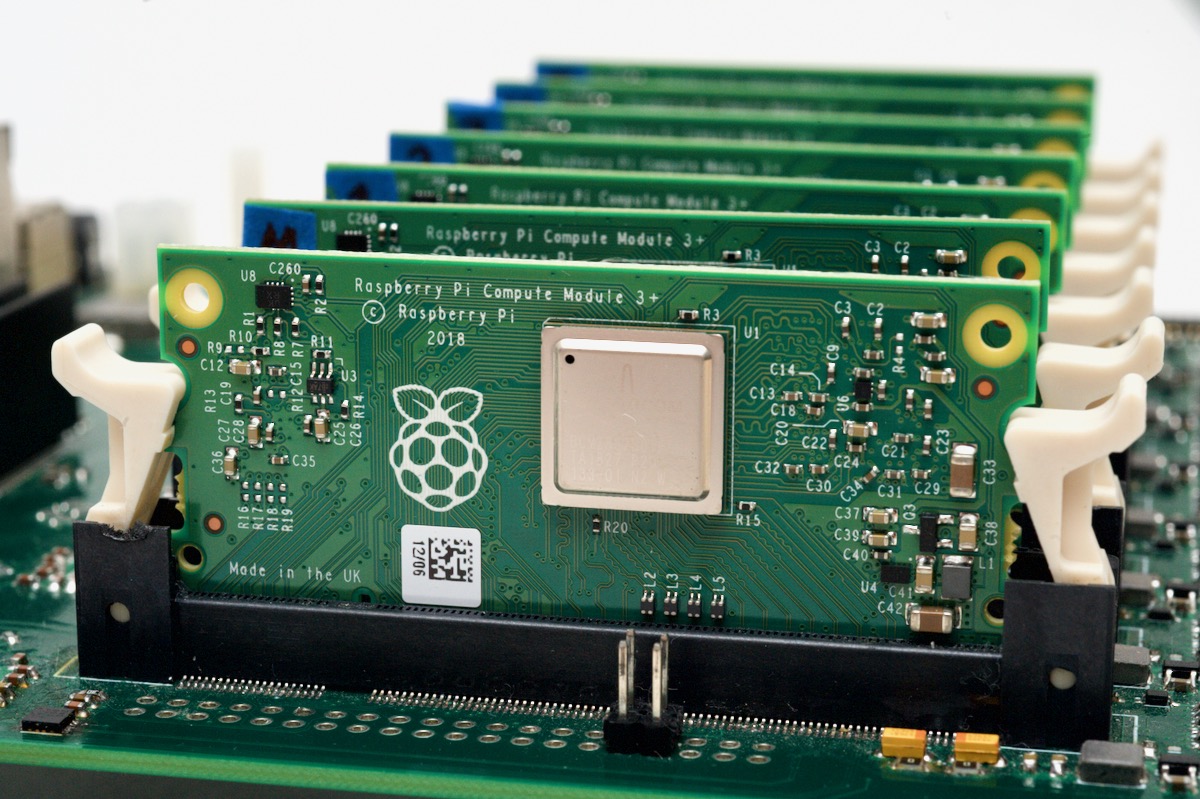
I recently got to play around with a Turing Pi, which uses Raspberry Pi Compute Modules to build a cluster of up to 7 Raspberry Pi nodes.
Interested in learning more about building a Turing Pi cluster? Subscribe to my YouTube channel—I'm going to be posting a series on the Turing Pi and Rasbperry Pi clustering in the next few weeks!
You can buy Compute Modules with or without onboard eMMC memory. If you don't have memory, you can attach a microSD card and boot from it, just like you would on any Raspberry Pi model B or model A. But if you have the eMMC memory, it's nice to be able to 'flash' that memory with an OS, so the compute module uses the onboard storage and doesn't require a separate boot device (either microSD card or USB disk).
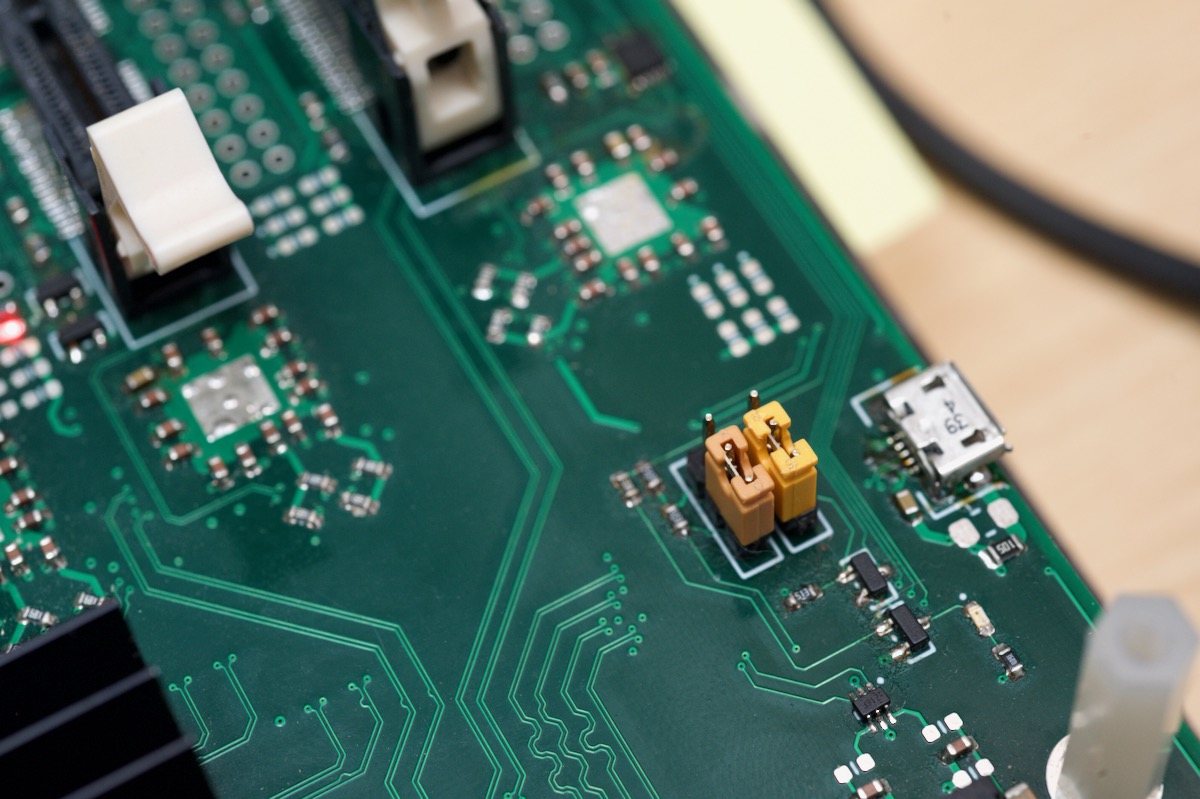
On the Turing Pi, you can move a jumper from 'boot' to 'flash' mode, put your Compute Module in slot 1 (closest to the micro USB port), then plug your Mac into the micro USB port:
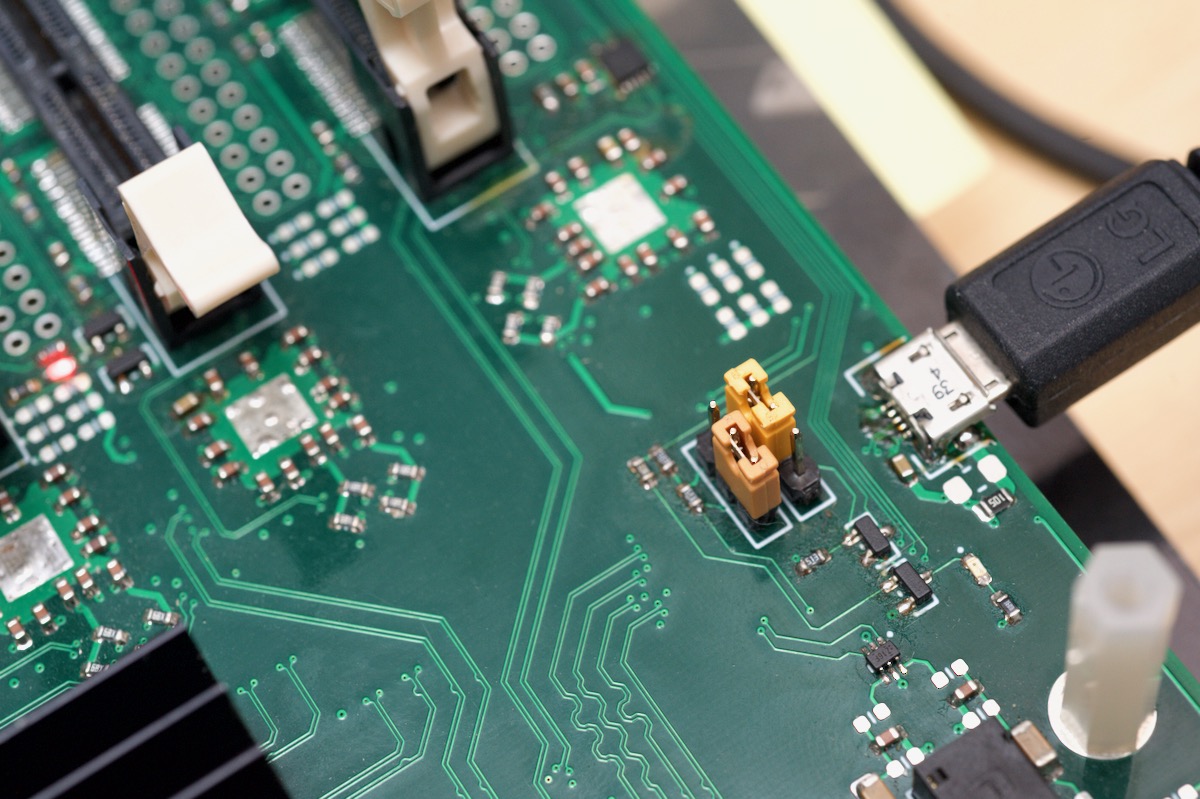
If you're using a Compute Module IO board (instead of the Turing Pi), make sure that J4 ('USB SLAVE BOOT ENABLE') is set to the 'EN' (enabled) position. Also, note that I am using a pre-production Turing Pi board in the above picture; the final production version may differ slightly from what you see here.
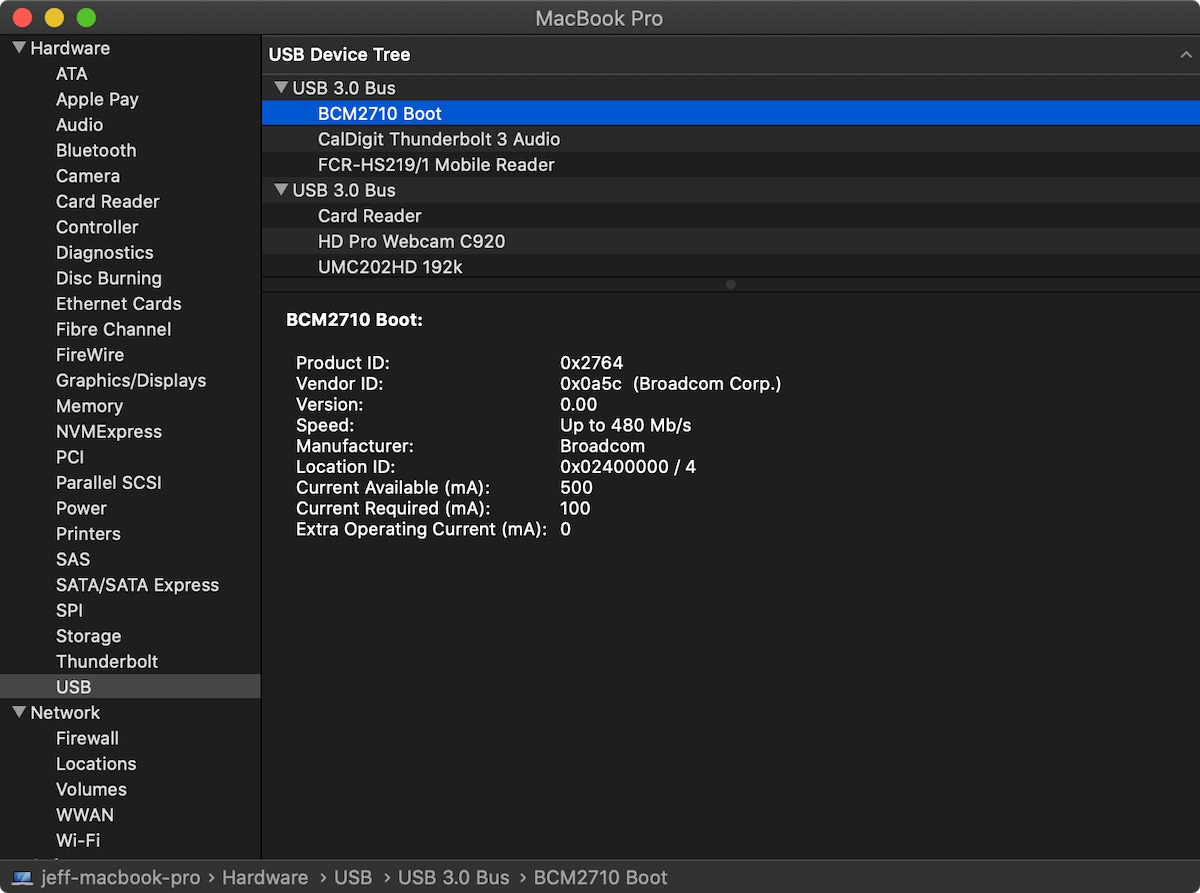
Once you plug in the board's power supply, you can see the Compute Module in the USB devices in your Mac's 'System Report'; click on the Apple menu, select 'About This Mac', then click 'System Report...'. Click on 'USB' under 'Hardware', then scroll down until you see the device (in my case, "BCM2710 Boot"):
At this point, I was trying to figure out the best way to get the device to show up as a mass storage device, so I could flash it like I do any common microSD card. I came upon this article from 2014, which pointed me down the right path. But since enough of the process was different, I thought I'd write down the full process here, for the benefit of anyone trying this with newer Macs and newer Compute Modules.
Getting the usbboot tool
To turn the Raspberry Pi device into a USB Mass Storage Device ('MSD'), you will need to use the Raspberry Pi foundation's usbboot tool.
But before you can use that tool, you need to install a dependency it requires, libusb. The easiest way to install it is using Homebrew:
brew install libusb
With that out of the way, you can install usbboot by cloning it's repository and running make:
# Clone the `usbboot` repository.
git clone --depth=1 https://github.com/raspberrypi/usbboot
cd usbboot
make
You might get a deprecation warning, but you can ignore it. You should now see a rpiboot executable in the directory:
~/Downloads/usbboot $ ls
LICENSE      Readme.md    bin2c.c      debian       main.c       rpiboot      win32
Makefile     bin2c        bin2c.dSYM   fmemopen.c   msd          rpiboot.dSYM
Run it with sudo:
sudo ./rpiboot
It will take a few seconds, but it should complete the process of turning the Compute Module into a MSD:
$ sudo ./rpiboot
Password:
Waiting for BCM2835/6/7/2711...
Sending bootcode.bin
Successful read 4 bytes
Waiting for BCM2835/6/7/2711...
Second stage boot server
File read: start.elf
Second stage boot server done
Once that's complete, you'll see a message stating "The disk you inserted was not readable by this computer.":
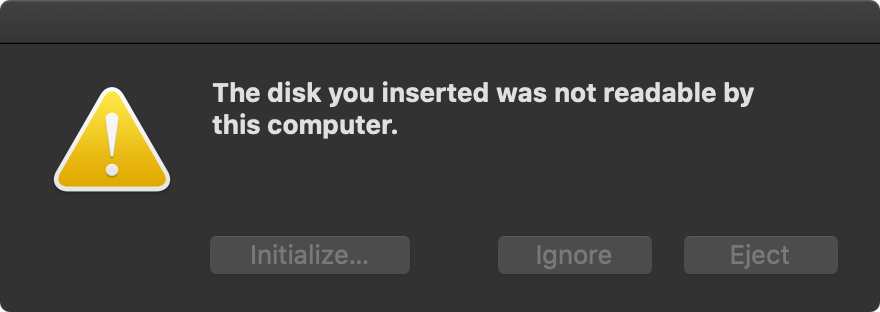
Click 'Ignore'.
Note: If your computer has trouble seeing the Compute Module, or it sees it then has errors when it tries writing to it, you may need to plug the USB cable into a port directly attached to your Mac, or to a powered USB hub. Some unpowered hubs, like the one built into a keyboard, don't supply enough power for USB mass storage devices to work properly. If in doubt, always plug a USB device directly into your Mac.
Writing Raspbian (or another OS) to the card
From this point, the process for writing Raspbian or any other OS image is the same as with any microSD card or USB drive:
- Find out the identifier of the Compute Module:
diskutil list(should be an 'external, physical' ~8/16/32 GB device, like/dev/disk4) - Make sure the disk is unmounted:
diskutil unmountDisk /dev/disk4(substitute your disk identifier here!) - Write the OS image to the card:
pv yyyy-mm-dd-raspbian-stretch.img | sudo dd bs=1m of=/dev/rdisk4- This command uses
pv, which makes it easy to monitor the progress of the copy (brew install pv), but you could usedddirectly instead of using it withpvif you want.
- This command uses
The write process took about 5 minutes on my machine, at a rate of about 5-6 MiB/s.
If you need to make any boot customizations (e.g. changes to the config.txt options, or if using something like Hypriot, setting the hostname inside user-data and adding a list of ssh_authorized_keys to the hypriot user), you should do that now, and then run the diskutil unmountDisk command again.
Booting the Compute Module
After unmounting the volume, I unplugged the micro USB connection on the Turing Pi, then I unplugged power to the board. To get the compute module to boot, I switched the jumper back to 'boot' mode:
Then I powered up the Turing Pi, and the Compute Module booted up with its fresh install!
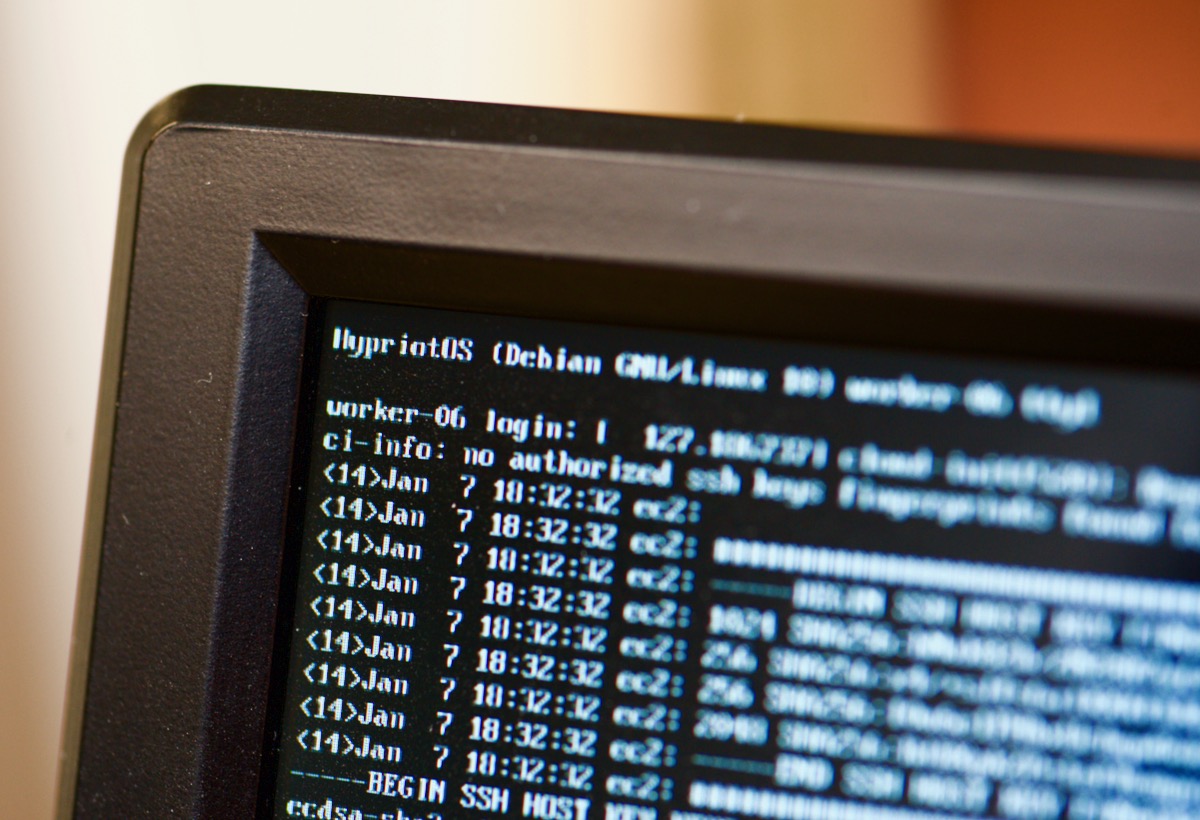
With the Turing Pi, the Pi in slot 1 is connected directly to the Turing Pi's HDMI port, so if you want to monitor the boot progress, plug an HDMI display into this port. The first boot can take some time, especially if it runs a process like cloud-init, which is the case with Hypriot (the first boot on my CM3+ module took about 2.5 minutes):
Comments
I use Balena Etcher for flashing Compute Modules from a Mac.
On MacOS Monterey, before running make in usbboot, run 'brew install pkg-config'.
Thanks! This was very helpful in my CM3 setup.
thanks Jeff - you're a star
I want to know how to connect camera to raspberry pi compute module