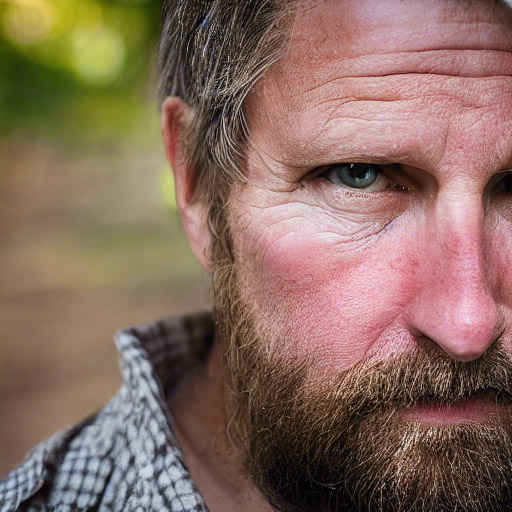
According to AI, this is me.
Or at least, what I look like if I deliver the prompt Jeff Geerling, realistic, photograph, sharp focus to Stable Diffusion, a machine learning, text-to-image model. But if you take that same prompt and paste it into the Stable Diffusion Demo, you'll get a different result.
Dall-E 2 and Stable Diffusion are two frontrunners in the current AI/ML image generation race. Put in the right descriptive text, and the machine learning models that were trained using many terabytes of image data will churn out something surreal and synthetic, yet alarmingly real.
Or they'll pop out an abomination like:
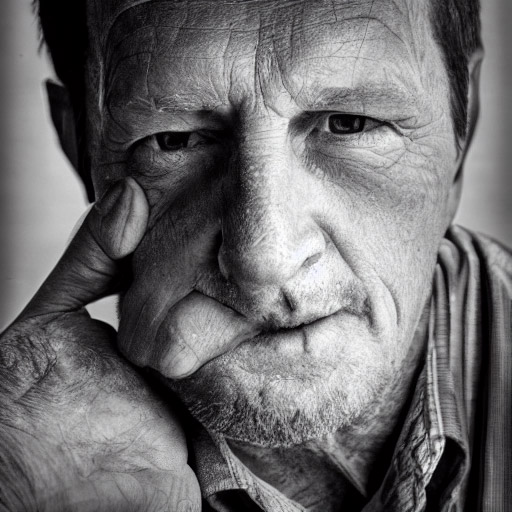
This is the stuff of nightmares... and many of the small details have this Lovecraftian horror to them. Zoom in on the lips in the more realistic image at the top of this post and you'll see what I mean.
The more you dive into prompts, the more you can explore these diffusion models' 'creativity':

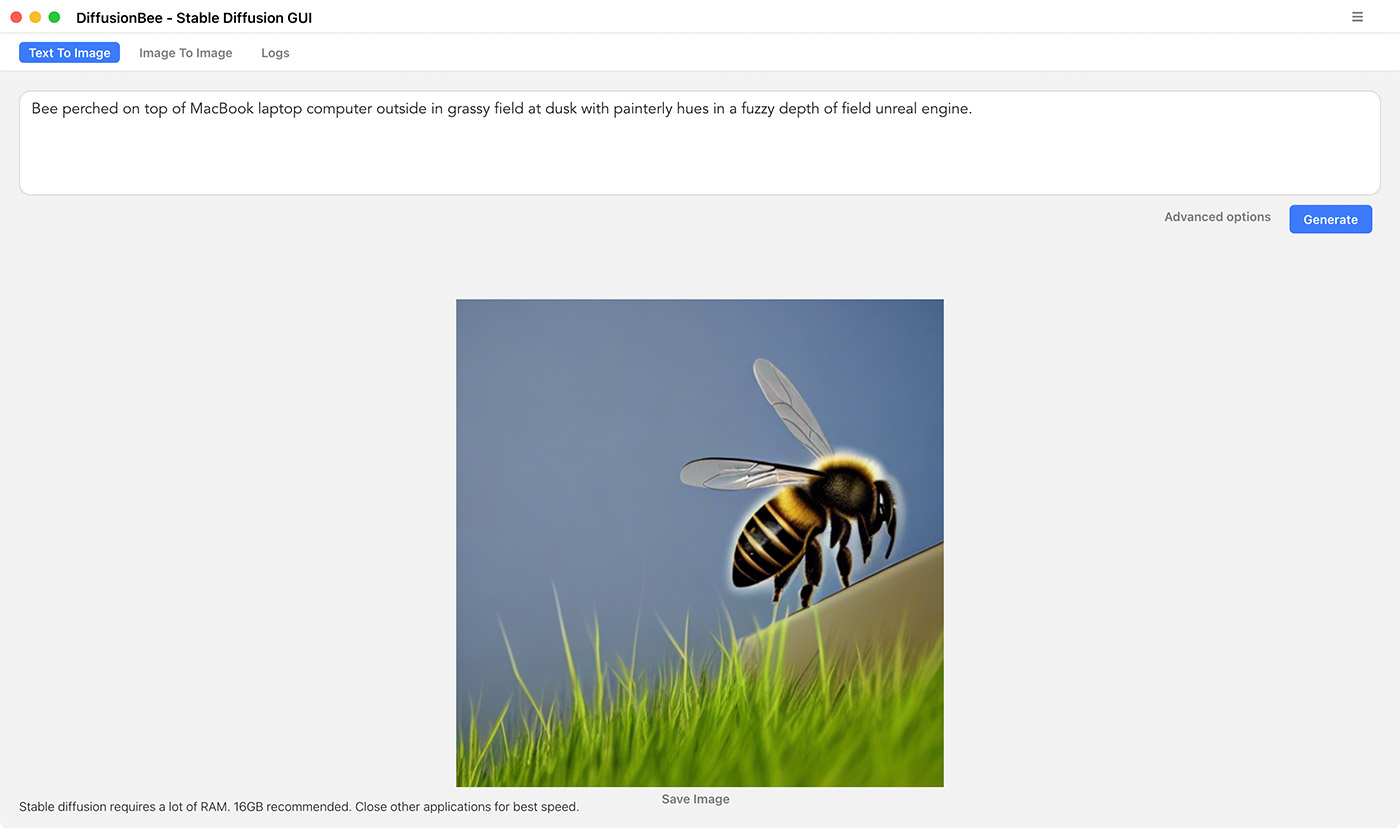
Prompt: Brad Pitt sitting with laptop computer in front of computer data center server rack low poly.
The implications of this tech, tweaked a bit further, can be far reaching. Besides all the corporate blogs that'll toss up AI generated images in the header for their posts to save a few bucks on Getty Images, companies that formerly hired illustrators might farm out work to image generation services. And because of the way these models are trained (scanning something like 10% of all images available on the Internet), some of those illustrators' work may be informing the final image output!
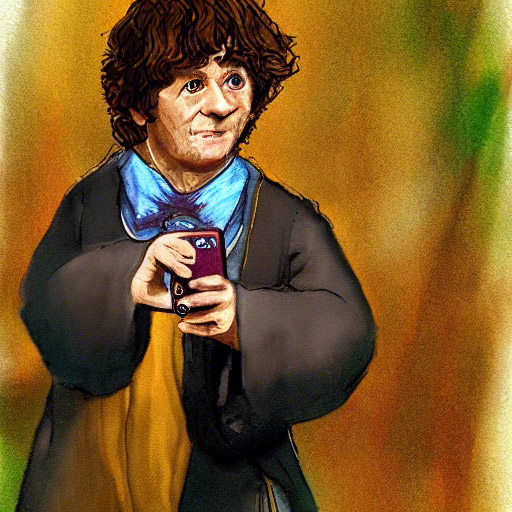
Prompt: Bilbo Baggins talking on a mobile phone painterly in the style of Pauline Baynes
There are some guard rails in code to help the generated work avoid specific conditions, like a filter for text prompts to avoid any realistic phrases from appearing in generated text:
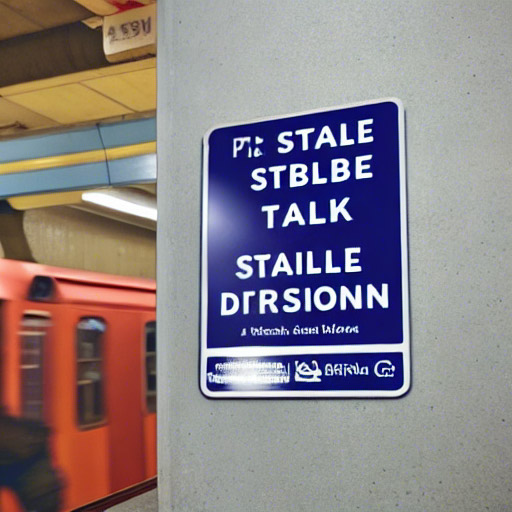
Prompt: NYC subway sign that says stable diffusion
But this kind of technology is not useful for exploration (IMHO) unless it can be done easily—and locally. And luckily, assuming you have a relatively powerful computer (e.g. an M1 Mac with 16 GB of RAM or more, or a PC with an AMD RX 6800 XT or better, or Nvidia RTX 3060 or better), you can download and run the software fairly easily.
I generated some of the images in this post on my M1 Max Mac Studio (which takes about 45 seconds per image), and others using my PC (which I just upgraded to an RTX 3080 Ti). Here's how I got Stable Diffusion running on each.
On macOS
There are actually a number of GUIs available for Stable Diffusion now, but the one I decided to try out on my M1 Mac (sorry, so far I haven't seen anything for Intel-based Macs) is DiffusionBee.
You literally download the .dmg file, open it, drag DiffusionBee into Applications, and you're off to the races! Well... after waiting for it to download the model files on the first run (that can take a while, depending on your Internet connection).
But it's a snappy macOS-native GUI app. You put in a prompt, and out pops a picture. On my M1 Max Mac Studio, it took 30-45 seconds to produce an image. On my M2 MacBook Air, it takes about a minute.
There are a number of stable-diffusion forks that add M1 support and tweak the application for different use cases (e.g. for laptops with less RAM, or to make it slightly more optimized for M1 Ultra), but I found it a little more challenging getting the main stable-diffusion repo (and a few of the forks I tried) running stably on macOS.
So I'm happy with DiffusionBee for the time being, but it's not super fast.
On a PC with AMD or Nvidia GPUs
And that's where my PC comes in... if you have a modern, high-end GPU like the Nvidia 3080 or 3090, or an AMD RX 6800 or 6900 XT, and have at least 12 GB of VRAM, you can generate images in just a few seconds.
And indeed, the easiest way I found to expose all the features of Stable Diffusion was to run the most popular Stable Diffusion Web UI on my PC with an Nvidia GTX 3080 Ti with 12 GB of VRAM, under Ubuntu 22.04 (I dual-boot Ubuntu and Windows on my PC currently—though you can get things working on other Linux distros pretty easily).
Here's how I set it up (summed up in this gist):
- Install Docker and docker-compose following the official Docker install guide
- Add your user to the
dockergroup:sudo usermod -aG docker $USER - Log out and log back in to make that take effect. (I actually had to reboot)
- Install the NVIDIA Container Toolkit following this guide.
- Clone the stable-diffusion-webui repo:
git clone https://github.com/sd-webui/stable-diffusion-webui.git - Go into that clone directory:
cd stable-diffusion-webui - Copy the Docker environment file:
cp .env_docker.example .env_docker - Build the Stable Diffusion Web UI environment:
docker-compose up -d - Wait for it to build (takes a while—follow its progress with
docker-compose logs -f) - Once you see a message about running on localhost, it should be ready to serve up the Web UI.
In a browser window on that computer, I visited localhost:7860 and got the Web UI:
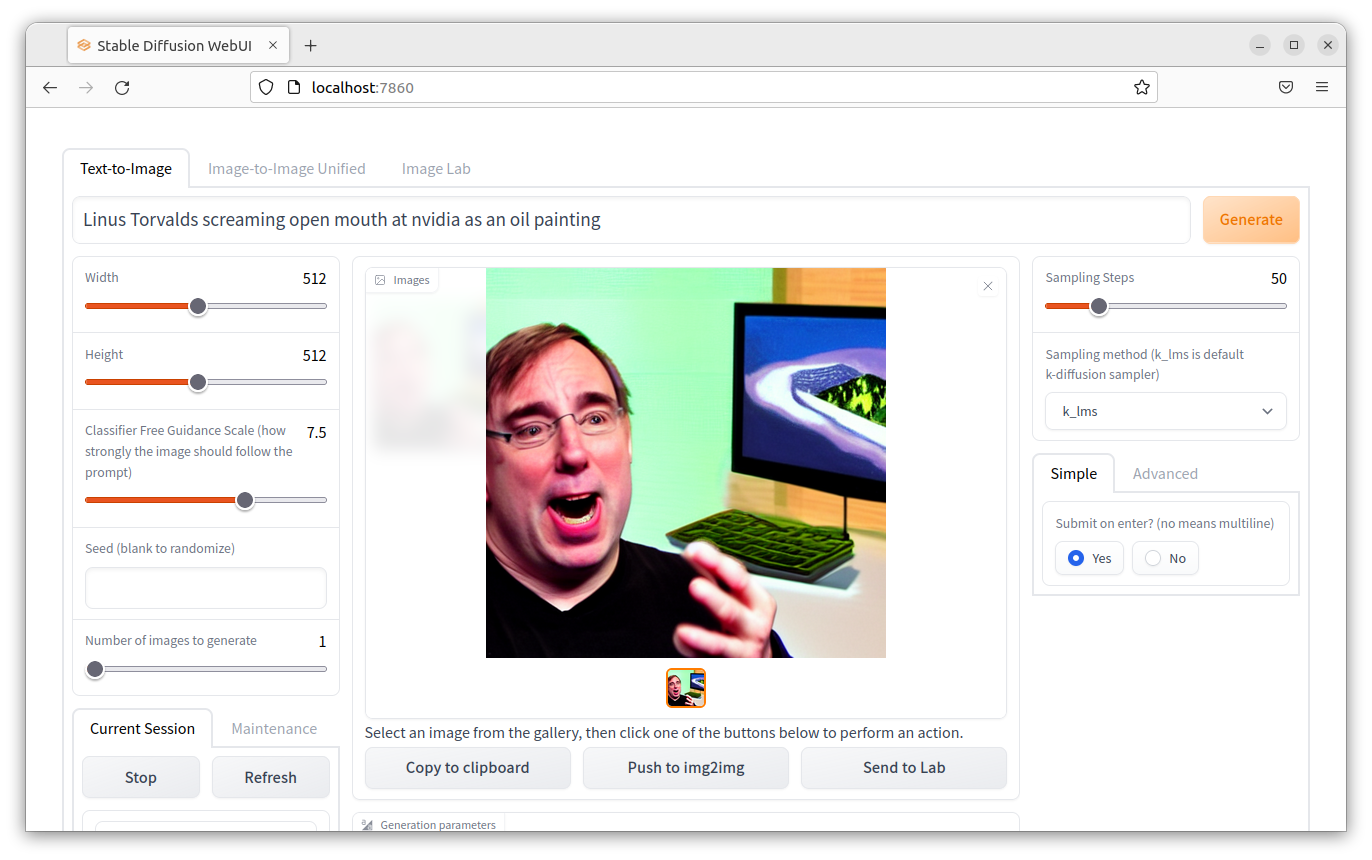
The Web UI exposes a lot more functionality than DiffusionBee, and even includes some tools for refining the generated image or 'painting out' parts of an image. And on my 3080 Ti, it ramps the GPU to 100% and spits out an image within about 5 seconds—a vast improvement over the 30-45 seconds it currently takes on the M1 Max.
Assuming your computer's firewall isn't blocking anything, you could also access the Web UI anywhere else on your network by entering the computer's IP address instead of localhost for the URL (e.g. http://192.168.1.29:7860/).
I was also able to get Stable Diffusion running on the same setup with the main repo—my guide for that is here, but running it in a container makes it a lot more portable and easy to set up, and you don't have to mess around with Python environments or anything like that.
If you have an AMD GPU, things are a little different. I have a guide for installing Stable Diffusion on Ubuntu 20.04 for AMD GPUs, but because AMD's ROCm only works with their highest-end cards (currently the 6800+, my 6700 XT didn't work), I wasn't able to fully test these instructions.
If you don't do the extra steps in my guide (which is adapted from this comment in the Stable Diffusion repo), you'll end up with a warning like:
RuntimeError: Found no NVIDIA driver on your system. Please check that you have an NVIDIA GPU and installed a driver from http://www.nvidia.com/Download/index.aspx
Stable Diffusion is still in its early days, and it seems like there's a new fork with some significant new feature coming out every couple days. For some inscrutable reason, a lot of the community around these tools happens in Discord, so a lot of good information is forever lost in the bowels of a proprietary chat app... but it is what it is.
Comments
I believe that number 8 command for installing on a PC has and extra - and should be "docker compose up -d" not "docker-compose up -d"
Nope, "docker-compose" is correct.
You're both correct, it just depends.
`docker-compose` with the dash is when using Docker Compose v1. `docker compose` without the dash is when using Docker Compose v2, which is now a Docker plugin.
I wonder if there is a way for users to add their own images to the model.
How long before it'll work on a Raspberry Pi
I wanna be able to try it with my 5600XT, and I want it to be easier to install and get setup, and not require doing a docker thing.
time to check your prompt with midjourney :)
OK, it sucks that we have to go through Discord to use such tool.
I'm not fond of these IA stuff, they are cool, they can help you to explore stuff but having to use another "service", to rent things just to pretend to go faster, not for me.
BUT I definitely understand why it will succeed. Companies don't really care as soon as it is cheaper.
And it's not like the cinema/animation industry is really trying to innovate.