Harbinger of the Internet of Dings
Last year, I built the first version of what I call the "Raspberry Pi Bell Slapper." It was named that because it used a servo and a metal arm to slap the top of the bell in response to a stimuli—in this case, an email from a donation notification system for a local non-profit radio station.
This year, that same radio station had another one of their fund-raisers (a radiothon), and to celebrate, I thought I'd do the thing justice, with a better circuit (using a solenoid instead of a servo) and a 3D printed enclosure. And this is the result:
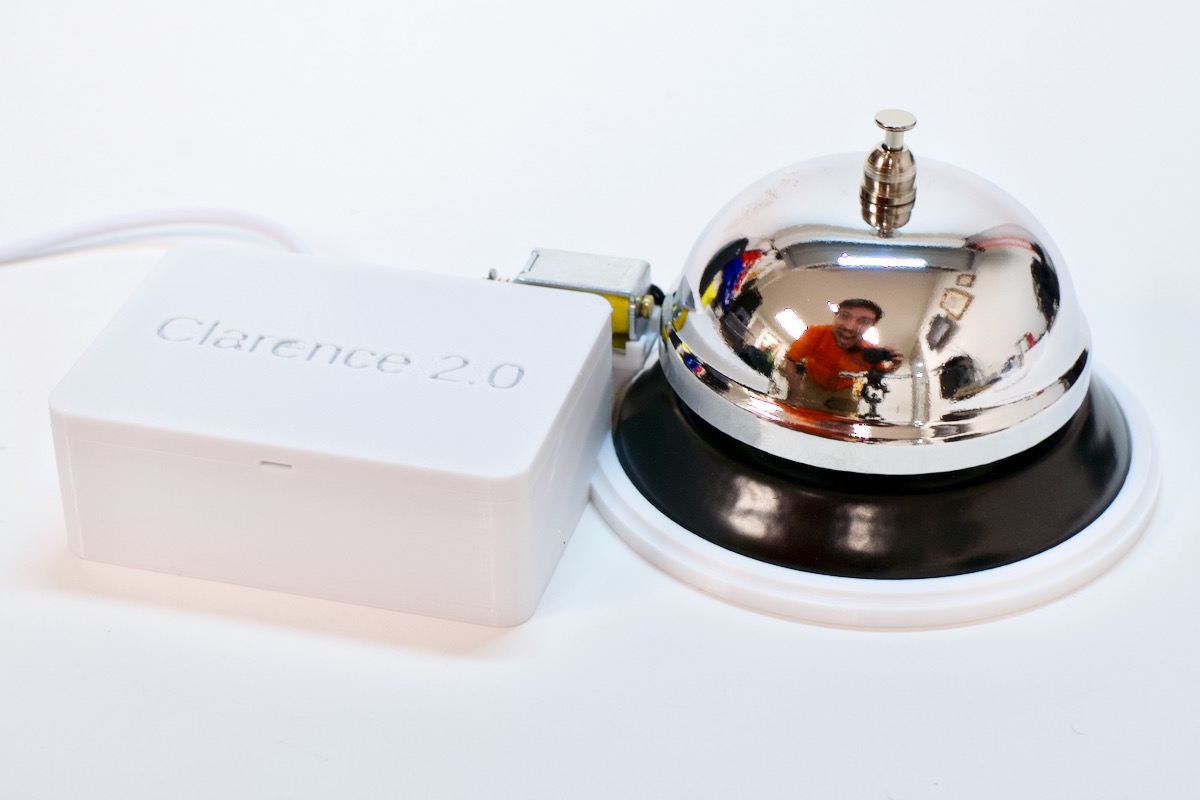
There is a Raspberry Pi Zero W with a custom solenoid control HAT on top inside the case to the left, and the solenoid right up against the bell, which is mounted on the right.
I also posted a video on YouTube exploring the project in detail: The Raspberry Pi IoT Notification Bell.
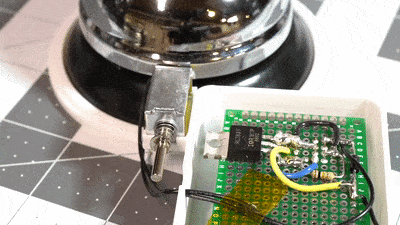
Building the Solenoid control HAT
It's not technically a HAT but it's like a HAT so I'll call it a HAT; I translated the following circuito.io circuit diagram:
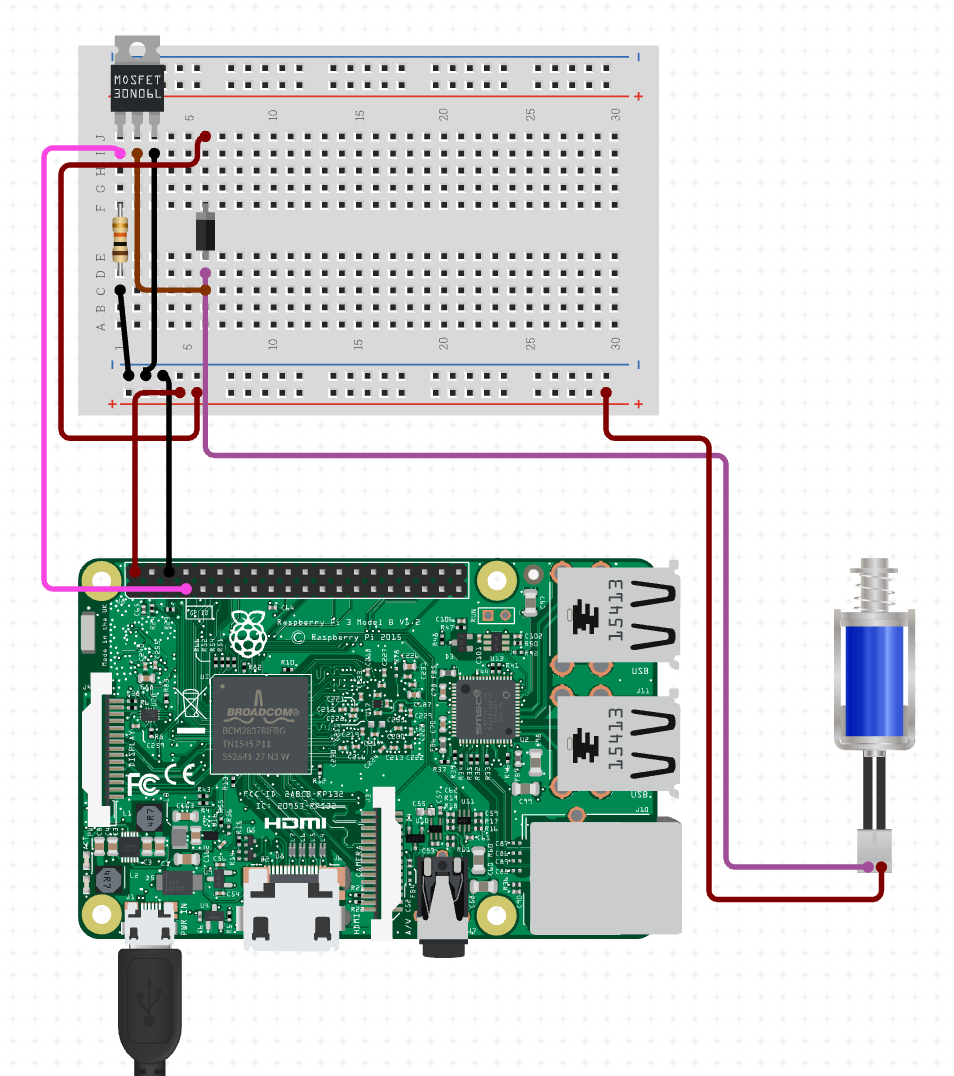
...into the following protoboard circuit:
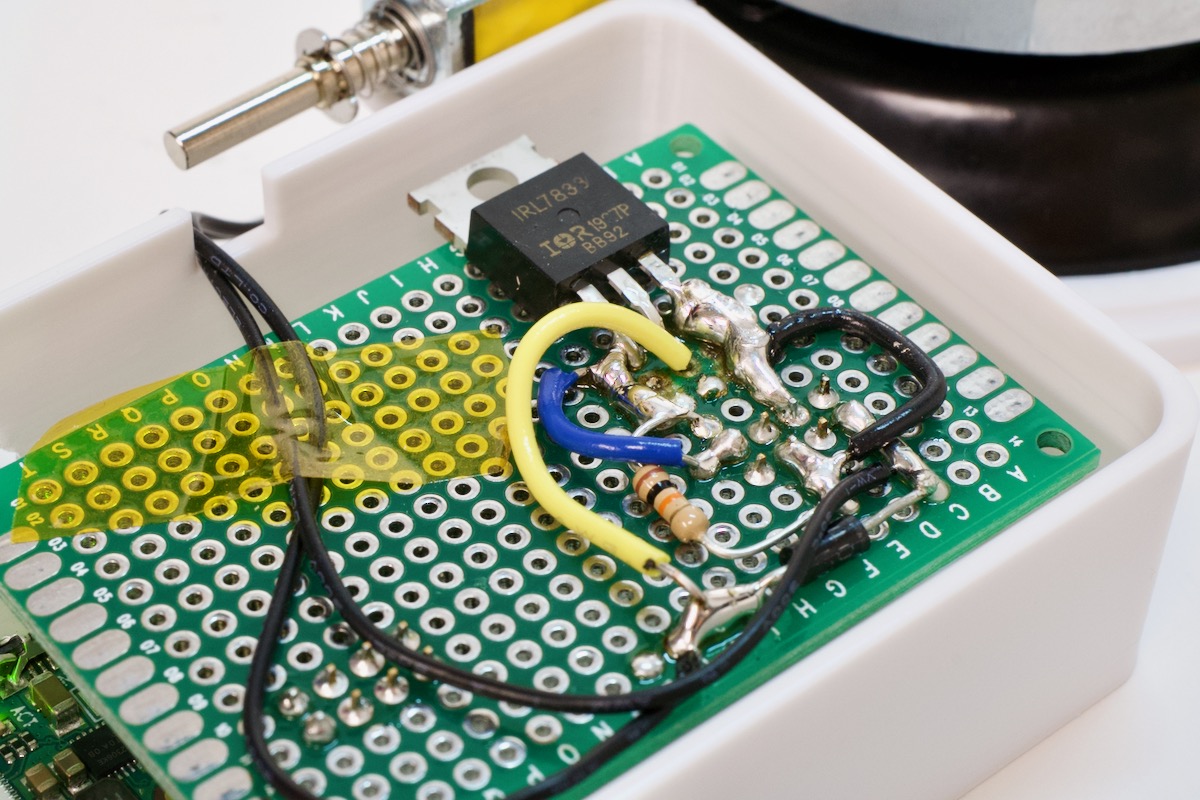
It's not my best work, but my excuse is that I had about 30 minutes to complete the thing (while trying to record it for a YouTube video), and didn't even spend time laying it out before soldering it in place. Plus I didn't have any strip board available—bridging with globs of solder is inherently uglier 🤪
But hey, it works. What more can you ask? Someday I might create a proper PCB for it, who knows.
Building the 3D printed case
I was prepared to spend a few hours designing a new case from the ground up, when I found user @tenderlove published his Analog Terminal Bell case design.
So I decided to learn OpenSCAD and hack that case design a bit to fit my larger Pi Zero and HAT.
And voila! I had a case:
Putting it all together
The solenoid circuit is wired up to the Pi's GPIO pin 4, so controlling it with Python is pretty simple:
from time import sleep

# GPIO Pin where solenoid control circuit is connected.
solenoid_pin = 4

# Define the Pin numbering type and define Servo Pin as output pin.
GPIO.setmode(GPIO.BCM)
GPIO.setup(solenoid_pin, GPIO.OUT)

# Slap the bell.
GPIO.output(4, GPIO.HIGH)
sleep(0.01)
GPIO.output(4, GPIO.LOW)

GPIO.cleanup()
The final script is a little more robust—check out bell_slap.py in the Pi Bell Slapper repository.
It basically:
- Sets up GPIO.
- Briefly sets pin 4 'high'.
- Cleans up GPIO.
Then there's an email_check.py script that ties into a configured email account to check for a specific notification email, then call out to bell_slap.py any time a donation email is found.
You can check out all the source (and a lot more documentation) in the Raspberry Pi Bell Slapper repository—and if you haven't watched the video, check it out on YouTube: The Raspberry Pi IoT Notification Bell.
Comments
Internet of dings! I love it!