raspberry pi

Using LibreELEC like a pro—management via SSH

For a recent project, I needed to install LibreELEC/Kodi on a Raspberry Pi Compute Module 4 with built-in eMMC storage.

Because it's inconvenient to be swapping the Pi around from the embedded display I was using it in to my preferred carrier board I use for flashing Pis and interacting with their filesystems, I wanted to manage my LibreELEC install over SSH.

It seems like whatever documentation the LibreELEC Wiki used to have for remote SSH access is missing, and all I could find were references to enabling SSH during a GUI setup wizard. If you didn't see that during initial setup, the easiest way is to add ssh to the end of the line in the system's cmdline.txt file, then reboot.

So I pulled the Pi, used usbboot to mount the fat32 volume on my Mac, and opened cmdline.txt and added ssh. Then I popped the Pi back in the embedded display, and started it up.

Sure enough, I could now SSH in:

Watching the Earth move with a Raspberry Pi

A few months ago, someone from the Raspberry Shake team got in touch, and asked if I'd like to try out a Shake at my home.

As someone who has spent a bit too much time nerding out over space and atmospheric weather, but never touched seismology, I decided it was time to dig deep and learn a bit more about the Earth.

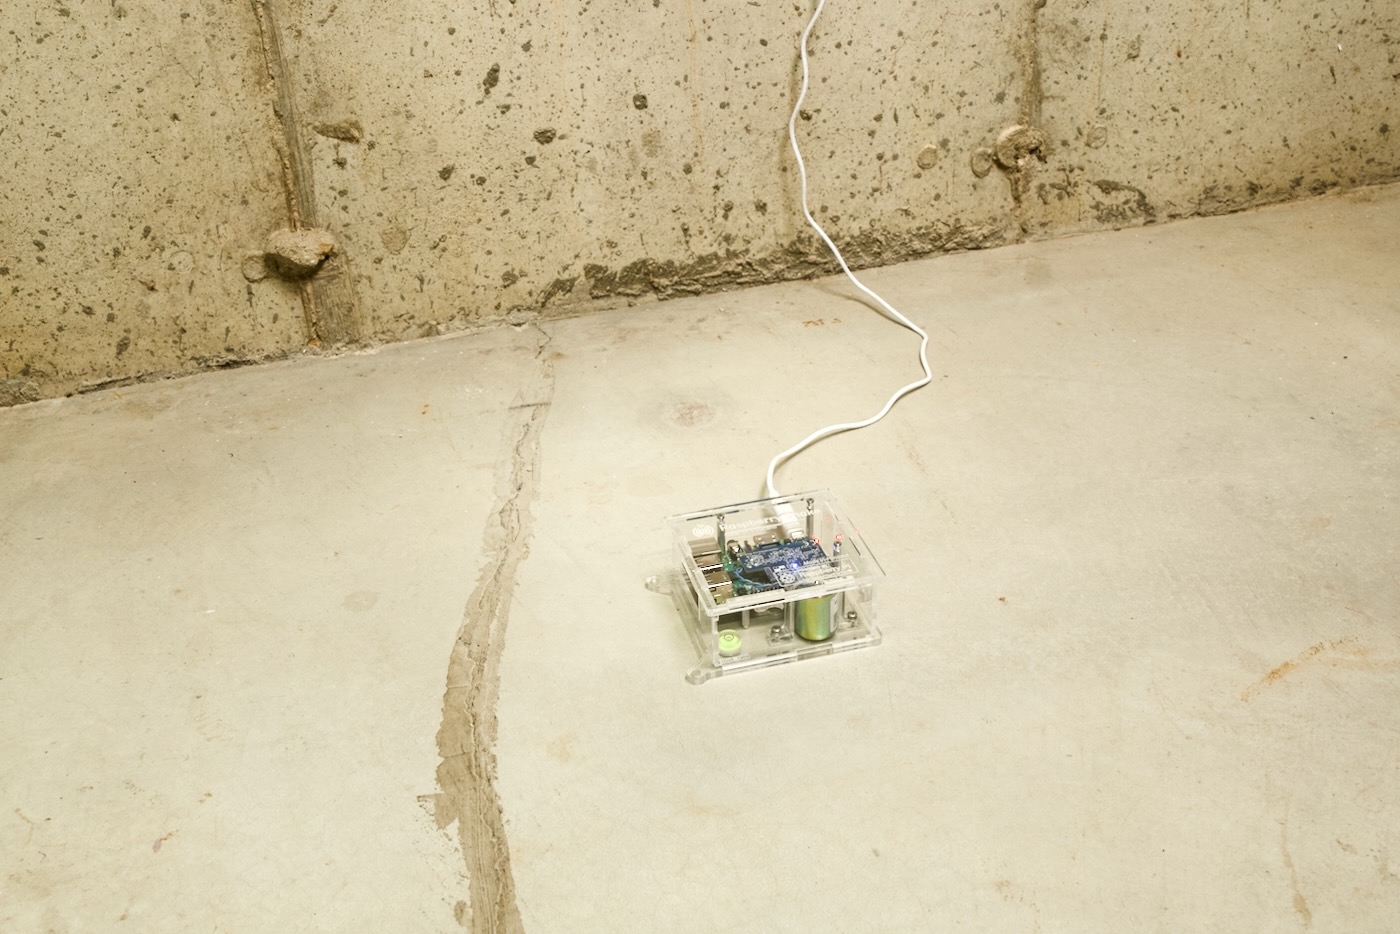
Raspberry Shake on basement floor

And learn I did! They sent their simplest model, the Shake 1 RS1D, I placed it on my concrete basement floor, and then waited.

The Petabyte Pi Project

I haven't had time to write up the details yet, but I wanted to share a project that's been many months in the making: The Petabyte Pi Project on YouTube.

I'm still doing follow-up testing based on feedback from Broadcom storage engineers, and will put out a much more in-depth blog post later, but the gist is:

Can a single Raspberry Pi cosplay as an 'enterprise' storage server, directly addressing 1 PB of storage?

Now... caveats abound here. What does 'enterprise' mean? And what does 'directly addressing' mean? Those things are all answered in the video linked above.

But to give a tl;dr: The Pi does not perform swimmingly. But... I did get a single array of 60 hard drives—20TB Exos HDDs to be exact—working in a 45Drives Storinator XL60 chassis, controlled only through a single Raspberry Pi Compute Module 4. Of course I had to rip out the Xeon guts and replace them with said Pi:

External graphics cards work on the Raspberry Pi

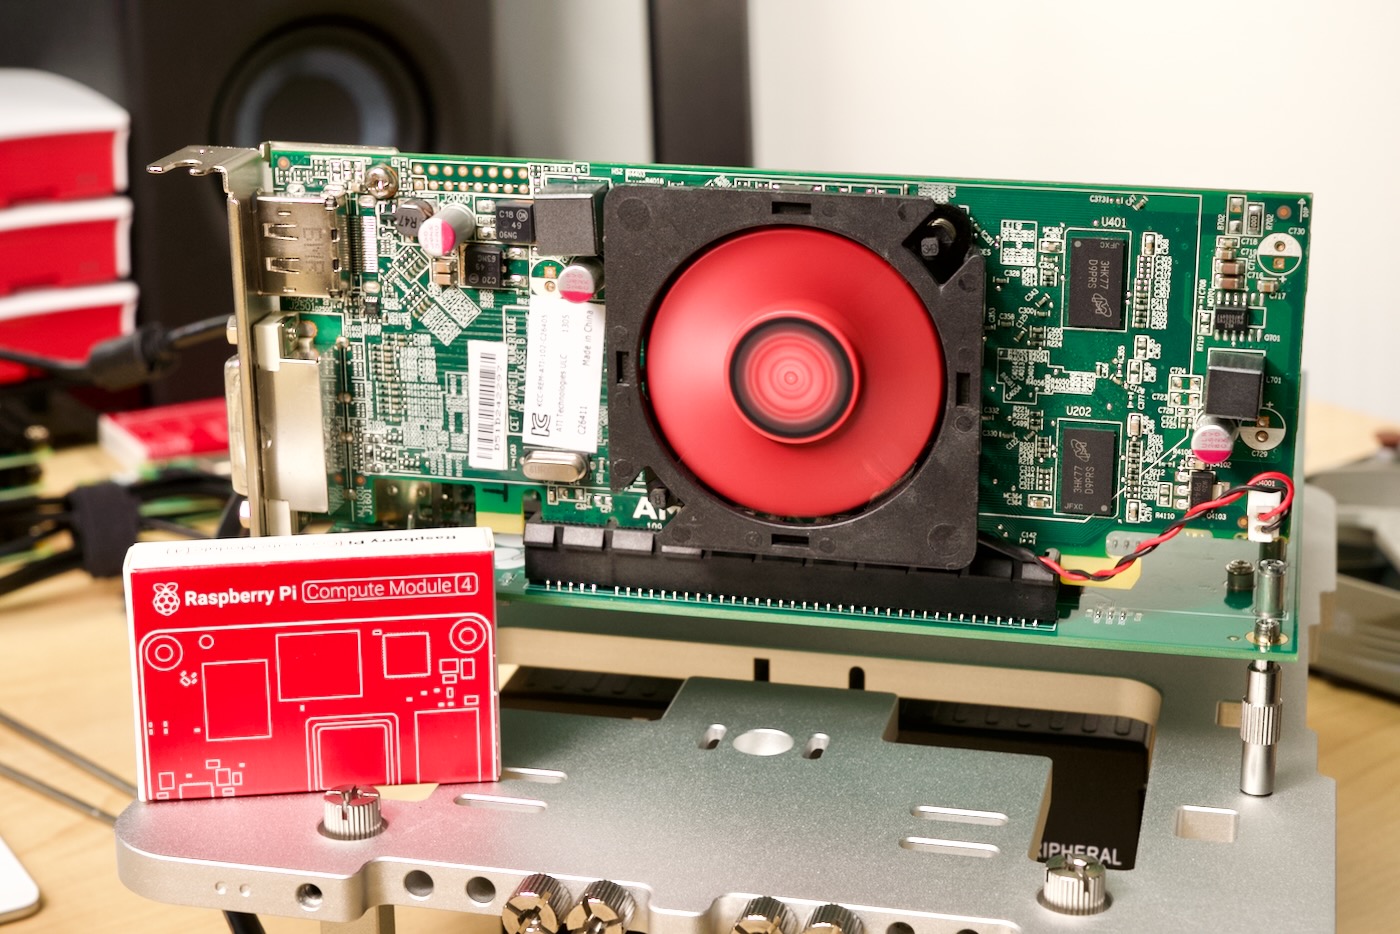
AMD Radeon HD 7450 Graphics card with Raspberry Pi Compute Module 4

In October 2020, after Raspberry Pi introduced the Compute Module 4, I started out on a journey to get an external graphics card working on the Pi.

At the time, it'd been over a decade since the last time I'd built a PC, and I had a lot to learn about PCI Express, the state of graphics card drivers in Linux, and PCI Express support on various ARM SoCs.

8 New Compute Module 4 boards for Spring 2022

It's been a busy start to the year on my Raspberry Pi PCIe Devices website. Not only have we finally made some significant progress learning about the BCM2711's PCIe bus (both good and bad), I've also added a few dozen new Raspberry Pi CM4-based boards to the site.

In my YouTube video today, I go through four of them in depth, showing how they're built and what they're used for.

The four projects I cover in depth are:

  1. Bigtreetech's Raspberry Pad 5
  2. Seeed Studio's reTerminal
  3. Waveshare's Dual Ethernet 5G/4G base board
  4. Ab-log's RPi4-RTC-PoE DIN rail computer

And there are some other projects I'm watching closely as they journey down the road towards production:

How to run glmark2-drm to benchmark an external GPU on a Raspberry Pi

Recently I wanted to see whether I could get glmark2 (an OpenGL 2.0 and ES 2.0 benchmark tool) to run on a Raspberry Pi with an external graphics card (see this thread).

But glmark2 isn't available in any Pi repositories, so you have to build it from source:

sudo apt install -y meson libjpeg-dev libdrm-dev libgbm-dev libudev-dev
git clone https://github.com/glmark2/glmark2.git
cd glmark2
meson setup build -Dflavors=drm-gl,drm-glesv2
ninja -C build
sudo ninja -C build install

I built this for drm only, so it can run fullscreen without any X/Wayland environment. To run the full suite:

glmark2-drm

Or you can run a specific benchmark like glmark2-drm -b jellyfish.

New Raspberry Pi: Compute Module 4S

Update: The Compute Module 4S is now listed on Raspberry Pi's website. But they state it "is not for general sale."

Strange times beget strange things.

And that's an apt description of the new Raspberry Pi Compute Module 4S:

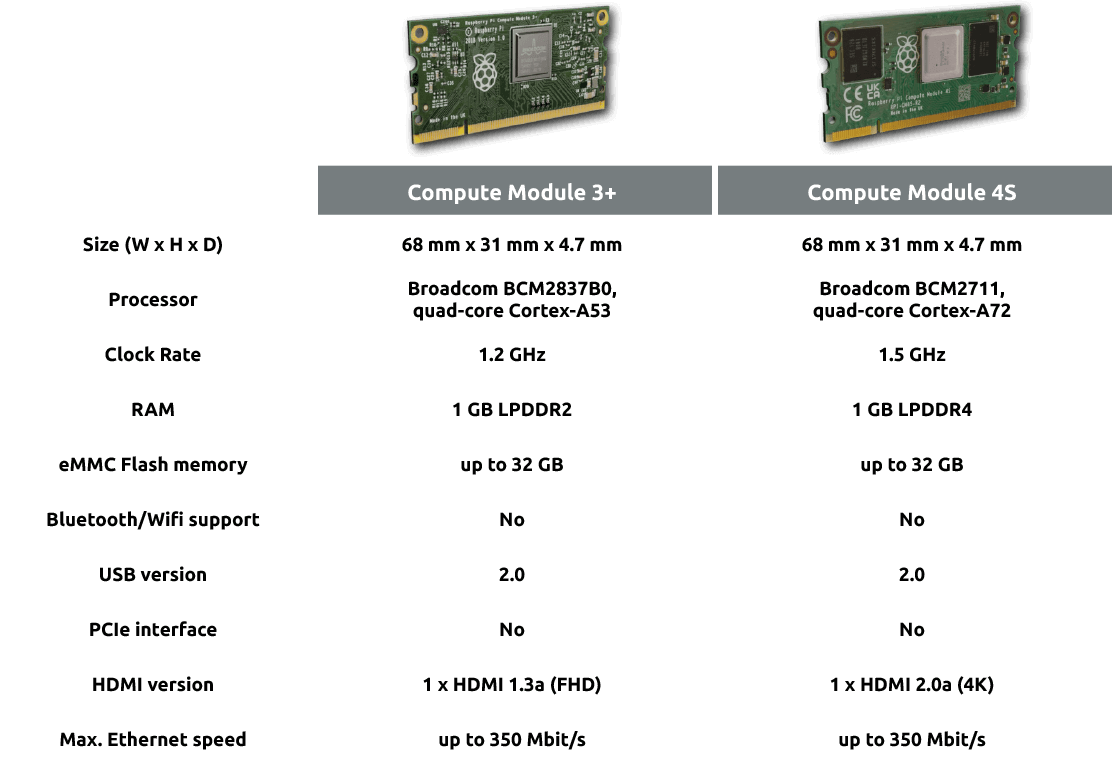
Raspberry Pi Compute Module 3+ to 4S Differences

The above chart is from Revolution Pi's page announcing the RevPi S and SE, which are updates to their popular CM3+-based industrial DIN rail computers.

Playing sounds with Python on a Raspberry Pi

Today I needed to play back an MP3 or WAV file through a USB audio device on a Raspberry Pi, in a Python script. "Should be easy!" I thought!

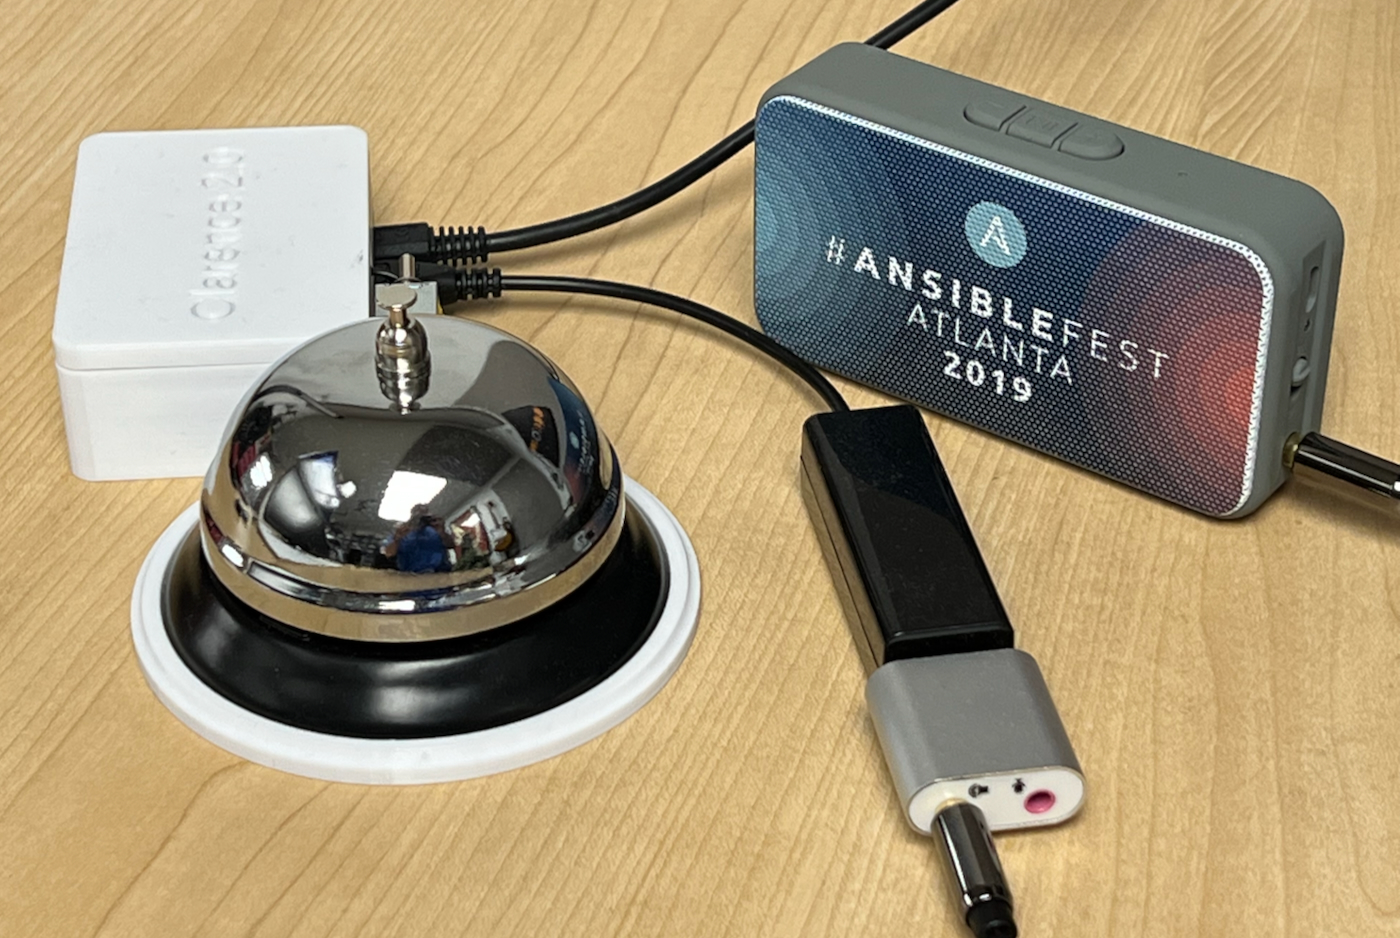
Clarence the Raspberry Pi Bell Slapper with USB audio output and speaker

Well, a couple hours later I decided to write this blog post to document the easiest way to do it, since I had to take quite a journey to get to the point where sound actually plays through the USB audio output.

The problem is most guides, like this simple one from Raspberry Pi's project site, assume two things: