Installing an outdoor GPS antenna for more accurate time
I've been deep into time and timing lately (more shenanigans coming tomorrow), but today I posted a video covering the install of a PCTEL GPS/GNSS antenna at my studio.

I put up the antenna after realizing how indoor GPS reception is just never that great, due to a variety of factors (like multipath propagation and interference), even if I placed my antennas up in the plenum space right under the roof. Of course, it doesn't help that my studio has a metal roof :)
I was able to get a 3D position fix, and a time reference probably down to the sub-microsecond level, but it would vary through the day, and I realized why every cell tower, infrastructure building, etc. has one or multiple outdoor GPS antennas like the one I installed!
You can watch the video below, or I'll also list some of the highlights and the parts we used for the install after it:
Why an outdoor GPS antenna?
If you're interested in position, indoor reception might be adequate. Even for time, the signal quality can be good enough—especially if you're not in a highly-metal-framed and roofed environment like I am.
But I'm interested in dipping into the single-ns realm of timing accuracy.
And for that, in addition to a good GPS receiver (I'm using a U-blox ZED-F9T currently for my Time Pi server), you need a clear view of the entire sky (more GNSS satellites is better, and a direct shot means less interference to deal with—usually), plus a very static mount (no motion).
If you have that, you can use TIME mode to further hone in on 2-5ms level timing accuracy on a modern U-blox. Which would be awesome.
I'm not there yet, but with this new antenna install, I can get there, once I figure out the software side. And a GPS distribution amplifier for more experimentation (let's not go down that rabbit hole quite yet).
The equipment I chose
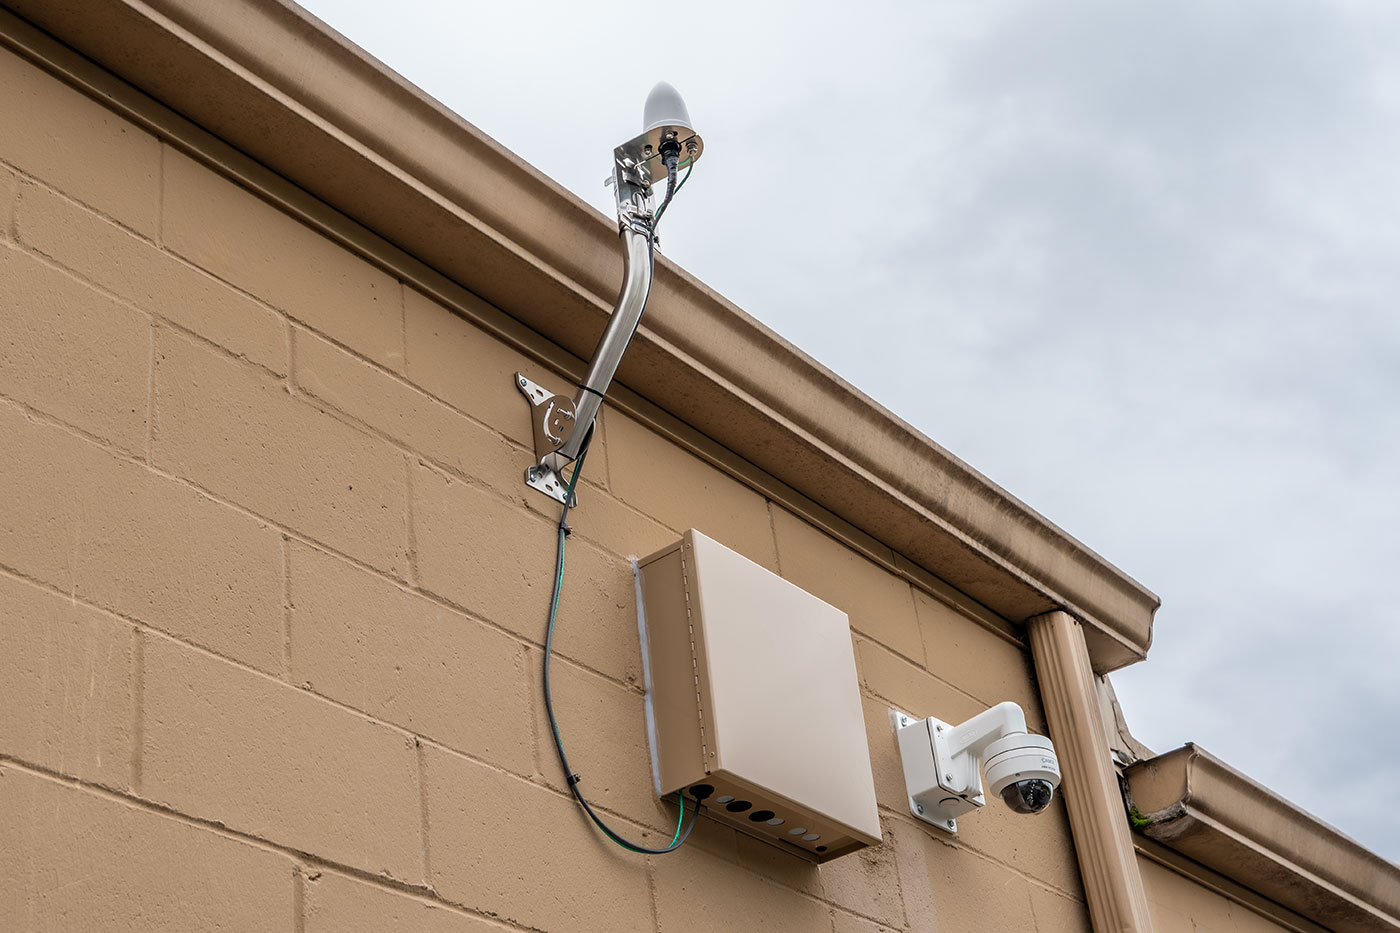
From a connection at OCP-TAP, I was provided a surplus PCTEL GPS Antenna which is weatherproof, has built-in lightning protection, and includes pole or post mounting hardware.
To go from the antenna into the rack room, I have a length of Belden H155 50 ohm coax cable terminated at one end with an N connector (to screw into the GPS antenna), and the other end with SMA (to screw into a GPS distribution amplifier at some point—right now it just goes into a little SMA to IPEX U.FL adapter, which plugs into the GPS module on my Time Pi.
The antenna is mounted to the exterior cinder block wall using a Proxicast Pro Grade J-Max stainless steel wall antenna mount.
The cable, along with a #10 AWG copper braided cable off the grounding lug on the antenna, passes into a KF7P Metalwerks Defender Series cable entrance box. This box is a bit expensive compared to DIY... but the finish on it, the documentation around how to install, and the customer support for it is top notch.
That passes through the cinder block wall, and I sealed the pipe with expanding foam, and will soon stick some duct seal into the end of the pipe to insulate from the exterior (at the suggestion of a YouTube comment).
The full install took about 6 hours, including the time to chisel out a hole in the cinder block wall, route the cable through the plenum space, and run to the hardware store twice to try to get the right mounting straps for the GPS antenna bracket (it came with straps for a very large pole, like a telephone pole!).
Tips for a solid install
Just noting a few observations after completing the install, and having some time to discuss a few of the finer points with folks online:
- For the large diameter holes in the cinder block wall, I drilled a series of small holes in a circle, then chiseled out the larger hole. This is a bit messy, and I know there are 'coring' drills... but any way to make a cleaner hole that doesn't involve renting a larger machine? I wasn't about to sacrifice one of my wood hole saws seeing if it could be made to work (I imagine it would chip out and get dull!).
- After installing the antenna, it's good to weatherproof the connection point (the N connector, in this case). We used Coax Seal, and my Dad called it 'tar tape'—there's different opinions about using 'courtesy wrap' first (a layer of electrical tape on the connector, then coax seal, then another layer of electrical tape) or just applying the moldable plastic goop directly to the connector like we did here. My Dad said he usually does a layer of electrical tape first, so that 5-10 years down the line, it's cleaner to remove and the connector isn't all gooey.
- In a similar vein, my Dad usually starts below the connector, wraps up towards the connection, then back down (and some other hams and cellular installers said they do the same). There seems to be a lot of opinions about small details (like one commenter mentioned the way he cuts the tape so it doesn't start coming undone over time, or another mentioned wrapping the entire connection in heat shrink tubing...).
- I've ordered a used 1x4 GPS Splitter to try to split the antenna out to multiple receivers, but for now it is plugged directly into my Time Pi in the rack room. I will tidy up that last bit of the cable run once I can screw the splitter onto my board on the wall.
- Every time I spend another week working on some aspect of time/timing/clocks/GPS/time distrubtion, I realize there are a few more rabbit holes I could devote a year or a lifetime to. It is hard to pick things to focus on, because they're all so fascinating! Just being on the Time-Nuts mailing list has already sucked a few hours out of every week chasing down new things I hadn't heard of before!
Comments