Messing with the Beepy (formerly known as Beepberry)
Every once in a while, there's a little project that pops up in my feed that is just so neat, it's hard to resist buying it.
I have a couple boxes full of these things.
Meet the Beepberry:

This thing is the brainchild of SQFMI, a group who seems to know exactly how to tickle the interest of a tech enthusiast who loves little gadgets.

On the front, there's a crisp low-power LCD display (no backlight, but readable in most lighting).
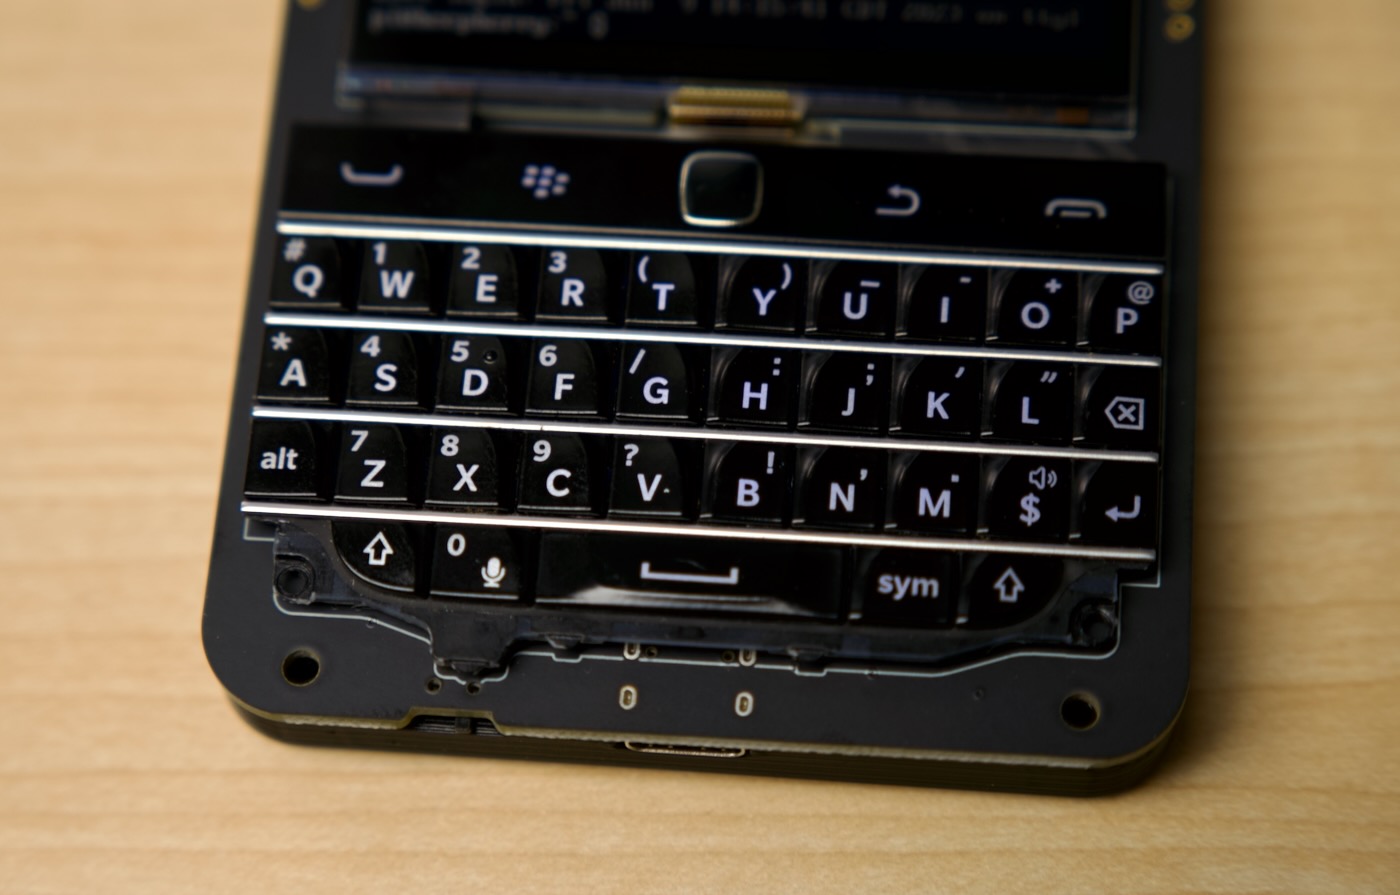
Under that, a backlit Blackberry keyboard. Very clicky.
The keyboard feels almost as good as any old Blackberry, though it doesn't have full support from behind—I think a good case design could provide a tiny bit more structure behind the left and right side of the keyboard. The center keys feel great, the outside keys have a tiny bit of flex to them. Ctrl is mapped to the little 'pick up phone' icon (which looks more like an empty bowl to me), and you can hold down the 'hang up phone' (the park bench on the right) to safely shut down the device. There's also a power switch on the bottom.
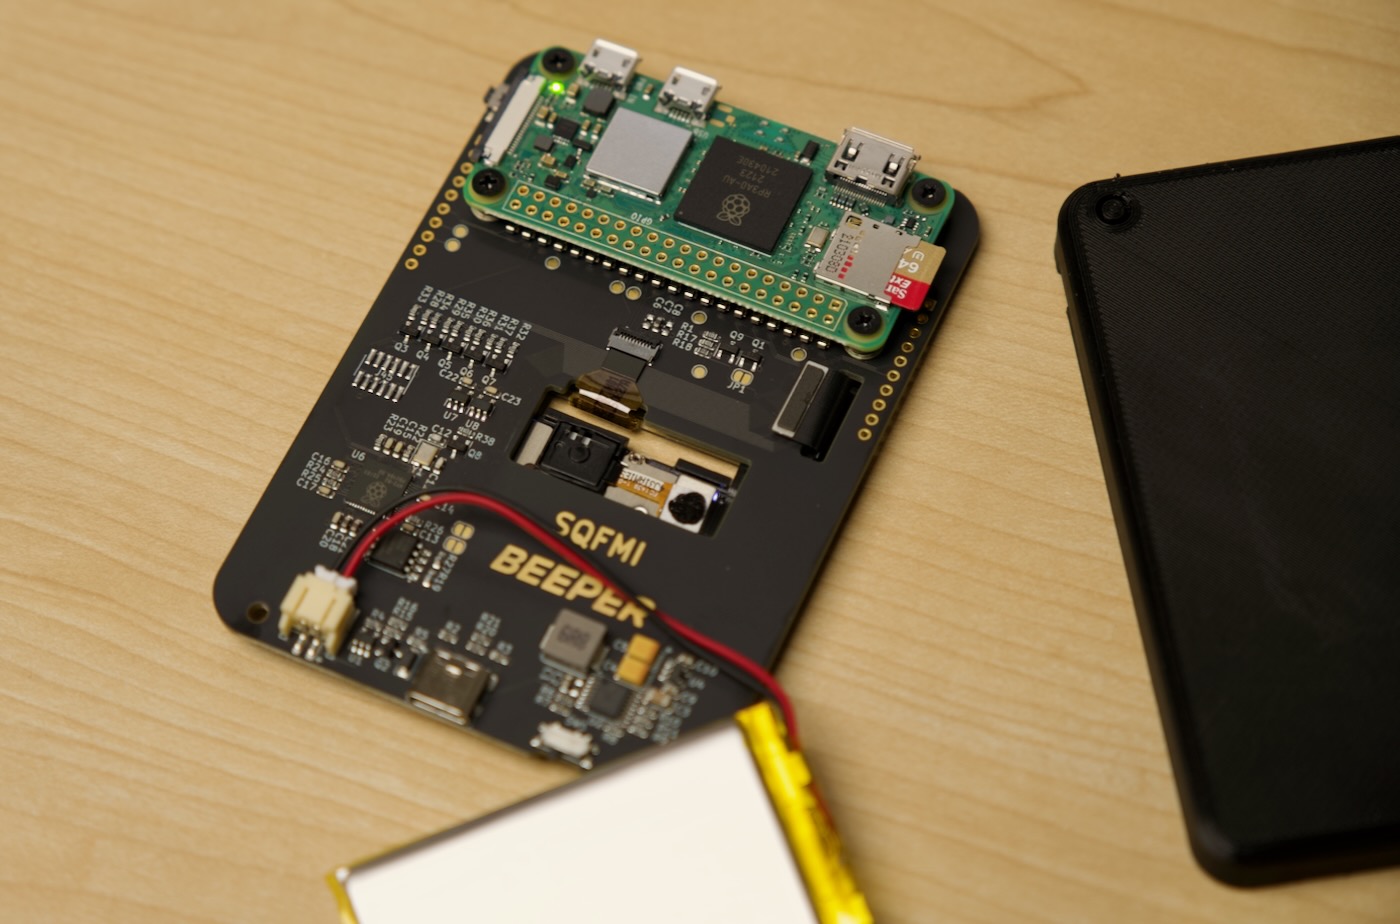
On the back, room for a Raspberry Pi Zero W, or Zero 2 W—or, considering the Pi shortage, some Pi-compatible clones. Then there's a space for a little battery pack, which, when installed, covers up the integrated RP2040 microcontroller and some other circuitry.
Unlike many similar projects that came before, this thing has pretty much full feature support out of the gate, and it only took me about 10 minutes to go from box to fully booting.

The install script works on Raspberry Pi OS (32 bit if you're on an older Pi Zero, or you can also choose 64-bit on the newer Zero 2 W). The hardest part is waiting while the thing boots up the first time and appears on your WiFi network—the Zero's only work on 2.4 GHz networks, and it's easiest to configure the credentials when you flash the microSD card using Raspberry Pi Imager.
One really cool design aspect is the LGA-style pins that rest on the Pi Zero's underside. Though getting them all perfectly aligned can be finicky (I had to carefully bend a couple slightly to get them all to make contact). But the layout allows the Pi Zero to be popped on and off relatively quickly—no soldering required! And the IO ports are all aligned on the topside so you could plug in an external display via HDMI, or some USB device.
Just don't try powering the board through the Pi's USB power input! It needs a little extra juice, so you should only use the bottom USB-C power input. That port also doubles for flashing the RP2040 firmware—you just turn on the device while holding the 'end call' key and the RP2040 will boot in flash mode.
The Beepberry Docs are currently getting filled in, but there's enough in there to get the board into a very usable state.
Some things still being documented are how to control the integrated RGB LED, how to read the battery power level, and different ways to control the thing using the side button, too.
Over in Discord, I noticed the community is already working on a buildroot configuration to create a Beepberry image that should boot from scratch in less than 10 seconds (potentially as quickly as 2-4 seconds!).
There are still plenty of other little things to test, and I'm printing the 'slim' 3D printable case right now (there's also a blockier one that requires a little more 3D printing finesse), but it's already a very fun little board.
I'm sure the folks at SQFMI would prefer I load Beeper on the device for multi-service messaging, but I might see about just loading up old school IRC for now. Maybe SMS or iMessages, hearkening back to BBM.
Comments