Setup a FOSCAM WiFi camera directly connected to a Mac via Ethernet
This post is more than 10 years old. I do not delete posts, because even old information is still useful, but please know that some material on this page may be outdated or incorrect. Thanks!
I have two FOSCAM WiFi IP cameras set up in my house (in addition to an outdoor Arlo I use for security purposes), and generally all three of these cameras give a reliable connection and work without much intervention.
Recently, however, one of the FOSCAM cameras decided to stop connecting to the wireless network. I needed to get access to the camera via the wired interface, but I didn't want to have to bring the camera all the way to where my wired networking drops were located, because it's in a bit of an inconvenient area of the basement in the midst of some cleanup we're doing.
So I plugged the FOSCAM directly into my Mac's USB 3.0 ethernet adapter, and got blinky lights... but couldn't connect to the camera because it's wired connection is configured to use DHCP by default, and there's no Bonjour/zeroconf configuration.
To get around this and directly connect to the camera, I did the following:
- Open Console (Applications > Utilities > Console).
- Enter
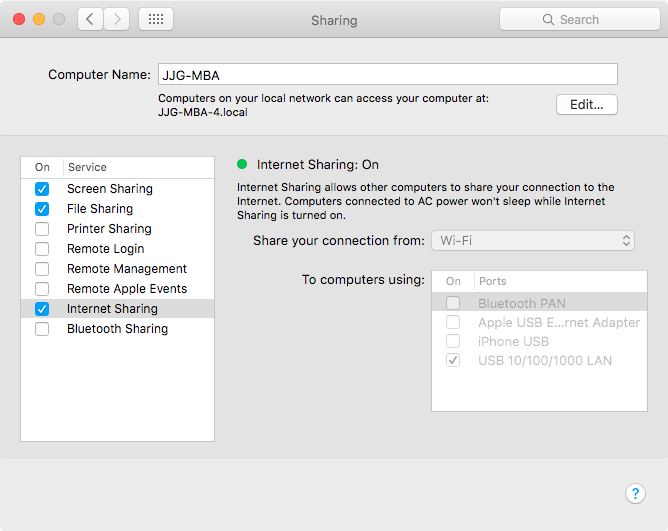
ipcamin the 'Filter' field (this will filter out all the log entries and just show FOSCAM-related entries). - Open System Preferences, go to 'Sharing', and enable Internet Sharing ("Share connection from WiFi to computers using USB 10/100/1000 LAN"). (Illustration)
- While monitoring the Console logs, plug in the network cable from my Mac to the FOSCAM.
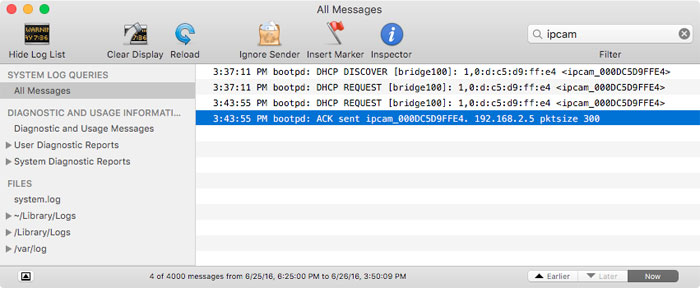
After a second or so, you should see a message in the logs like DHCP REQUEST [bridge100], which is the FOSCAM trying to get an IP address from the Mac. Immediately following, a message should show ACK sent (meaning 'Acknowledgement sent') along with an IP address. In my case, my Mac assigned the FOSCAM the IP address 192.168.2.5:
I've used this same trick in the past to connect to a Raspberry Pi via direct Ethernet connection too. macOS's simple DHCP-powered Internet Sharing saves the day again!
Comments