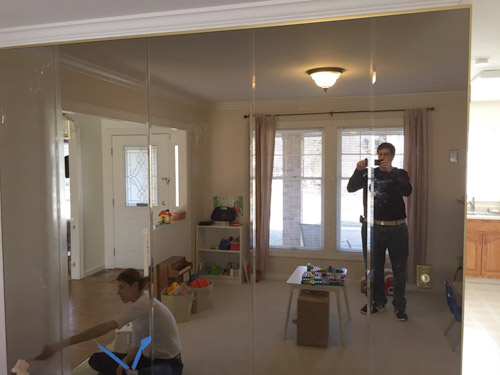
Between projects at work, I decided to take a week's vacation and attempt a rather ambitious DIY project at the house. After working through some plans for the main rooms in our house, my wife and I decided we wanted to convert what was originally the formal dining room at our home, complete with a low-hanging chandelier and wall of floor-to-ceiling tinted mirrors, into a functional schoolroom with tons of storage and a teacher desk area.
So we started with this:
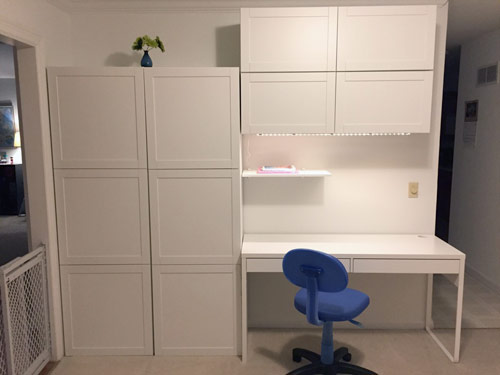
And ended up with this:
My wife helped cover the mirrors with laminate sheets for safety (removal was probably the most dangerous part of this whole operation, especially as one panel was already halfway shattered from screwing in an outlet a little too tight a year prior), my neighbor helped me safely move the panels downstairs (I guess I'll break them up and dispose of them somehow? Not sure yet), and my Dad helped me mount things nice and true (thanks again, Dad!).
I wanted to post this blog post and the full writeup/image album, because the only information I found about floor-to-ceiling mirror removal was scattered around a bunch of DIY/home improvement forum posts. here are some of my tips:
- Safety first! Wear goggles, gloves, jeans, thick shirt, etc. to prevent any possible cuts. Cover the mirrors with laminate sheets. Place cardboard on the ground in case a panel falls and breaks, for easier cleanup. Have a friend help move the panels.
- Use shims to get a gap between the wall and mirrors, then use a flat prybar and gently flex the middle of the mirror out from the wall to break the grout off the wall. YMMV.
- After you remove the mirrors, there will likely be a bunch of ripped areas of drywall, with the face entirely gone (so you see through to the paper). You need to seal that properly before painting, or you'll have an ugly finish and a lot of bubbling/moisture problems:
- Use a razor blade to cut a line around the torn area (I made circles about 2x the diameter of each tear).
- Tear away the rest of the paper out to your cut line.
- Roll good non-latex primer over the area to seal it.
- Mud the area (one or two coats depending on the damage) with a 10" knife.
- Skim coat the entire wall (I used a Magic Trowel for this; much easier for a non-drywall-pro like me).
- Sand the entire wall with 220 grit paper or a sanding block.
- Lay down a coat of primer, then one or two coats of paint, and profit!
- Use a drill when putting together five pieces of Ikea furniture; even though the diagrams say don't use a drill, if you have a drill with a good chuck and torque collar, set it to a low setting when zipping in cams and other bits, and as long as you line things up and start them with a screwdriver, you'll save a ton of time using a drill, with no stripped out particleboard!
I've posted a full writeup of the project inside this Imgur album: Mirror wall to Ikea storage wall. The main takeaway from my 2014 DIY Basement Home Office build remains: I do not have any aspiration to become a professional drywall finisher. Ever.